




TrueNAS Development Documentation
This content follows experimental development changes in TrueNAS 28, a future version of TrueNAS.
Use the Product and Version selectors above to view content specific to a stable software release.
NVMe-oF Share Screens
21 minute read.
The NVMe-oF screens provide access to screens, cards, settings, and dialogs to add, manage, or delete NVMe over Fabric subsystems (targets). NVMe-oF (NVMe over Fabric) is a specification that extends NVMe storage access over network fabrics like Ethernet, Fibre Channel, and InfiniBand. It allows hosts to access NVMe storage remotely while maintaining the high performance and low latency benefits of NVMe.
The NVMe-oF Subsystems card shows on the Shares screen. The header shows the status of the NVMe service as Stopped or Running, and opens the NVMe-oF screen.
Add opens the Add Subsystem screen.
The dropdown menu options are:
- Turn Service On/Off toggle - Turns the service on or off. You can also turn the service on/off from the System > Services screen or set it to automatically restart after a system restart.
- Config Service - Opens the NVMe-oF Global Configuration screen. You can access this configuration screen by going to System > Services or using the Global Configuration button on the NVMe-oF screen.
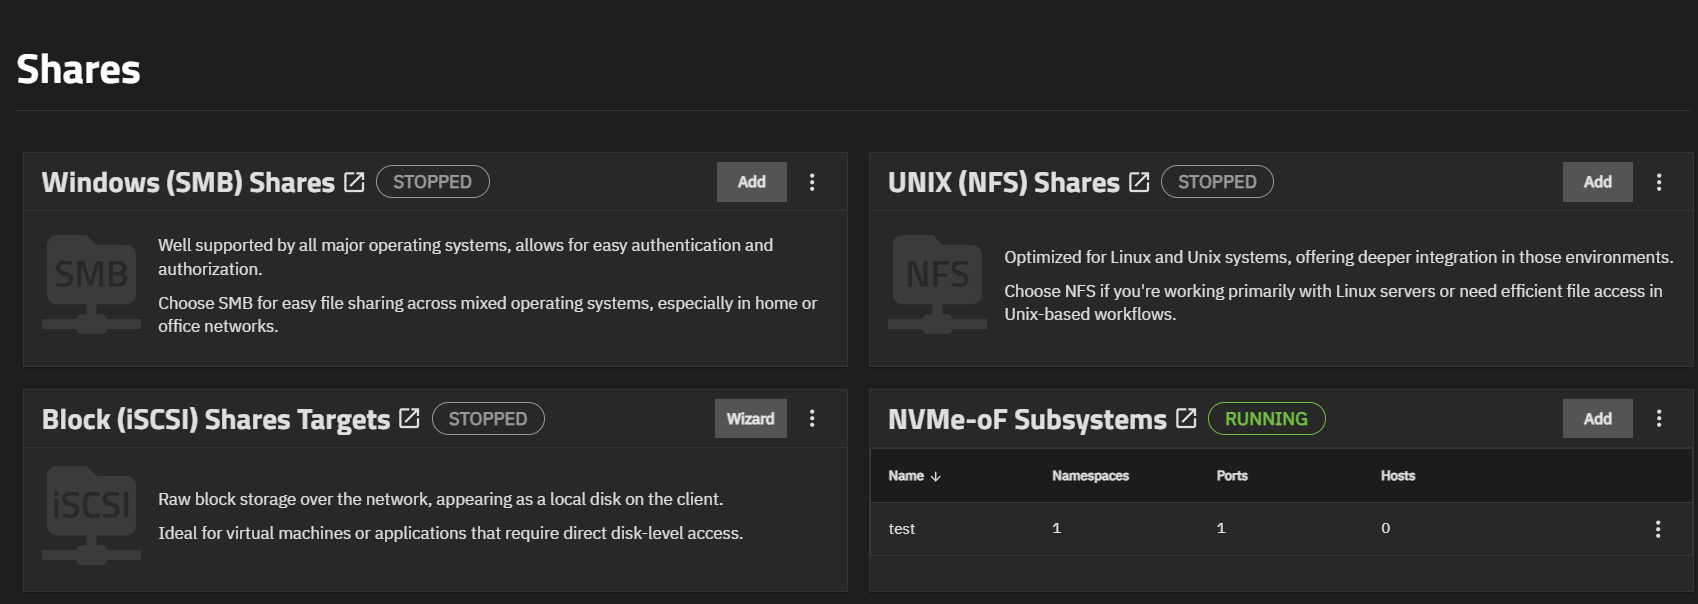
The NVMe-oF Subsystems card table lists subsystems added in TrueNAS. Each table row shows the subsystem name, the number of namespaces associated with the subsystem, the number of ports available through the subsystem, and the number of hosts allowed or restricted from accessing the subsystem.
The subsystem dropdown menu options are:
- View - Opens the NVMe-oF screen showing the cards for the selected subsystem.
- Delete - Opens Delete Subsystem dialog.
The Delete Subsystem dialog shows the name of the subsystem and asks for confirmation before it deletes the subsystem from TrueNAS.
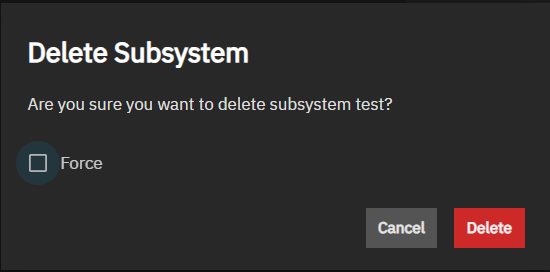
Force forces the delete operation if the subsystem has a port or host associated with it.
Cancel closes the dialog without deleting the subsystem.
Delete removes the subsystem from the TrueNAS system.
The NVMe-oF screen shows a table listing subsystems (targets) added to Truenas, and a set of Details cards for the subsystem selected in the table. The screen opens with the first subsystem in the table selected and showing the cards for that subsystem. Subsystem cards show the information for the table row selected.
Shares on top breadcrumb returns you to the Shares screen.
Before adding an NVMe-oF subsystem, the NVMe-oF screen shows a general card with information about subsystems and a basic comparison to iSCSI.
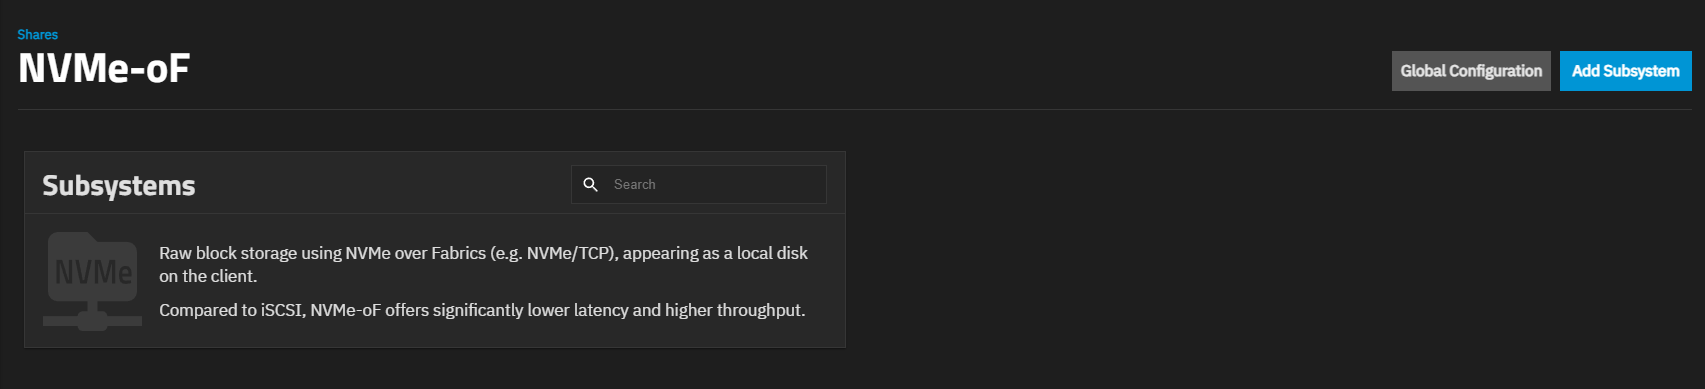
Global Configuration opens the NVMe-oF Global Configuration screen.
Add Subsystem opens the Add Subsystem screen.
The NVMe-oF screen Subsystem table lists subsystems added to TrueNAS.
Search in the Subsystems table header row filters the subsystems listed in the table to match the entered text.
Each row shows the subsystem name, the number of namespaces associated with the subsystem, the number of ports available through the subsystem, and the number of hosts allowed or restricted from accessing the subsystem.
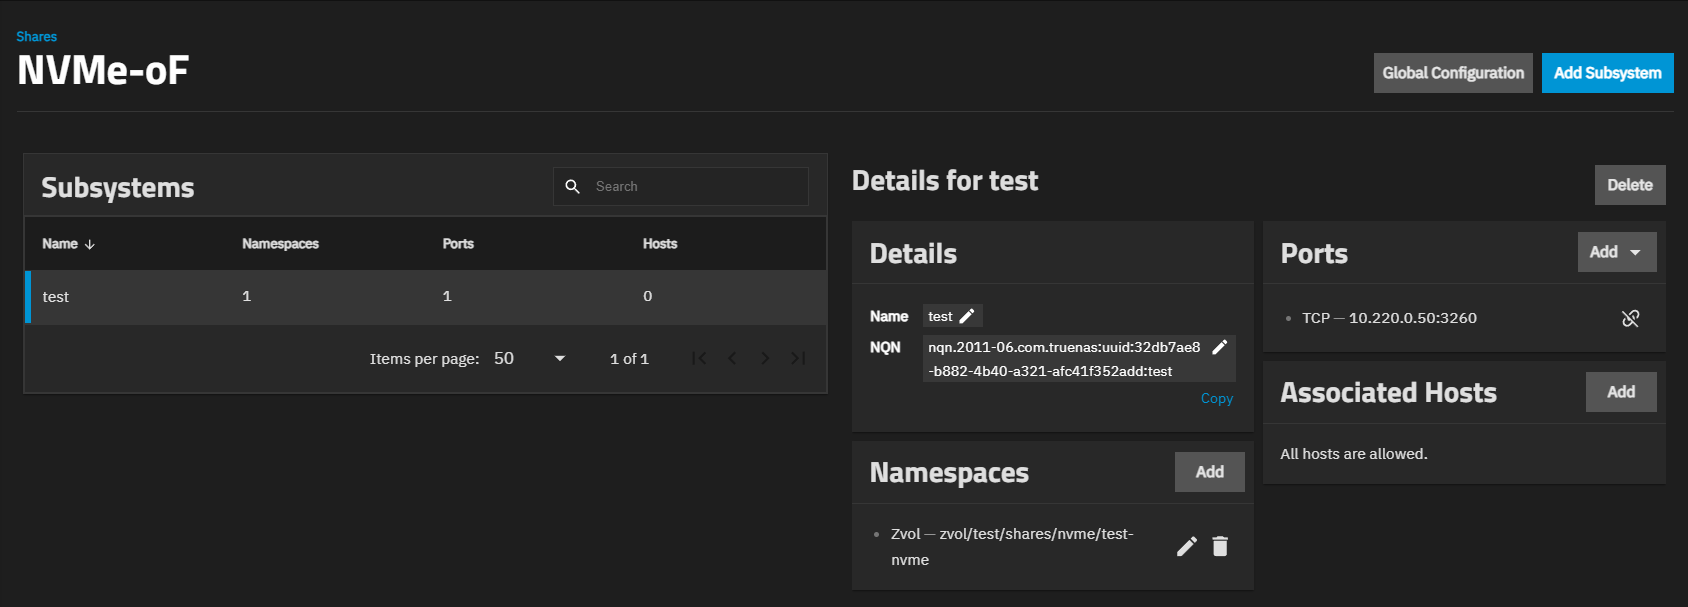
TrueNAS allows adding a subsystem without configuring a namespace, port, or host, which can be added later. An alert icon shows beside the namespace name in the table and on the Ports and Namespaces cards until these are added.
Each subsystem shows a group of Details for subsystemName cards on the right side of the screen, subsystemName is the name given to the subsystem (i.e., test). Subsystem cards are:
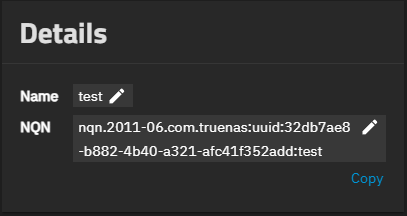
The Details card shows the name and NQN ID associated with the TrueNAS subsystem. The NQN shows an edit icon that changes the NQN to a text-entry field.
The Namespaces card lists namespaces (zvol or file) added to the subsystem and the path to it. Namespaces are similar to iSCSI extents.
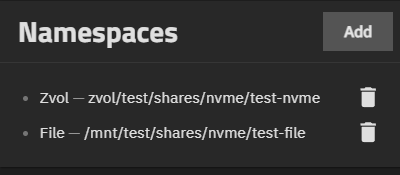
Add opens the Add Namespace screen.
Delete opens a confirmation dialog for the namespace.
The Ports card shows the port type and ID associated with the subsystem.
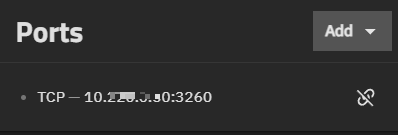
The Add button to the right of Ports shows a dropdown list of options:
The  Remove this port from the subsystem icon removes the port from the subsystem but does not delete the port from TrueNAS.
The Associated Hosts card shows a list of hosts associated with the subsystem. Shows All hosts are allowed if a host is not specified.
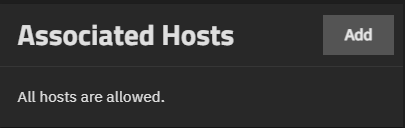
After adding a host, the card shows the NQN identification number for the client host and the Removes this host from the subsystem icon that only removes the host from the subsystem but does not delete it from TrueNAS.
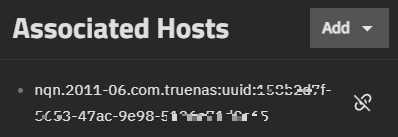
Add shows a dropdown list of options:
- Create New - Opens the Add Host screen.
- Manage Hosts - opens the Hosts window
- Allow all hosts - Removes the host from the subsystem but does not delete it. It toggles the Add dropdown list to show the available host NQN hidden by selecting Allow all hosts and removes Allow all hosts from the dropdown list.
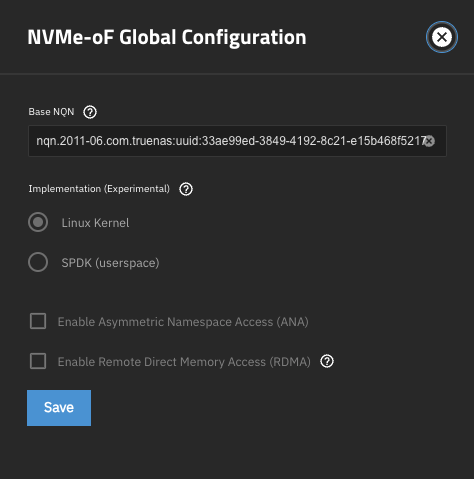
Configures system-wide NVMe-oF settings. Config Service on the NVMe-oF Subsystem card dropdown menu, Global Configuration on the NVMe-oF screen, and the edit icon on the NVMe-oF row on the System > Services screen open the NVMe-oF Global Configuration screen.
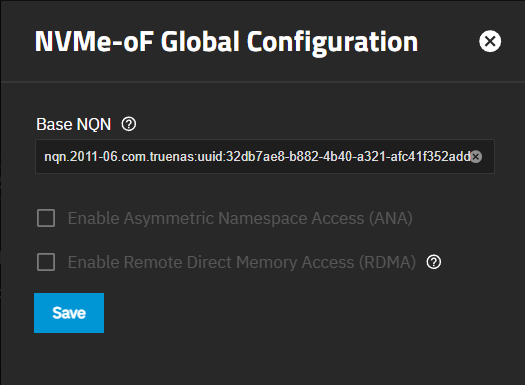
Enterprise systems equipped with the right hardware and license show the SPDK (userspace) and Linux Kernel options that change the NVMe backend. These experimental implementation functions are geared toward experimentation with client compatibility, and are available to try based on your use case if you have issues with certain clients, such as hypervisors that might require specific capabilities that come with the Linux Kernel or SPDK option. Stopping the service enables these options. After selecting, restart the service.
The Add Subsystem wizard opens after clicking Add on the NVMe-oF Subsystem card or Add Subsystem on the NVMe-oF screen. The wizard has two parts: What to Share and Access. What to Share shows by default.
The What to Share screen settings configure the subsystem and add a namespace.
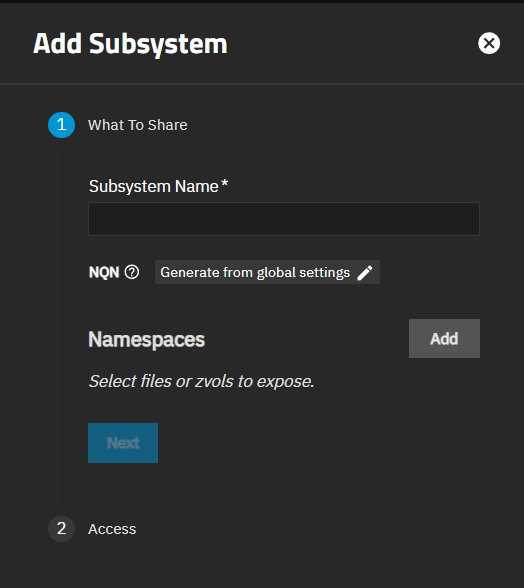
Add to the right of Namespaces opens the Add Namespaces screen.
The Add Subsystem wizard Access screen configures hosts allowed to connect to the subsystem and ports the target uses to communicate with hosts.
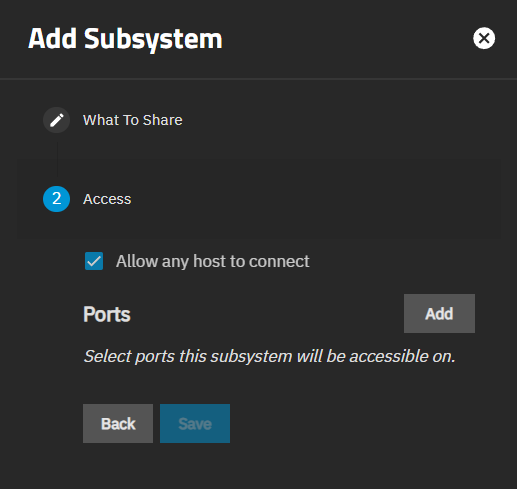
Allow any host to connect is selected by default. It allows connections to any host. When not selected, it shows the Allow Hosts and Add button that opens the Add Host screen to configure a host.
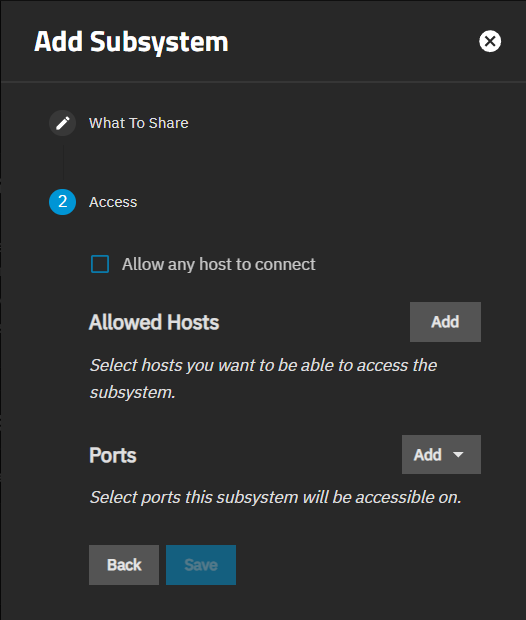
The Add button to the right of Ports shows a dropdown list of options:
Save saves changes, creates the subsystem, closes the wizard screen, and returns to the previous screen.
The Add Namespace screens settings and options create namespaces. Use to select or create the storage device (zvol or file) for the NVMe-oF share.
Add to the right of Namespaces on the What to Share option of the Add Subsystem wizard opens the Add Namespace screen. Add on the Namespaces card on the NVMe-oF screen opens the Add Namespaces screen.
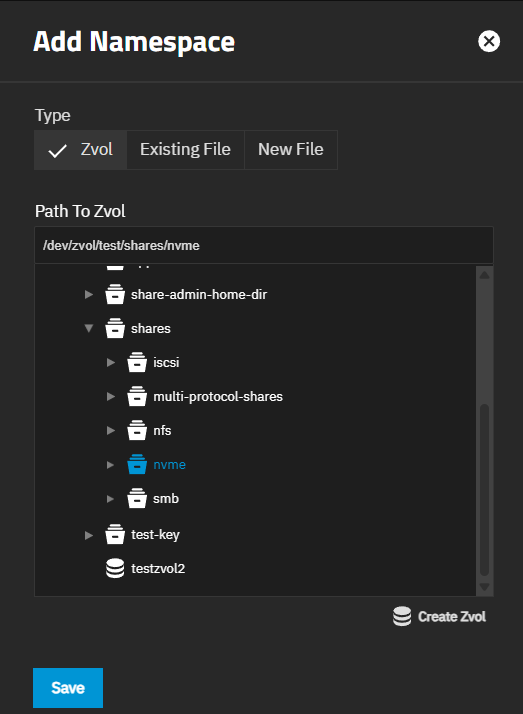
The Add Namespace screen has three tabs:
- Zvol (selected by default) - Adds a zvol.
- Existing File - Adds an existing file in a dataset or zvol.
- New File - Creates a new file in the storage location selected.
The Zvol tab on the Add Namespace screen allows selecting an existing or creating a new zvol namespace. Path to Zvol has two fields: the blank field that populates with the path manually entered or selected with the file browser, and the file browser field.
Create Zvol allows adding a new Zvol while selecting the path to the storage location. It opens the Add Zvol screen. It only shows on the Zvol tab and activates after selecting the parent dataset in the file browser field.
Use to create a new zvol for the namespace to use for storage. Create Zvol on the Add Namespace screen with the Zvol tab selected opens this screen.
Add Zvol Screen Settings

| Setting | Description |
|---|---|
| Name | Specifies a short name for the zvol that is not longer than 63 characters to prevent potential problems accessing zvols as devices. For example, you cannot use a zvol with a 70-character file name or path as an iSCSI extent. |
| Size | Specifies a size and value such as 10 GiB. You can include units like t as in TiB, or G. You can increase the size of the zvol later, but you cannot reduce the size. If the size is greater than 80% of the available capacity, the creation fails with an out-of-space error unless you select Force size. |
| Setting | Description |
|---|---|
| Force size | Sets the system to restrict creating a zvol that brings the pool to over 80% capacity. When set, forces creation of the zvol (not recommended). By default, the system does not let you create a zvol if that operation brings the pool to over 80% capacity. Setting this overrides this rule. |
| Sparse | Enables using thin provisioning where disk space for this volume is allocated on-demand as new writes are received. Use caution when enabling, as writes can fail when the pool is low on space. |
| Comments | Enter any notes about the zvol. Descriptions show on the iSCSI screens when the zvol is used in a block share. |
| Sync | Sets the data write synchronization. Options:
|
| Compression | Sets the compression algorithm. Compression encodes information in less space than the original data occupies. We recommend choosing a compression algorithm that balances disk performance against the amount of space saved. Options:
|
| ZFS Deduplication | Sets TrueNAS to transparently reuse a single copy of duplicated data to save space based on the selected option. Options:
|
| Read-only | Allows or prevents storage volume (zvol, dataset) modification. Inherit ues the the parent setting. On prevents modifying the dataset. Off allows users to access the dataset to modify its contents. |
| Block size | Sets the zvol default block size. Automatically chosen based on the number of disks in the pool for general use cases. The default is 16KiBt, other options are 4KiB, 8KiB, 16KiB, 32KiB, 64KiB, 128KiB. |
| Snapdev | Controls visibility of the volume snapshot devices in the |
| Use Metadata (Special) VDEVs | Stores data blocks in a special allocation class (fusion pool) metadata VDEV. Options:
|
Encryption settings secure data within this zvol. These settings establish the level and type of encryption applied. The default setting is Inherit (non-encrypted) when the root or parent dataset for the new storage is unencrypted. If encrypted, it shows Inherit (encrypted).
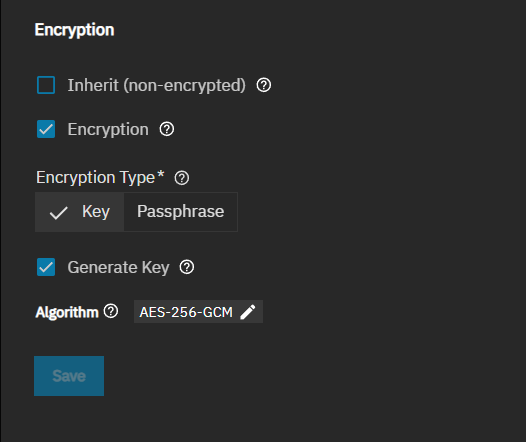
When a zvol is encrypted, Edit on the Encryption card found on the Datesets screen opens a configuration screen where you can change the passphrase for a zvol encrypted with the passphrase type, but you cannot change to a key encryption type. If the zvol is not encrypted, you do not see encryption options on the Edit Zvol screen.
| Setting | Description |
|---|---|
| Inherit (non-encrypted/encrypted) | Inherits encryption from the parent dataset when selected. Default setting. Clearing shows the Encryption settings. When the parent is encrypted, this option defaults to Inherit (encrypted); otherwise, it shows (non-encrypted). If the parent is encrypted with the passphrase type, the zvol can only use passphrase encryption. When the parent is encrypted with a key, the zvol can use either key or passphrase encryption. Refer to the Encryption Settings article for more details. |
| Encryption | Secures data within this zvol. Data is unusable until unlocked with an encryption key or passphrase. If parent dataset has encryption enabled, it is not possible to disable this option. The default encryption type is key. Clearing the Encryption checkmark hides the encryption settings. For detailed encryption configuration and management that covers pool-level encryption settings refer to the ZFS encryption man page, and ZFS key management. |
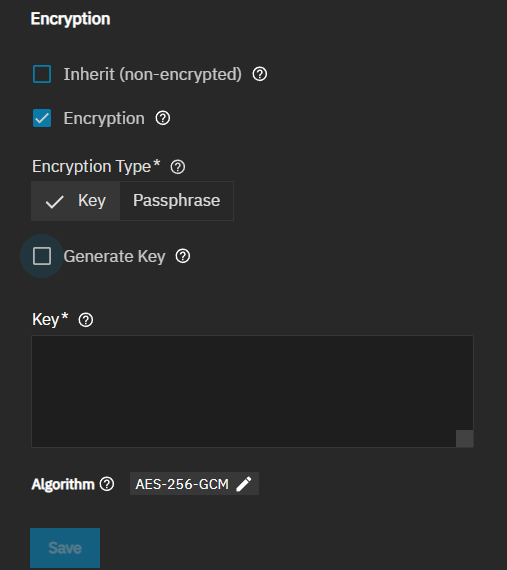
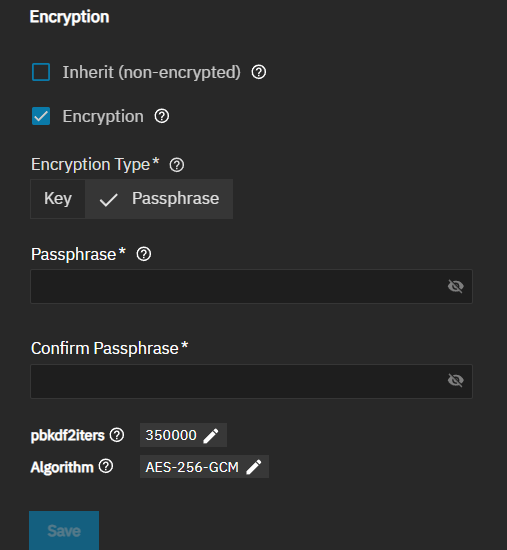
Disabling the inheirt option shows the Encryption Type setting the Key and Passphrase options. Each shows different settings.
| Setting | Description |
|---|---|
| Encryption Type | Sets the type of encryptiuon applied to the dataset as Key or Passphrase. Key shows key-based encryption settings, a system-generated key field, an option to use a manual entry key, and a key-based encryption algorithms. Passphrase shows text fields for manual or copy/paste entry of a passphrase, and passphrase authentication algorithms. It is disabled for child datasets of encrypted parent datasts. |
| Generate key | Sets TrueNAS to generate a random encryption key for securing the dataset. Shows when Encryption Type is set to Key. Clearing this shows the Key field that accepts manual or copy/paste entry of an encryption key. Warning! The encryption key is the only means to decrypt the information stored in a key-encrypted dataset. Store encryption keys in a secure location! Creating a new key file invalidates a previously downloaded key file (for this dataset). Delete any previous key file backups and back up the new key file. |
| Key | Specifies a manually entered encryption key string to secure the dataset. |
| Algorithm | Sets the encryption algorithm. Shows a list of mathematical instruction algorithms that determine how plaintext converts into ciphertext for key and passphrase encryption types. See Advanced Encryption Standard (AES) for more details on each option. |
| Passphrase Confirm Passphrase | Specifies an alphanumeric string or phrase to secure the dataset. |
| pbkdf2iters | Sets the number of password-based key deviation function 2 (PBKDF2) iterations used for reducing vulnerability to brute-force attacks. Entering a number larger than 100000 is required. See PBKDF2 for more details. |
The Existing File tab on the Add Namespace allows selecting an existing file as a namespace.
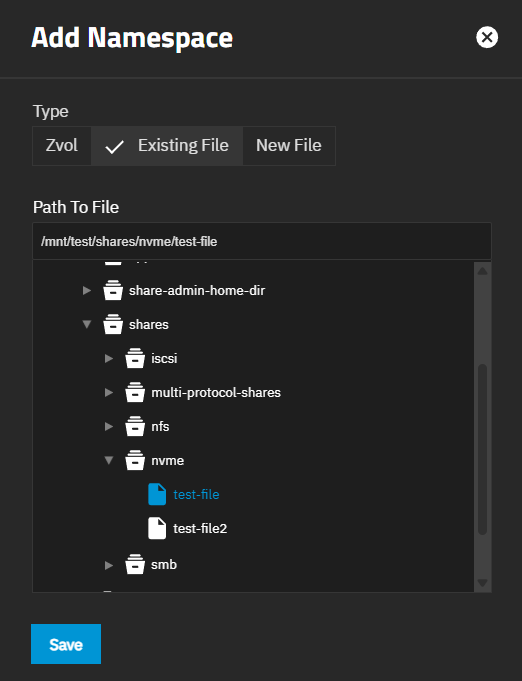
There are two Path to File fields: the blank field and the file browser field. The top blank field populates with the path for the existing file selected using the file browser field below it.
The New File tab on the Add Namespace screen allows creating a new file for a namespace.
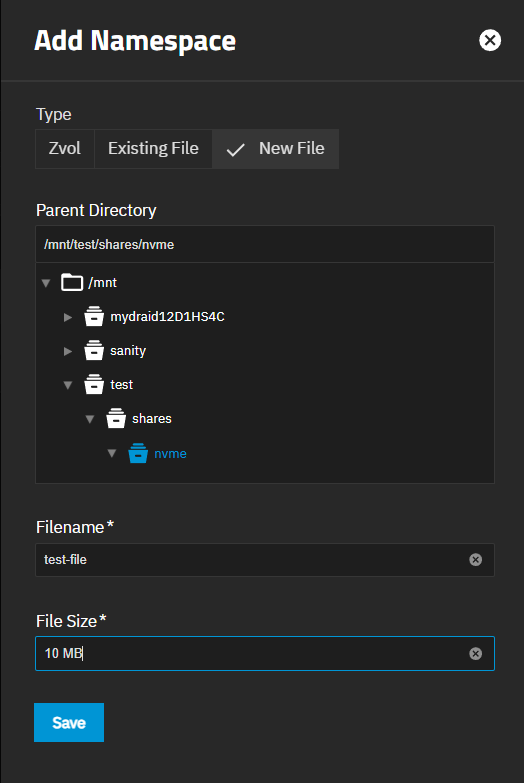
Save saves the settings, closes the screen, and returns to the previous screen.
The Delete Namespace removes the namespace configuration from TrueNAS.
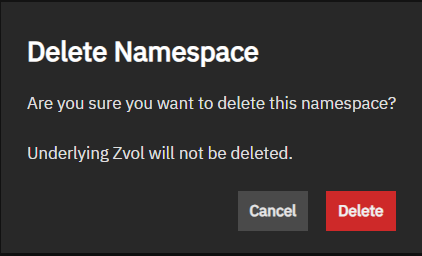
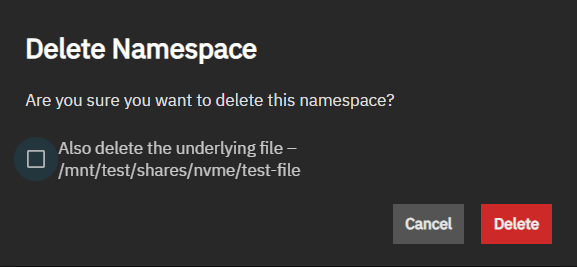
The delete icon to the right of a file opens a Delete Namespace dialog showing the option to delete the file.
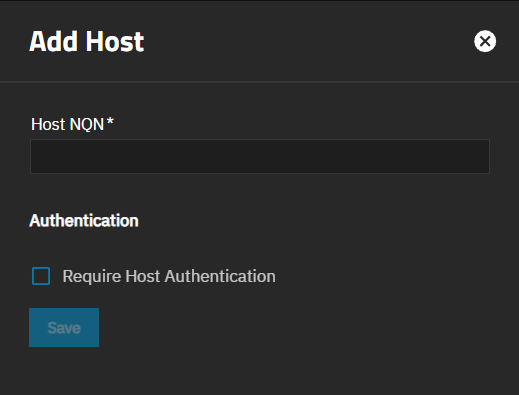
The Add Host screen specifies a host and adds it to a subsystem when the Allow any host to connect option on the Add Subsystem > Access screen is not enabled. The Edit Host screen shows the fields associated with the subsystem and allows you to change the host settings.
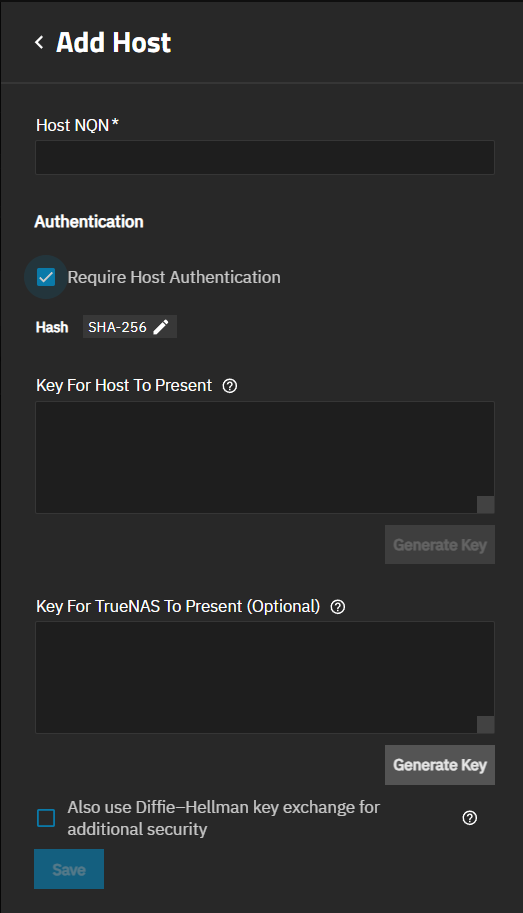
Require Host Authentication shows the additional setting options.
The Hosts window shows a table listing the host NQN, if it requires authentication, and the number of subsystems that use it. The host row shows the edit icon and the delete icons.
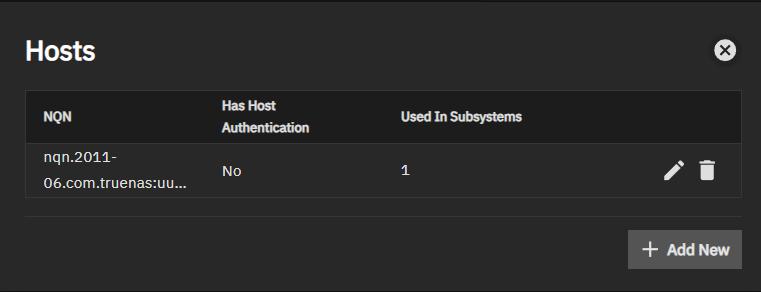
Add New opens the Add Host screen.
Edit opens the Edit Host screen.
Delete opens a delete confirmation dialog for the port.
After deleting the host, the Host window shows any remaining assoicated hosts configured in TrueNAS or shows the window with no hosts listed and the Add New button.
The Delete Host confirmation dialog deletes the host(s) from the listed subsystems listed in the dialog and from TrueNAS.
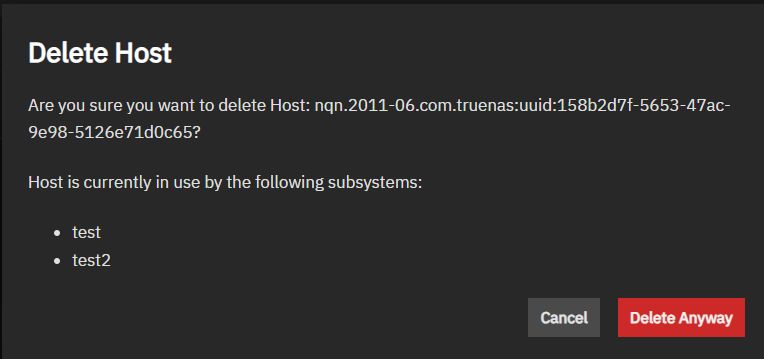
Cancel closes the dialog without removing the host from the subsystem.
Delete Anyway deletes the host from the subsystem(s) specified in the dialog.
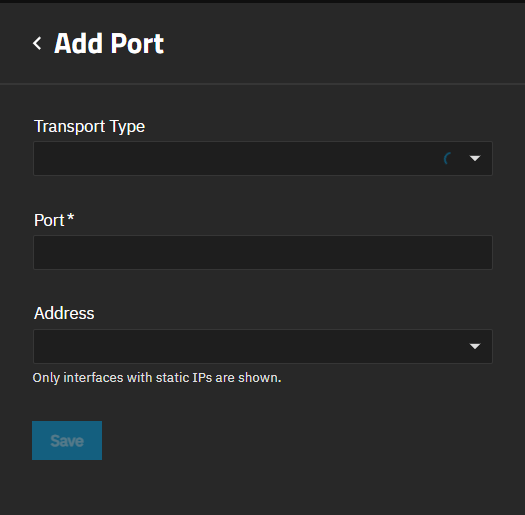
The Add Port Screen shows settings to add or select a port to associate with the subsystem. Ports are formatted as IP address:port. 4420 is the default port number, commonly selected for NVMe-oF with IP addresses, and we recommend using this port rather than adding a custom port.
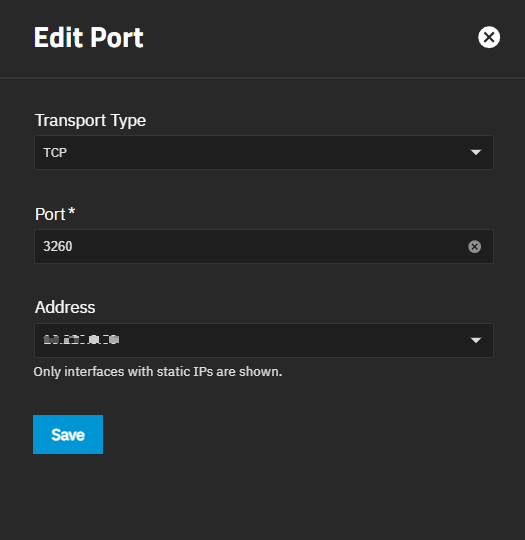
The Edit Port screen shows current port settings for the selected subsystem. The edit icon on the port row listed on the Ports dialog opens the Edit Port screen.
The Ports window shows a table showing the port name, type, IP address, communication port number, and the number of subsystems that use it. The port row shows the edit icon and the delete icon.
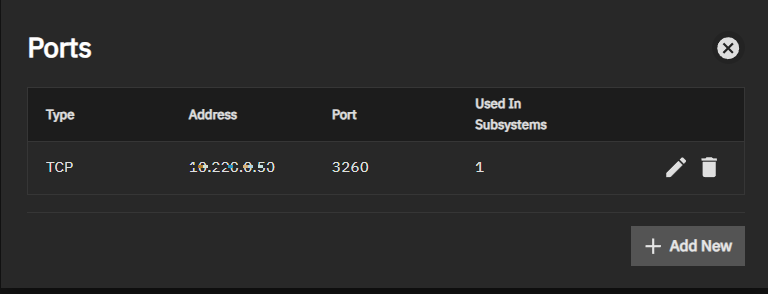
Add New opens the Add Port screen.
Edit opens the Edit Port screen.
Delete opens a delete confirmation dialog for the port.
After deleting the port, the Ports window shows any remaining configured ports, or shows an empty window with the Add New button.
The Delete Port confirmation dialog removes the port from the selected subsystem but does not delete it from TrueNAS. A deleted port shows on the Add dropdown list on the Ports card for a selected subsystem on the NVMe-oF screen. The dialog shows the name of the subsystem and the assigned IP address:port assignment.
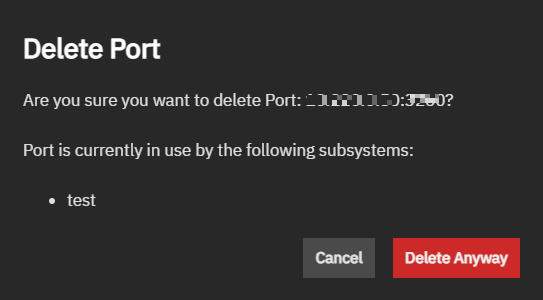
Cancel closes the dialog without removing the port from the subsystem. Delete Anyway removes the port assignment from the subsystem specified in the dialog.