Cloud Sync Tasks Screens
13 minute read.
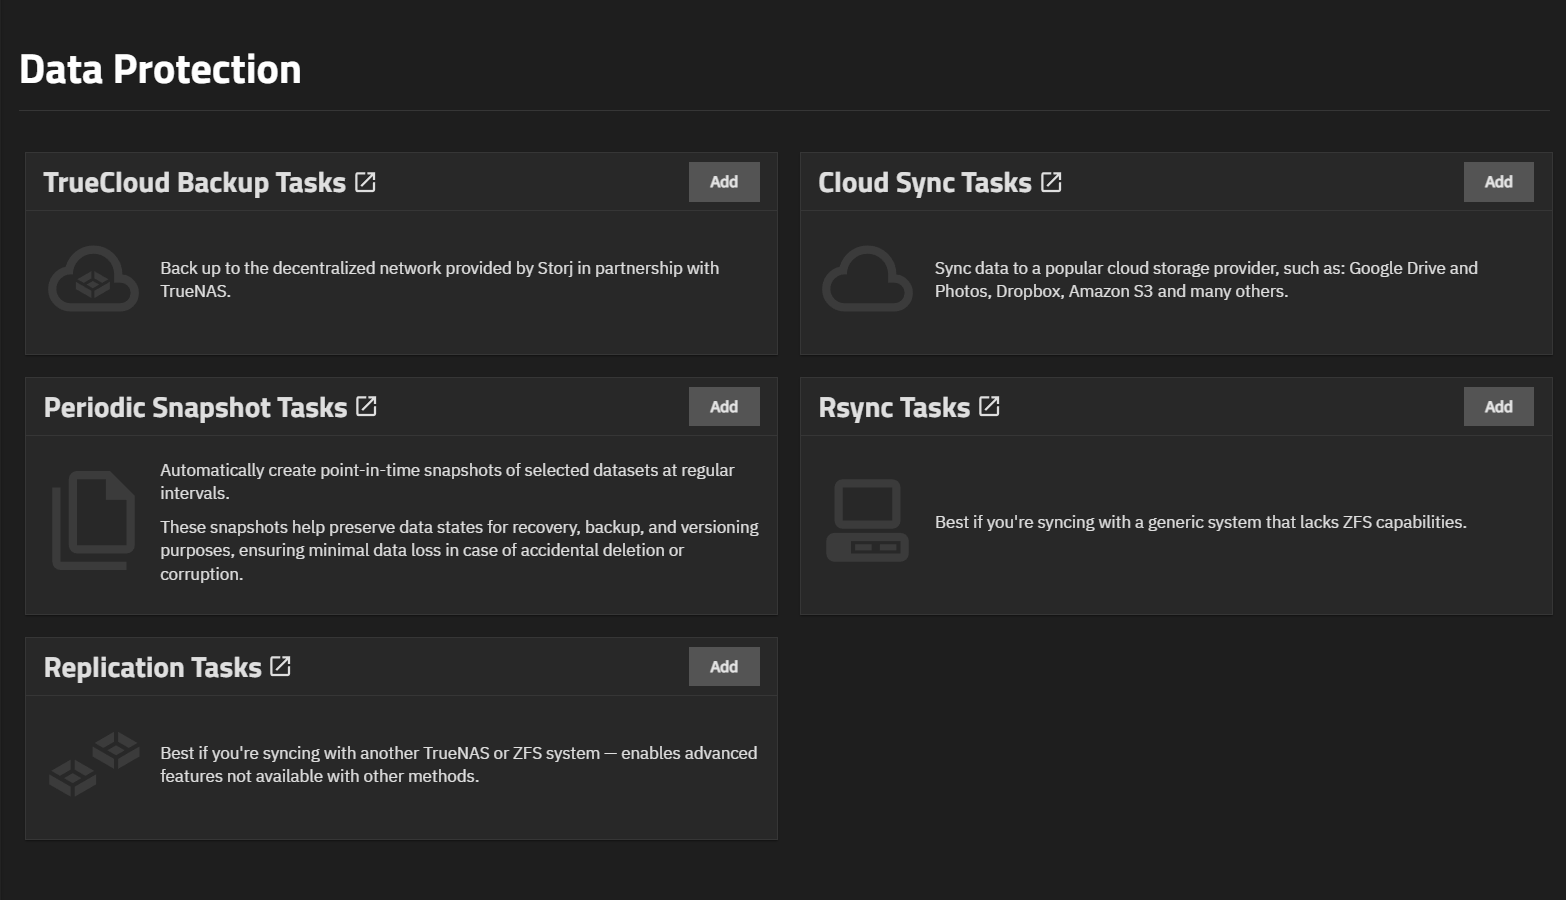
The Cloud Sync Tasks widget on the Data Protection screen shows configured cloud sync tasks, and provides access to configuration screens to add single-time or scheduled recurring transfers between TrueNAS and a cloud storage provider. Cloud sync tasks are an effective data backup method that sends data to a remote location, or when performing cloud-storage-migration through a provider.
These providers are supported for Cloud Sync tasks in TrueNAS:
- Amazon S3
- Backblaze B2
- Box
- Dropbox
- File Transfer Protocol (FTP)
- Google Cloud Storage
- Google Drive
- Google Photos
- Hypertext Transfer Protocol (HTTP)
- Hubic (closed to new accounts)
- Microsoft Azure Blob Storage
- Microsoft OneDrive
- OpenStack Swift
- pCloud
- SSH File Transfer Protocol (SFTP)
- Storj iX*
- WebDAV
- Yandex
*TrueCloud backup tasks streamline functionality for Storj iX cloud backups and restoration.
The Cloud Sync Task widget lists tasks configured on the system. The widget shows a description of cloud sync tasks before adding a task.


The widget header opens the Cloud Sync Task screen that lists all tasks configured on the system.
Add on the widget and the Cloud Sync Task screen opens the Cloudsync Task Wizard.
The vertical ellipses opens a dropdown menu with five options for various functions for each task:
Edit opens the Edit Cloud Sync Task screen populated with with the settings for that task.
Run Now starts the cloud sync, running it outside of the scheduled time.
Dry Run performs the same function as the Dry Run button on the add and edit configuration screens. It tests and validates the configured settings. During a dry run, you can close the window and monitor the task using the Jobs option on the top toolbar.
Restore creates a new cloud sync task from an existing task. The new task has the same settings but reverses the data transfer.
Delete opens a confirmation dialog before the system deletes the task.
State shows the status of the next cloud sync task:
- SUCCESS for completed tasks.
- FAILED if the task fails to complete the sync.
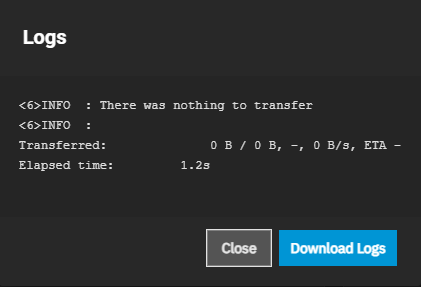
- PENDING for tasks not run yet. When clicked, the state oval opens the Logs dialog for that task. Download Logs saves a copy of the current task logs.
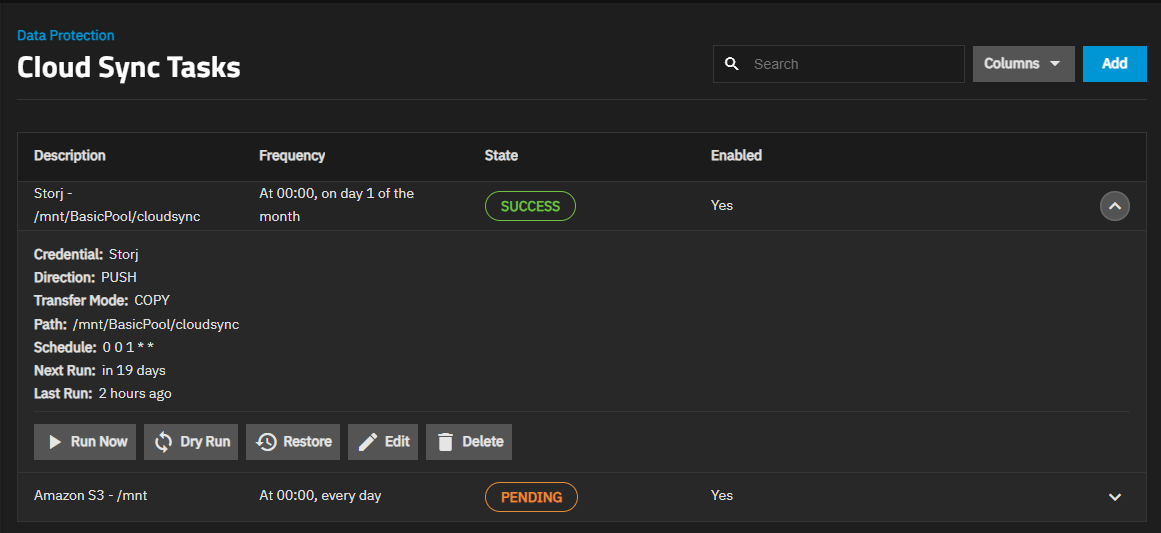
The Cloud Sync Task screen lists all tasks configured on the system.
Expand any task to see details on the configured task, such as the cloud sync provider, direction, transfer mode, path to the dataset or directories, and other options for that task.
Buttons for these task options perform the same functions as the icons on the widget:
Run Now starts the task outside of the scheduled period.
Dry Run performs a test of the configuration. This is the same function as the Dry Run button on the Edit Cloud Sync Task screen and the Advanced Options for the Cloudsync Task Wizard.
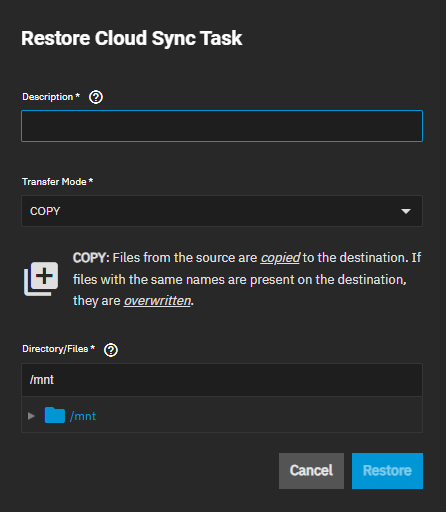
Restore opens the Restore Cloud Sync Task window, where you can create a new cloud sync task from an existing task with the same options, but the new task reverses the transfer from PUSH to PULL and vice-versa.
Edit opens the Edit Cloud Sync Task screen.
Delete opens a dialog where you confirm the action before the system deletes the task.
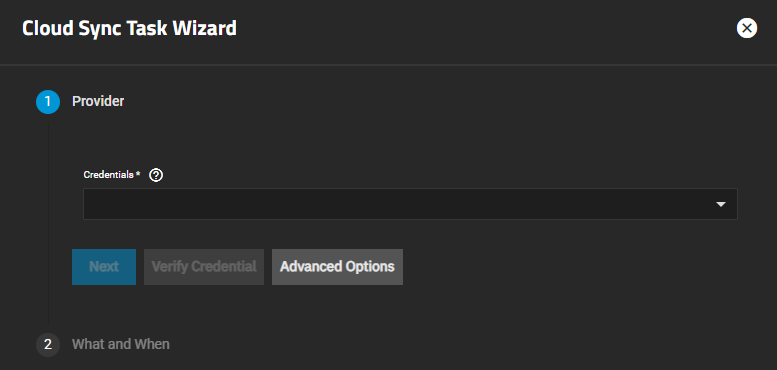
The Cloud Sync Task wizard screens simplify the task creation process. The wizard has two screens, Provider and What and When.
The Provider wizard screen allows you to set the cloud sync provider with the Credentials dropdown. Selecting a provider from the dropdown list shows the additional credential settings required to establish a connection.
Add New opens the Cloud Credentials screen. The same configuration screen opens when you click Add on the Credentials > Backup Credentials screen.
Advanced Options opens a screen with the same settings as the Edit Cloud Sync Task screen.
Verify Credentials tests the settings before you advance to the settings on the What and When wizard screen.
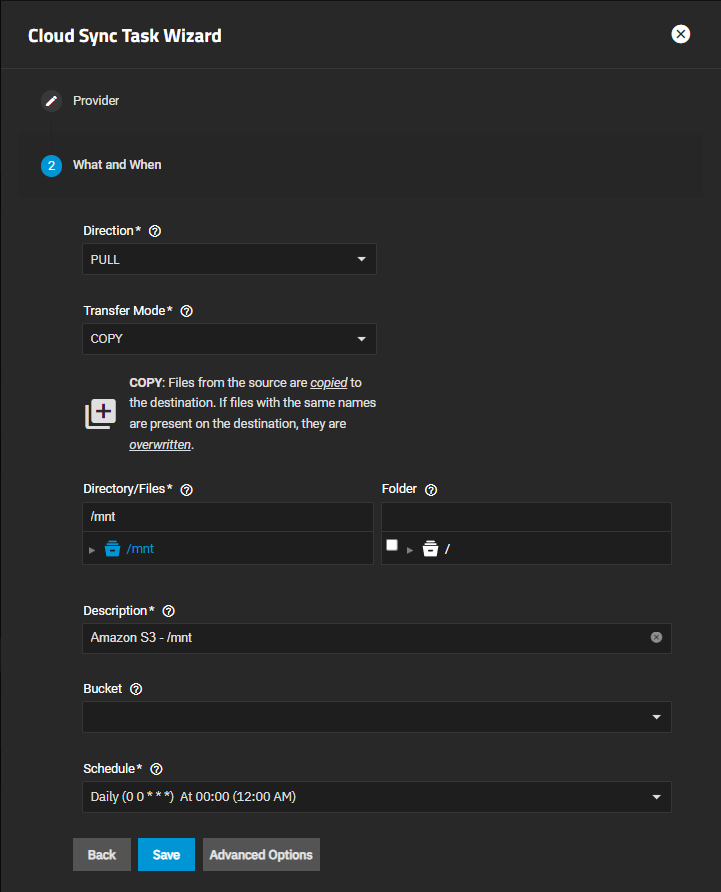
The What and When screen sets the direction (push or pull), transfer mode (move, copy, or sync), sets the datasets or directories source and destination, and the schedule for the transfer. Bucket shows for providers that use buckets to hold transferred files, folders, etc.
Advanced Options shows at the bottom of this screen.
Advanced Options accessed from the Cloudsync Task Wizard and Edit Cloud Sync Task show the same settings, and settings are grouped into Transfer, Remote, Control, and Advanced Options.
Manage Credentials opens the Backup Credentials screen.
Transfer settings change the cloud sync task direction (PUSH or PULL), set the data transfer method (COPY, MOVE, or SYNC), and set the dataset or directory to use in the task. Selecting the dataset or file populates the Directory/Files field.
| Settings | Description |
|---|---|
| Description | A human-readable summary about the task. This is for administrator reference only. |
| Direction | Defines whether TrueNAS sends or receives data. PUSH sends data to cloud storage. PULL receives data from cloud storage and is the default setting. |
| Transfer Mode | Defines how files are handled during the task. There are three options: |
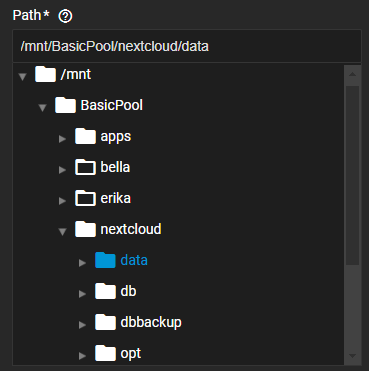
| Directory/Files | Enter or browse to select the source or receiving dataset or folder. Click the arrow to the left of /mnt folder to expand and show datasets and directories within that folder. After selecting the dataset or directory location (source) to send to the cloud for push syncs, or as the destination to write to for pull syncs. Be cautious with pull destinations to avoid overwriting existing files. Click the arrow to the left of /mnt folder again to collapse the directory tree. Note: Clear the checkmark to the left of /mnt. Not clearing this checkmark can result in an All selected directories must be at the same level error message. |
The Remote settings specify the cloud sync provider and destination storage locations. The option selected in Credential changes settings in the Remote settings area. The Manage Credentials link opens the Backup Credentials screen, where you can add a new provider credential.
| Settings | Description |
|---|---|
| Credential | Defines which preconfigured cloud storage account participates in this task. A Bucket setting displays after selecting a credential that uses S3, like Amazon S3. TrueNAS automatically validates the selected credential. |
| Bucket | Sets the pre-defined bucket to use. For Storj-iX credentials, select Add New to open the Add Bucket screen and create a new bucket on your Storj account from the TrueNAS UI. |
| Folder | Enter or browse to select the dataset. Click the arrow to the left of the folder icon and at each dataset or directory to reach the storage location to use for this task. |
The Add Bucket screen opens when Add New is selected from the Bucket dropdown in Remote Settings. It is only available for Storj-iX provider credentials.
| Settings | Description |
|---|---|
| Bucket Name | Enter a name for the new bucket |
Click Save on the Add bucket screen to create the remote bucket on Storj and then return to the Cloud Sync Task Wizard.
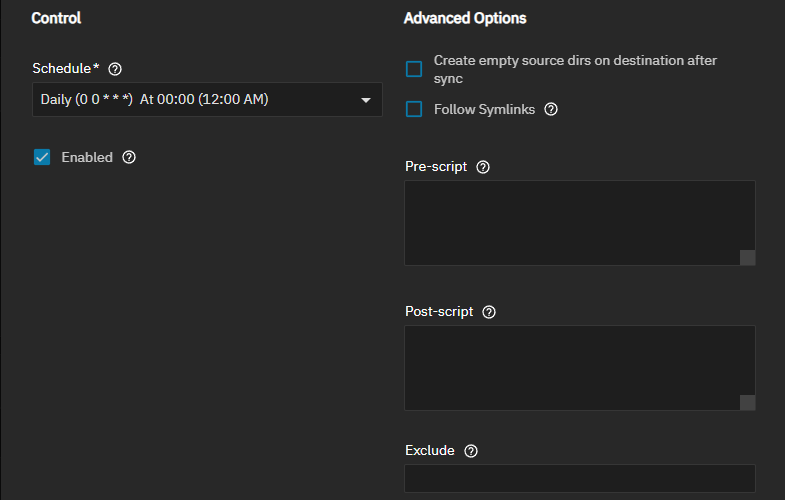
Control settings establish a schedule for when the cloud sync task occurs.
| Settings | Description |
|---|---|
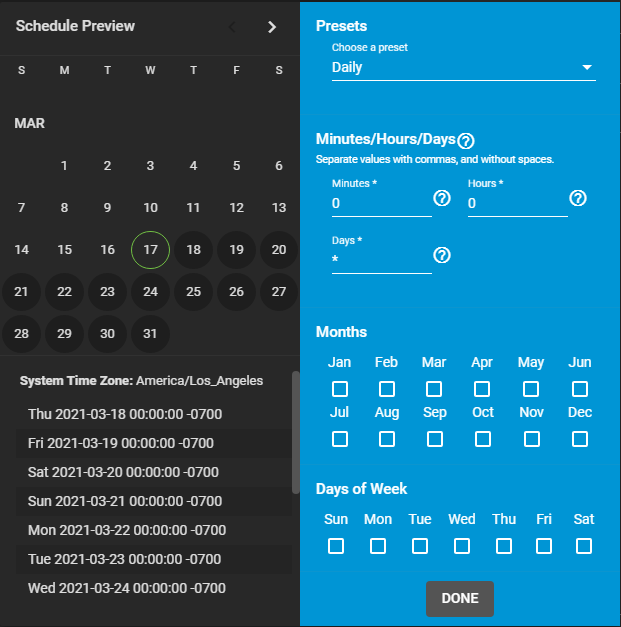
| Schedule | Shows a list of schedule preset options. See Schedule Presets below for more info. |
| Enabled | Enables this cloud sync task. Leave clear to disable the task without deleting it, and keep the configuration available without allowing the specified schedule to run the task. You can use the toggle in the Enable column on the Cloud Sync Tasks widget to enable or disable the task. |
Advanced Options settings are for advanced users. Selecting Push in Direction adds the Use Snapshot option.
| Settings | Description |
|---|---|
| Create empty source dirs on destination after sync | Creates an empty source directory in the cloud-storage provider folder when pushing data to the cloud provider location, or in TrueNAS if pulling data from the cloud storage provider. |
| Follow Symlinks | Sets symbolic links (symlinks) to follow when enabled and copies the items to which they link. |
| Pre-Script | For advanced users. Sets a script to execute before running sync to what is entered. See the Cloud Sync tutorial for more information. |
| Post-Script | For advanced user. Sets a script to execute after running sync to what is entered. See the Cloud Sync tutorial for more information. |
| Exclude | Sets up a list of files and directories to exclude from sync. Enter one or separate additional entries by pressing Enter. Examples of proper syntax to exclude files/directories are: photos</code> excludes a file named photos/photos> excludes a file named photos from root directory (but not subdirectories)photos/ excludes a directory named *photos/photos/ excludes a directory named photos from root directory (but not subdirectories).--exclude option. |
The Advanced Remote Options settings are for advanced users to configure remote encryption (if selected), transfer bandwidth speed, and bandwidth limit. The Edit Cloud Sync Task screen Advanced Remote Options screen has an additional setting not found on the Add Cloud Sync Task screen.
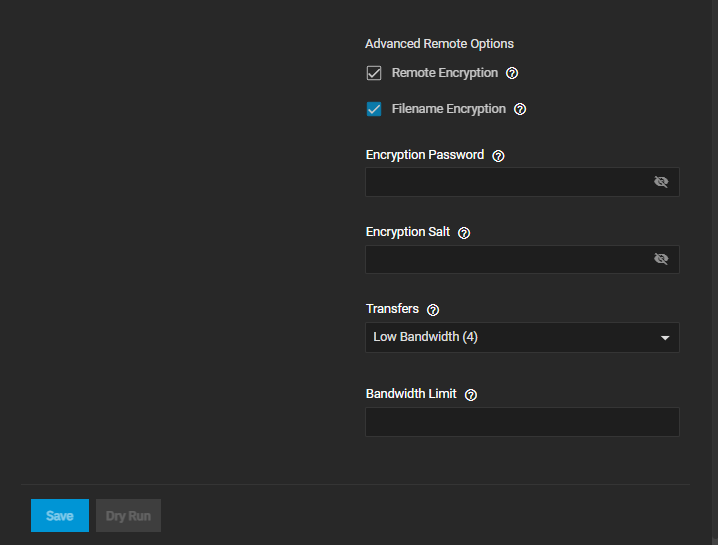
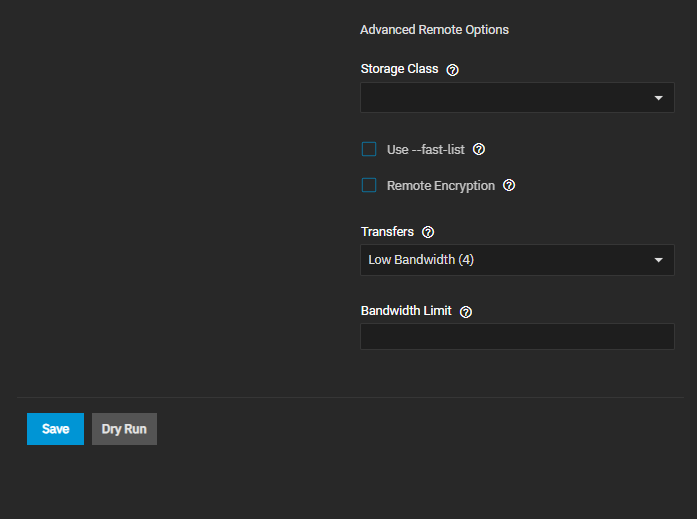
| Settings | Description |
|---|---|
| Remote Encryption | Select to use rclone crypt encryption during pull and push transfers. Selecting PUSH in Direction encrypts files before transfer and stores the encrypted files on the remote system. Files are encrypted using the encryption password and encryption salt values. Selecting PULL decrypts files stored on the remote system before the transfer. Transferring the encrypted files requires entering the same encryption password and encryption salt used to encrypt the files. Additional details about the encryption algorithm and key derivation are available in the rclone crypt File formats documentation. Selecting Remote Encryption shows the Filename Encryption, Encryption Password, and Encryption Salt settings. |
| Filename Encryption | Not recommended (see below). Shows after selecting Remote Encryption. When selected, transfers encrypt and decrypt file names with the rclone Standard file name encryption mode. The original directory structure of the files is preserved. When enabled, file names are encrypted, file names are limited to 143 characters, directory structure is visible, and files with identical names have identical uploaded names. File names can use sub-paths, single-copy files, and shortcuts to shorten the directory recursion. When disabled, encryption does not hide file names or directory structure, file names can be 246 characters long, and you can use sub-paths, and copy single files. |
| Encryption Password | Shows after selecting Remote Encryption. Enter the password to encrypt and decrypt remote data. Warning: Always securely back up this password! Losing the encryption password results in data loss. |
| Encryption Salt | Shows after selecting Remote Encryption. Enter a long string of random characters to use as salt for the encryption password. Warning: Always securely back up the encryption salt value! Losing the salt value results in data loss. |
| Transfers | Sets the option for the number of simultaneous file transfers based on the available bandwidth and destination system performance to the option selected on the dropdown list. Options: Low Bandwidth(4), Medium Bandwidth (8), High Bandwidth(16), and Custom. See rclone –transfers. |
| Bandwidth limit | Sets the bandwidth limit. Enter a single bandwidth limit or bandwidth limit schedule in rclone format. For example: 08:00,512 12:00,10MB 13:00,512 18:00,30MB 23:00,off. Separate entries by pressing Enter. You can specify units with the beginning letter b, k (default), M, or G. See rclone –bwlimit. |
The rclone project has identified known issues with Filename Encryption in certain configurations, such as when long file names are used. See SSH_FX_BAD_MESSAGE when syncing files with long filename to encrypted sftp storage. In some cases, this can prevent backup jobs from completing or being restored.
We do not recommend enabling Filename Encryption for any cloud sync tasks that did not previously have it enabled. Users with existing cloud sync tasks that have this setting enabled must leave it enabled on those tasks to be able to restore those existing backups. Do not enable file name encryption on new cloud sync tasks!


