Managing TrueCloud Backup Tasks
9 minute read.
TrueNAS can send, receive, or synchronize data with the cloud storage providers available in TrueNAS.
TrueCloud backup tasks allow for single-time transfers or recurring transfers on a schedule. They are an effective method to back up data to a remote location.
This article provides instructions on configuring a TrueCloud backup task using Storj and covers setting up the Storj iX account and TrueNAS credential.
To take advantage of the lower-cost benefits of the TrueCloud backup service, you must create your Storj iX account using the link provided on the Add Cloud Credentials screen.
You must also create and authorize the storage buckets on Storj for TrueNAS to use.
iXsystems is not responsible for charges incurred using a third-party vendor with the TrueCloud backup feature.
You must configure all system storage (pool and datasets or zvols) and have them ready to receive or send data.
To create a TrueCloud Backup task:
Create the TrueNAS Storj cloud credential.
Adding the Storj cloud credential in TrueNAS includes following the link to create the Storj iX account, creating a new bucket, and obtaining the S3 authentication credentials needed to complete the process in TrueNAS.
Create the TrueCloud Backup task for one bucket.
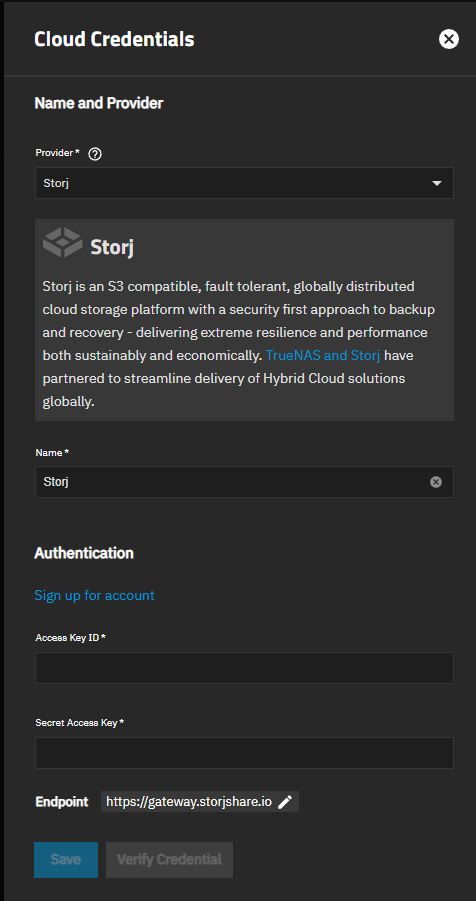
Go to Credentials > Backup Credentials and click Add on the Cloud Credentials widget. The Cloud Credentials screen opens with Storj displayed as the default provider in the Provider field.
Enter a descriptive name to identify the credential in the Name field.
You can create your Storj iX cloud service account using two methods:
- Go to the TrueNAS Storj web page and click Sign Up & Log in - iX-Storj.
- Go to Credentials > Backup Credentials and click Add. Select Storj iX as the Provider on the Cloud Credentials screen, then click Sign up for account.
The Storj Create your Storj account web page opens.
You must use this link to create your Storj account to take advantage of the benefits of the Storj iX pricing!
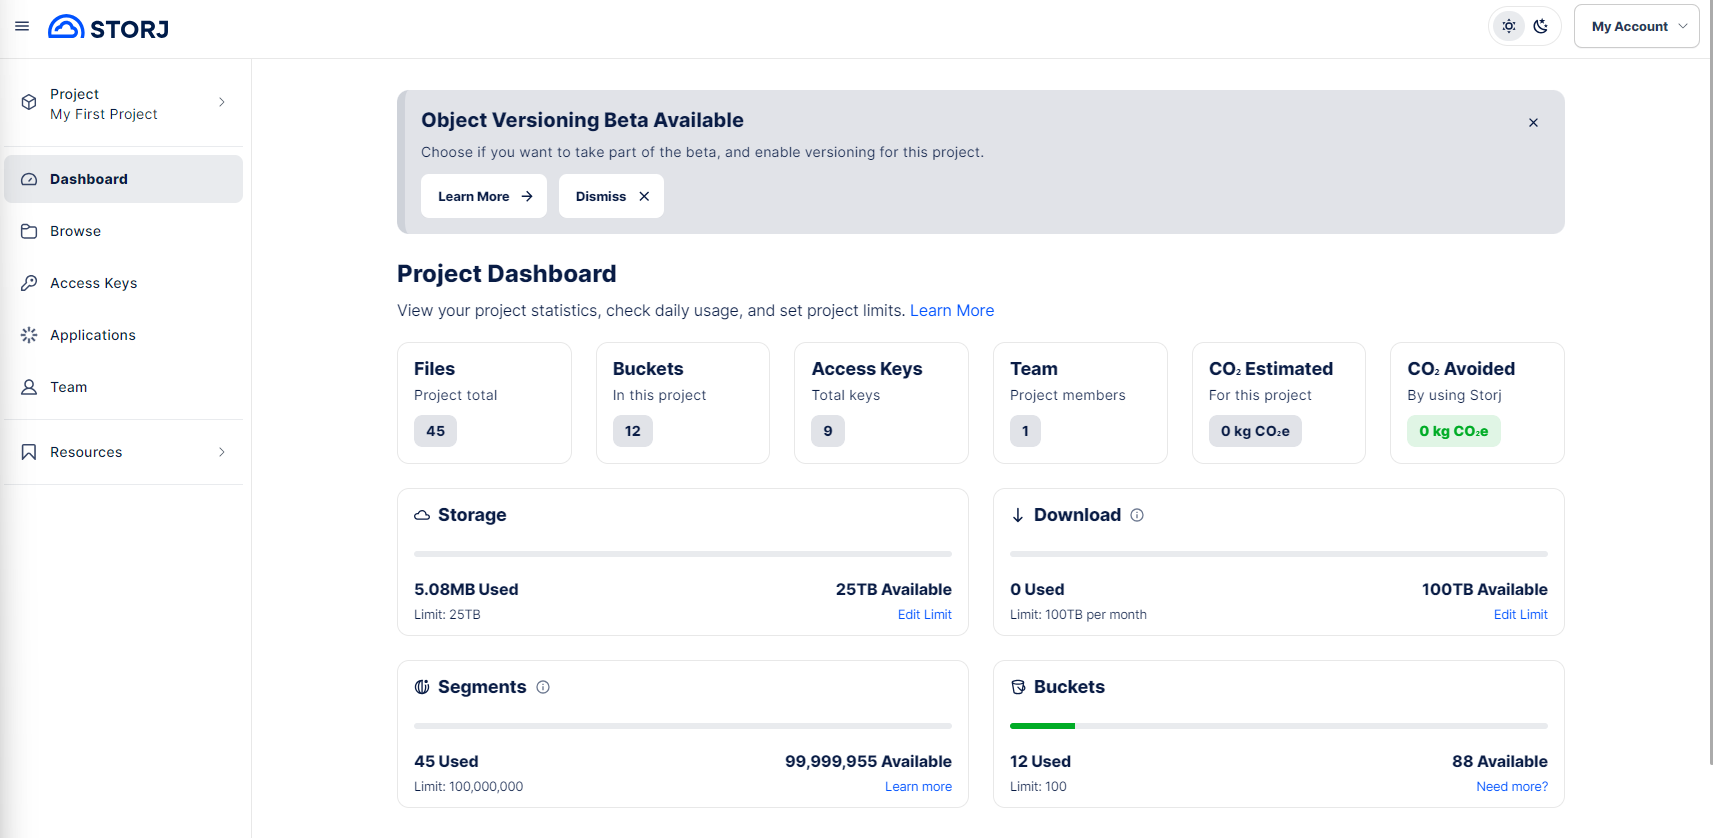
Enter your information in the fields, select the I agree to the Terms of Service and Privacy Policy, and click the button at the bottom of the screen. The Storj main dashboard opens.
After setting up your Storj iX account, set up Storj S3 access and create your Storj bucket.
The endpoint set in the Storj credential applies to all Cloud Sync Tasks that use that credential.
After completing this configuration form, you can set up the TrueCloud Backup task.
After creating your Storj iX account, add S3 access credentials.
Click Access Keys to open the Access Keys dashboard, then click New Access Key.
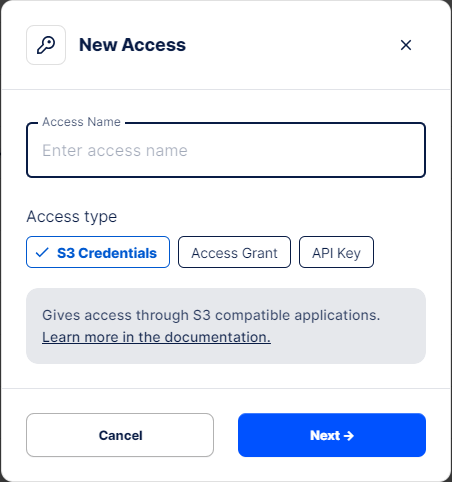
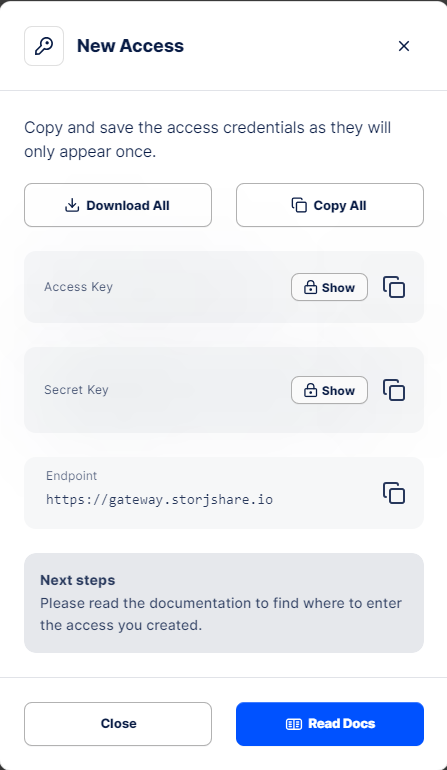
The New Access window opens.
Enter the name you want to use for this credential. Select S3 Credentials for access type, then click Next.
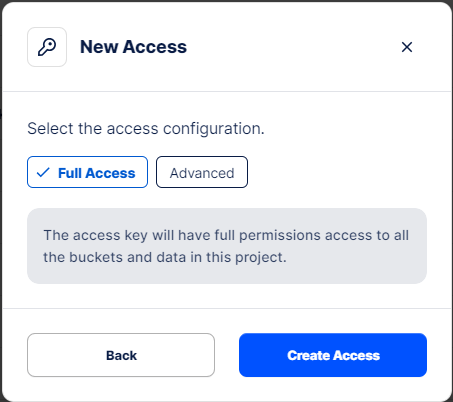
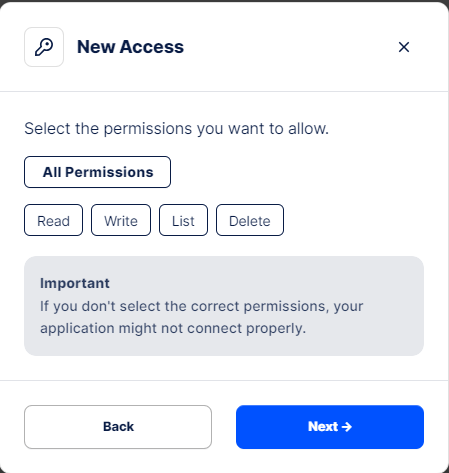
Select the permissions you want to allow this access key. Choose Full Access to allow permanent full permissions to all buckets and data then click Create Access or select Advanced then click Next to customize access configuration.
To enable TrueNAS to create new Storj buckets, set the access configuration to Full Access.(Optional) If configuring advanced access options:
a. Select the permissions to allow. Choose one or more of Read, Write, List, Delete, or choose All Permissions. Click Next.
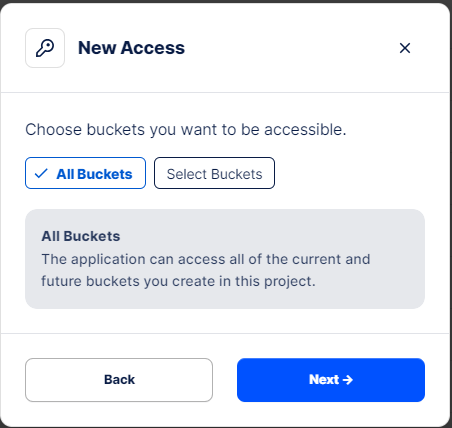
b. Select the buckets to allow access to. Click All Buckets or click Select Buckets and use the Buckets dropdown to select one or more bucket(s). Click Next.
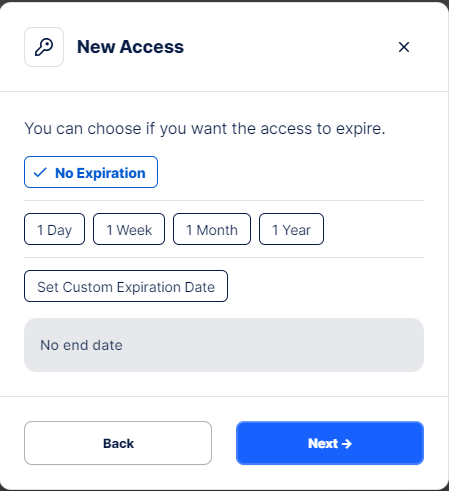
c. Select an expiration date if you want to set the duration or length of time to allow this credential to exist. You can select a preset period, click Set Custom Expiration Date to use the calendar to set the duration, or select No expiration. Click Next to open the Access Encryption window.
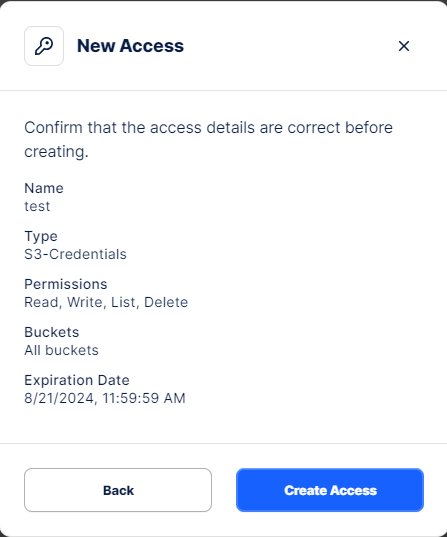
d. Review access details and then click Create Access.
Use Copy All or Download All to obtain the access key, secret key, and endpoint. Keep these in a safe place where you can back up the file.
Click Close.
Enter these keys in the Authentication fields in TrueNAS on the Cloud Credentials screen to complete setting up the cloud credential.
Enter the authentication information provided by Storj in the Access Key ID and Secret Access Key fields.
Click Verify Credentials and wait for the system to verify the credentials.
Click Save.
Not all Storj buckets are TrueNAS compatible. To create a TrueNAS-compatible bucket, either log in to Storj using the ix Storj affiliate link before creating the bucket in the Storj UI, or use the TrueNAS UI to create the bucket using the Add New option.
To create a Storj bucket from the TrueNAS UI:
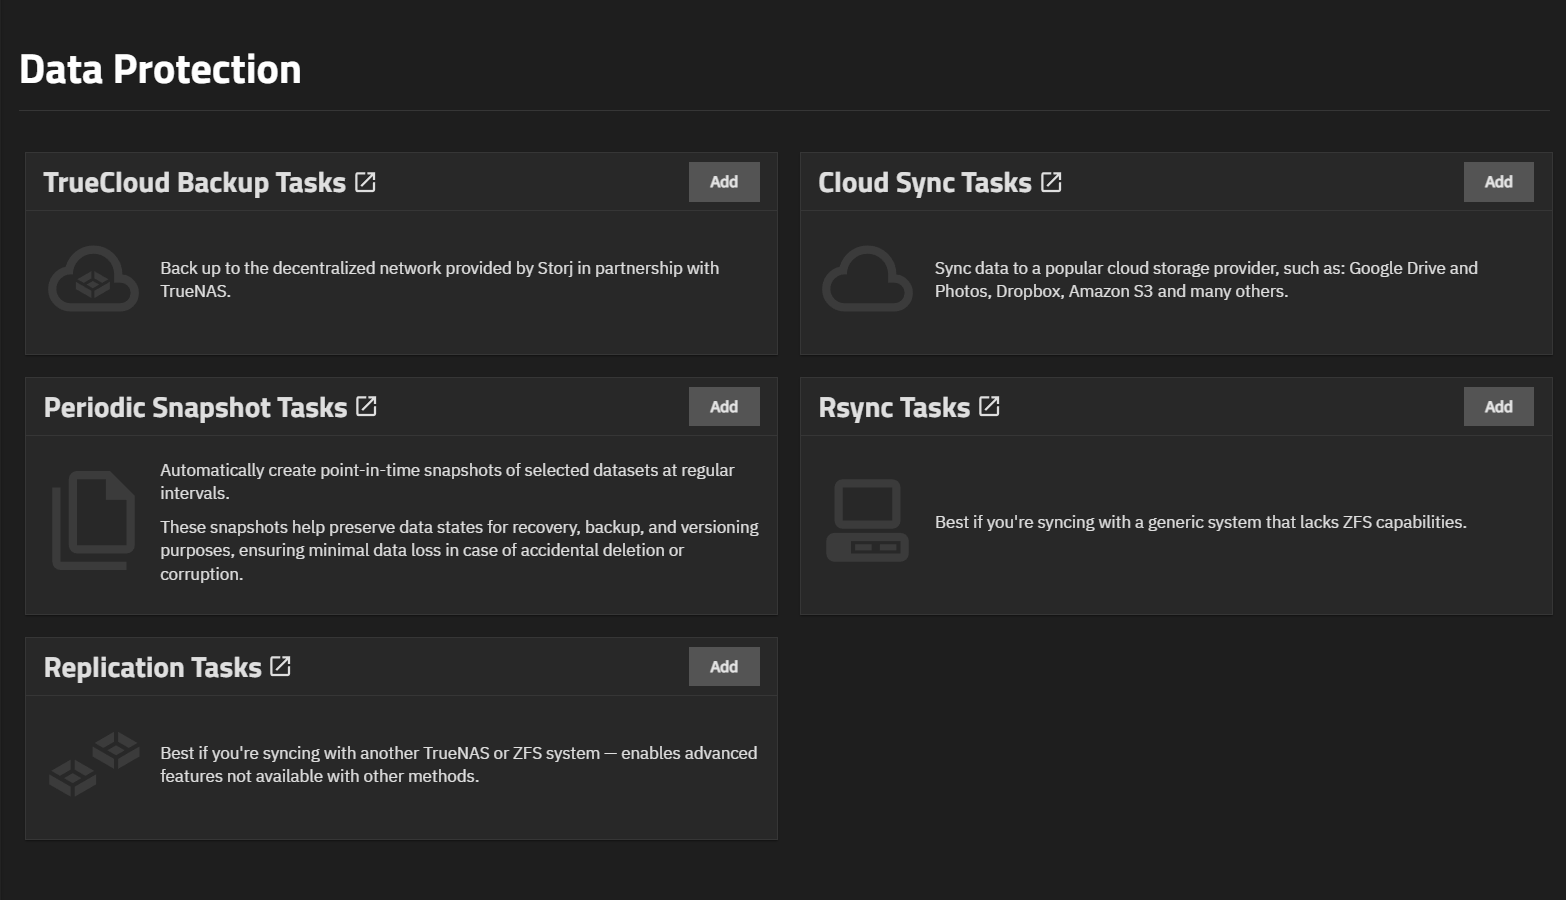
Go to Data Protection. Click Add on either the TrueCloud Backup Tasks or Cloud Sync Tasks widget.
If using the Add TrueCloud Backup Task screen:
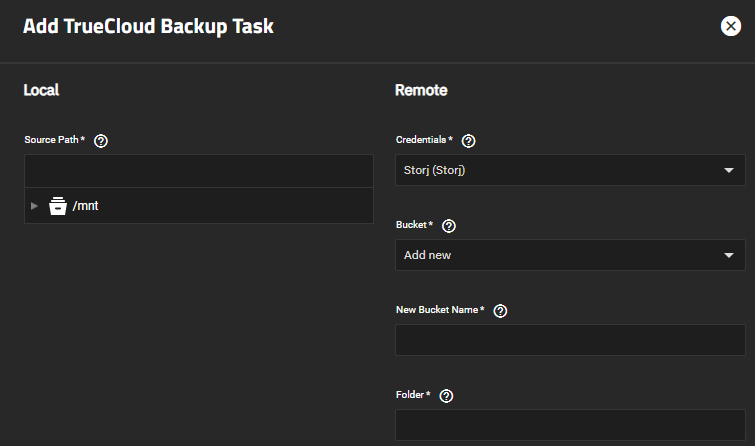
Select the stored Storj cloud credential from the Credentials dropdown. Do this as part of setting up a task.
Select Add New from the Bucket dropdown.
Enter a name for the new bucket. Only lowercase letters, numbers, and hyphens are allowed
Continue to configure the TrueCloud backup task, then click Save. TrueNAS creates the task and remote bucket on Storj.
If using the Cloud Sync Task Wizard:
Select the stored Storj cloud credential from the Provider > Credentials dropdown. Do this as part of setting up a task or use the wizard to create the bucket without saving a configured task.
Click Verify Credential for verification, then click Next to go to the What and When screen.
Select Add New to open the Add Bucket screen.
Enter a name for the new bucket.
Click Save. TrueNAS creates the remote bucket on Storj and then returns to the Cloud Sync Task Wizard.
To add the TrueCloud backup task, go to Data Protection > TrueCloud Backup Tasks:
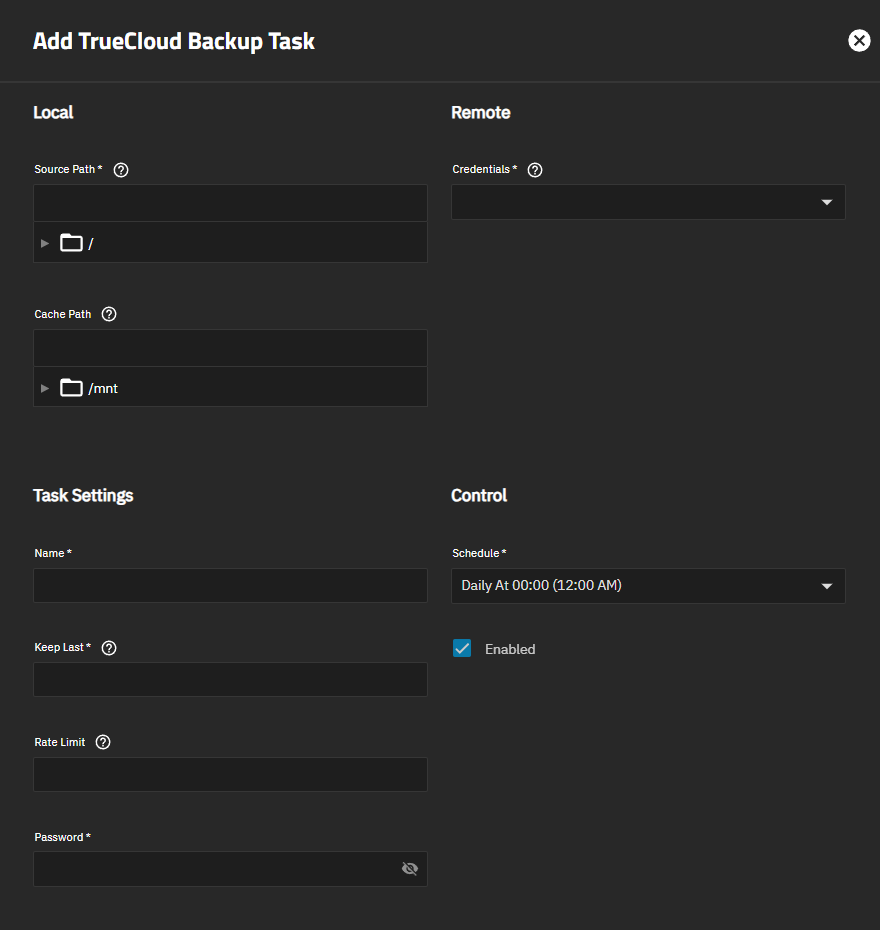
Click Add to open the Add TrueCloud Backup Task screen.
Enter or browse to select the local Source Path to the directories or files you want sent to the cloud for backup. Click the arrow to the left of the name to expand it, then click on the name to select it.
Optionally, enter or browse to select a Cache Path to store cache files. This can improve backup performance for users with massive datasets and large numbers of files.
Select the Storj credential on the Credentials dropdown list. You can select Add New to create the Storj credential if you skipped the instructions above.
Select the Storj bucket from the Bucket dropdown list.
If you have not previously created a TrueNAS compatible Storj bucket, select Add New and follow the procedure in Creating a TrueNAS Storj Bucket.
Click the arrow icon for the Folder field to expand the dropdown list and select the desired folder in the Storj bucket, or enter a folder path. Enter
/name, where name is a folder that does not exist, to create a new folder in the Storj bucket.Enter a name for the task under Task Settings.
Enter the number of snapshot copies to retain in Keep Last.
(Optional) Enter a Rate Limit value in KiB/s (kibibytes per second) to limit the backup transfer rate. This is a static rate limit that applies throughout the entire backup process. Leave empty for no rate limit.
Enter a password for the backup repository. Record this password in a secure location. You need the password to recreate the task using the same bucket/folder, such as in a new TrueNAS install or system, or to restore data from the existing snapshots in another TrueNAS system.
Set the task schedule for when to run this task.
Click Save.
TrueNAS adds the task to the TrueCloud Backup Tasks widget with the state N/A until the task runs on schedule. To test the task, click the vertical ellipses on the task and select Run Job to start the task apart from the scheduled time.
The task status changes to SUCCESS when complete.
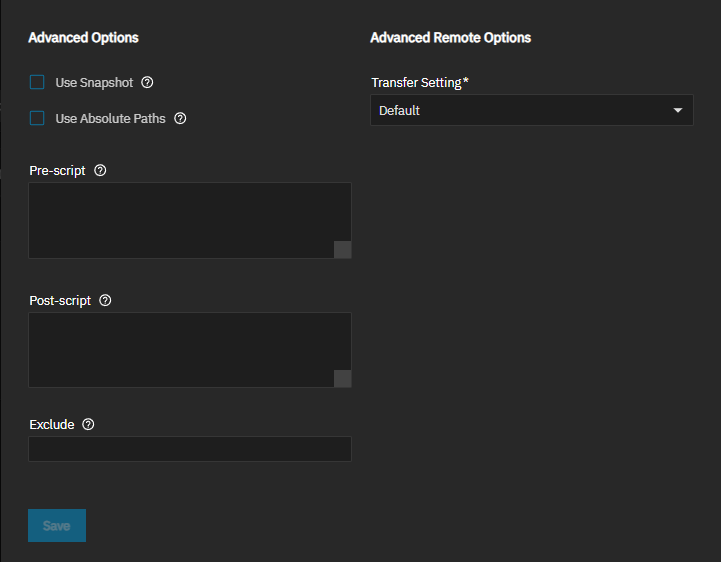
Advanced Options and Advanced Remote Options contain additional settings for advanced users.
Select Use Snapshot to create and use a snapshot to back up or synchronize the operation between TrueNAS and the TrueCloud backup solution. This snapshot is automatically removed after the operation completes.
Advanced users can write scripts that run immediately before or after the TrueCloud backup task. Enter environment variables in either the Pre-script or Post-script fields. The Post-script field only runs when the TrueCloud backup task succeeds. See TrueCloud Backup Tasks Screens for information on available environment variables.
Use Exclude to enter a list of files and directories to exclude from sync. Press Enter to separate entries. See TrueCloud Backup Tasks Screens for syntax examples.
Use Transfer Settings to prevent excess resource consumption by setting the pack size and read concurrency.
To edit an existing TrueCloud backup task, click the vertical ellipses on the task and select Edit to open the Edit TrueCloud Backup Task screen. After making changes, click Save.
To run a scheduled task before the defined time, click the vertical ellipses on the task and select Run Job to start the task immediately.
To delete a task, click the vertical ellipses on the task and select delete Delete for the task to delete.
See TrueCloud Backup Tasks Screens for more information on TrueCloud Backup Task screens.
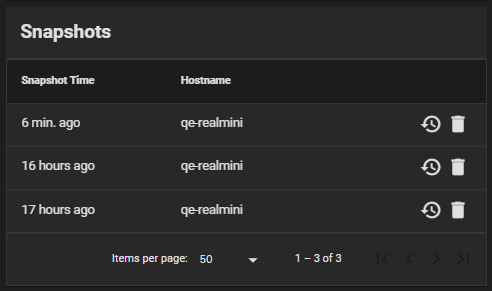
To restore data from a TrueCloud backup, locate an existing snapshot on the Snapshots widget.
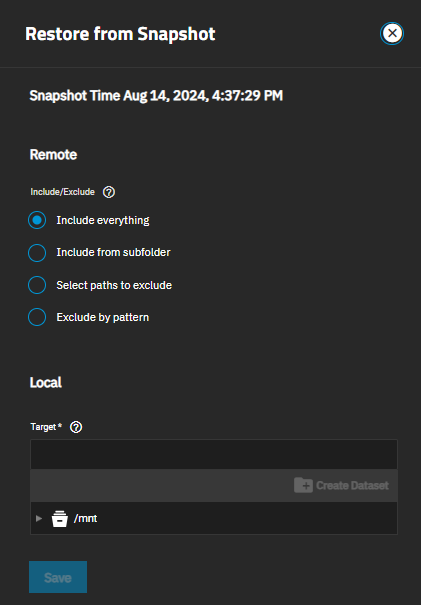
Click the vertical ellipses on the task and select history Restore to open the Restore from Snapshot screen.
Select Include Everything to restore all data, or exclude some data using Include from subfolder, Select paths to exclude, or Exclude by pattern. See TrueCloud Backup Tasks Screens for more information.
Set the local Target to the target dataset of the backup task. Click Save to restore data from the snapshot.
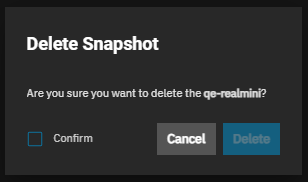
To delete an existing snapshot, locate it on the Snapshots widget. Click the vertical ellipses on the snapshot and select delete Delete to delete the snapshot. A Delete Snapshot dialog opens.
Click Confirm and then Delete to start the job.


