Configuring Rsync Tasks
18 minute read.
Rsync provides fast incremental data transfer to synchronize files between a TrueNAS system and a remote system. The Push function copies data from TrueNAS to a remote system. The Pull function copies data from a remote system to the TrueNAS local host system and stores it in the dataset defined in the Path field.
There are two ways to connect to a remote system and run an rsync task:
- Set up an SSH connection to the remote server.
- Set up an rsync module for the remote server.
An rsync task has two basic methods:
- Module
- SSH
Module mode requires adding an rsync app to the remote system, configuring a module on that system, and then entering it in the rsync task in TrueNAS.
SSH mode has two connection options:
- SSH private key stored in the user’s home directory
- SSH connection for the keychain
Setting options change based on the SSH connection option selected.
Set up a home directory for the remote system administrator on the remote system. Note the path to where home directories are stored to enter on the local host TrueNAS.
If the remote system is also a TrueNAS, go to Credentials, select Users to see the list of users. Select the administration user and click Edit.
If creating a new administration user for rsync functions, click Add. See Managing Users for more information. Take note of the path to the home directory to use in setting up the connection.
Add an SSH connection for the remote server on the local TrueNAS host system.
TrueNAS allows configuring multiple admin users on the system. All admin users configured in the TrueNAS system show in the rsync task User dropdown list.
Enabled SSH on both the local host TrueNAS, and the remote destination system.
You can use the SSS connection created in Setting Up an SSH Connection or create a new connection while configuring the rsync task.
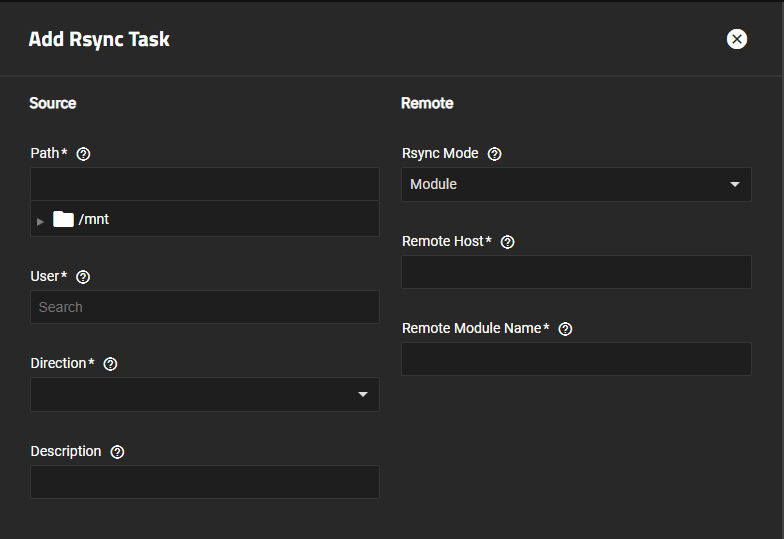
Go to Data Protection and click Add on the Rsync Tasks widget to open the Add Rsync Task screen.
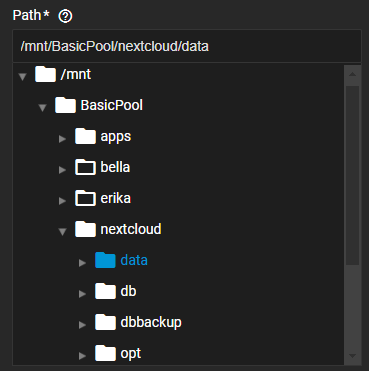
Enter or browse to the dataset or folder to sync with the remote server. Use the to the left of the /mnt folder and each folder listed on the tree to expand and browse through, then click on the name to populate the path field.
Select the administration user for the local host TrueNAS system from the User dropdown. This is the user account to perform the rsync task. The user must have read/write permissions for the local dataset.
Set the Direction for the rsync task. Select Pull to copy from the remote server to TrueNAS or Push to copy to the remote server.
Set the Rsync Mode to SSH, and then select the connection method from the Connect using dropdown list. Settings fields for the selected connection type show.
Leave this set to Module if syncing with a non-TrueNAS remote system. See Addin an Rsync Task Using Module Mode for more information.
If selecting SSH private key stored in the user home directory, the public key for the SSH connection must be alread be saved in the home directory for the admin user.
If selecting SSH connection from the keychain, choose either the existing SSH credential from the SSH Connection dropdown list or select Add New to open the New SSH Connection configuration screen. See Using an SSH Connection below for more information.
If the connection fails, the system lets you know what is wrong so you can correct the issue with the connection.
Enter the full path to the dataset on the remote server in Remote Path. The maximum path length is 255 characters.
To confirm the remote server is reachable and the path exists, leave Validate Remote Path selected.
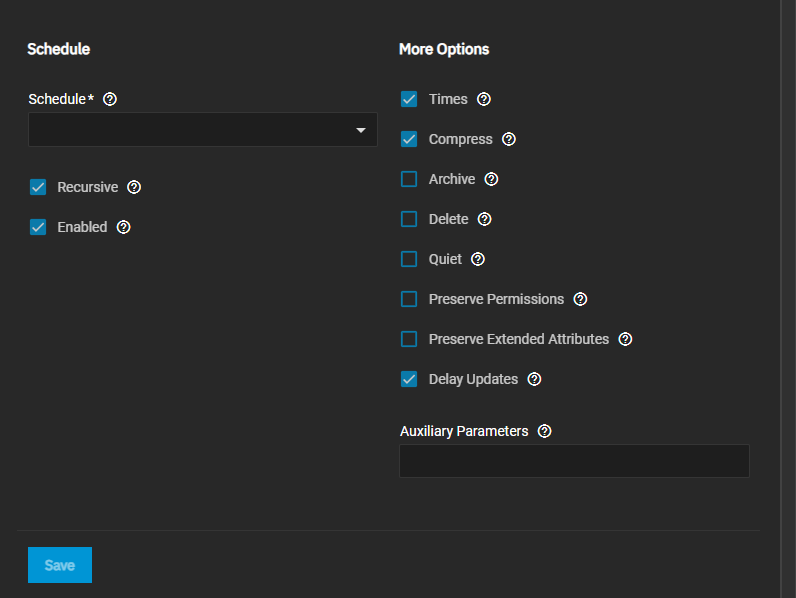
Select a schedule for when to run this task and any other options you want to use.
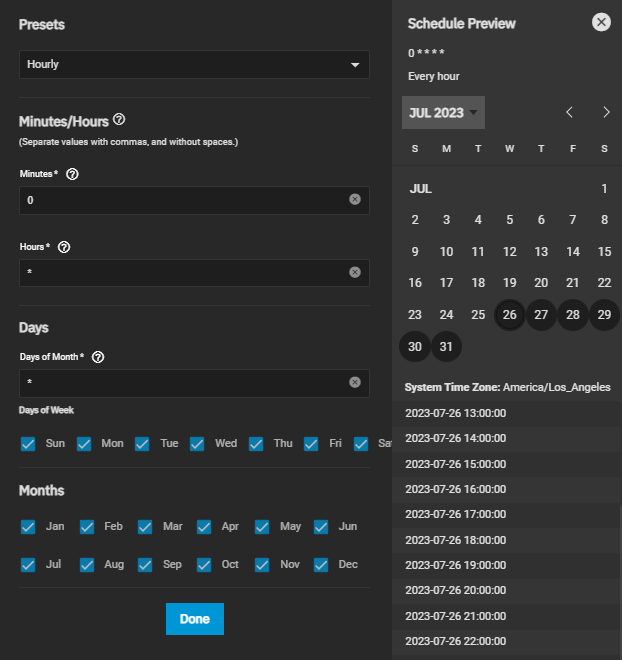
If you need a custom schedule, select Custom to open the advanced scheduler window.
Leave Enabled selected. Clear the checkbox to disable the task without deleting the configuration.
Click Save. The system verifies the SSH connection and adds the task to the Rsync Tasks widget.
To run the rsync task at any time, select it on the Rsync Tasks widget, click on the vertical ellipses for the task, and select the Run Now.
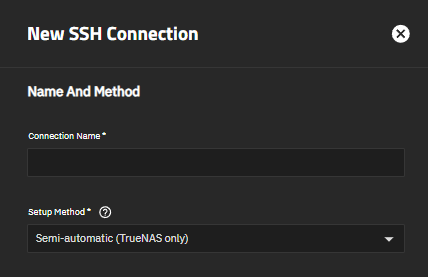
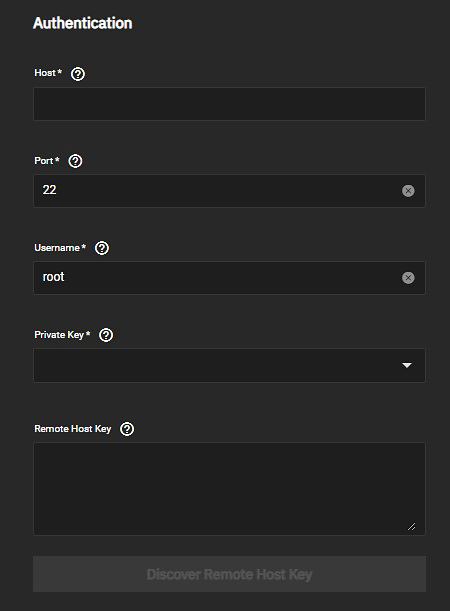
The TrueNAS UI allows users to select an existing SSH connection or to create a new connection while configuring the task. The New SSH Connection screen opened using the Add New option in the rsync task and accessed while on the Backup Credentials screen are essentially the same and show the same setting options.
To set up a new SSH connection before adding an rsync task, go to Credentials > Backup Credentials and click Add on the SSH Connections widget. See Adding SSH Credentials for more information on adding SSH Connections and key pairs.
To add a new connection while configuring the rsync task on the Add Rsync Task screen, set the mode to SSH, select SSH connection for the keychain, and then select Add New on the SSH Connection dropdown list. The New SSH Connection screen opens.
Next, set up a home directory for the system administrator on the remote system if one does not already exist. If the remote system is a TrueNAS, edit the user to add the public key. In TrueNAS, go to Users, click Edit, and paste the key into the pubic key field.
After adding the SSH connection, go to System > Services to turn on the SSH service. We don’t recommend leaving the SSH service turned on when not in use for security hardening. Turn it on before the rsync task is scheduled to run, then off again after the task completes to keep your system secured. (Optional) To automatically start or restart the SSH service after a system restart, select this option. Enable the SSH service on the remote system according to the configuration process for a non-TrueNAS system.
Before you create an rsync task in module mode, you must define at least one module per rsyncd.conf(5) on the remote rsync server. The Rsync Daemon application is available in situations where configuring TrueNAS as an rsync server with an rsync module is necessary.
After configuring the remote server with rsync and a module, configure the rsync task in TrueNAS.
If the non-TruNAS remote server includes an rsync service, make sure it is turned on. To configure a module on the remote server:
Create a dataset. Write down the host and path to the data on the remote system you plan to sync with.
Create an rsync module.
If the remote system is not a TrueNAS and has an rsync app installed, create a module according to the configuration process for that app and system. If the remote system is not a TrueNAS, install an rsync app, such as Rsyncd, and configure it per the instructions for the app and your remote non-TrueNAS system.
If the remote system is another TrueNAS, install an rsync app. Debian-based TrueNAS systems include the Rsync Daemon app in the Community app catalog. Install the app and use it to configure a module.
To configure the rsync task using module mode, you need:
- The name of the module
- The IP address or host name for the remote server
- The path to the dataset
Go to Data Protection and click Add on the Rsync Tasks widget to open the Add Rsync Task screen.
Enter or browse to and select the dataset or folder to sync with the remote server. Clicking on the dataset name populates the path field.
Select the admin account to perform the rsync task on the User dropdown list. The user must have permissions to run an rsync on the remote server and read/write permission for the local dataset.
Set the Direction for the rsync task. Select Pull to copy from the remote server to TrueNAS or Push to copy to the remote server.
Set the Rsync Mode to Module. The module settings fields show.
Enter the remote host name or IP in Remote Host.
Set the schedule for when to run this task, and any other options you want to use.
If you need a custom schedule, select Custom to open the advanced scheduler window.
Leave the Enabled selected to enable the task. Clear the checkbox to disable the task without deleting the configuration.
Click Save.
You can run the rsync task by clicking then the Run Now play_arrow icon for the rsync task on the Rsync Task widget.


