Configuring IDMap
2 minute read.
Idmap settings exist for the purpose of integration with an existing directory domain to ensure that UIDs and GIDs assigned to Active Directory users and groups have consistent values domain-wide. The correct configuration therefore relies on details that are entirely external to the TrueNAS server, e.g., how the AD administrator has configured other Unix-like computers in the environment.
The default is to use an algorithmic method of generating IDs based on the RID component of the user or group SID in Active Directory.
Only administrators experienced with configuring Id mapping should attempt to add new or edit existing idmaps. Misconfiguration can lead to permissions incorrectly assigned to users or groups in the case where data is transferred to/from external servers via ZFS replication or rsync (or when access is performed via NFS or other protocols that directly access the UIDs/GIDs on files).
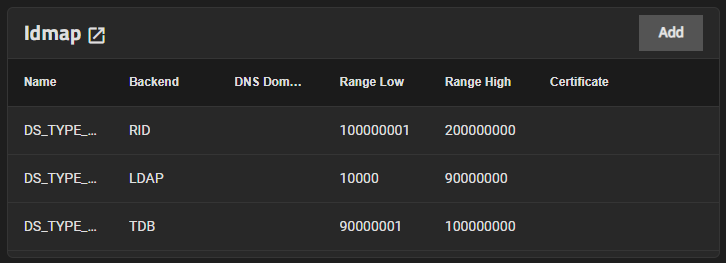
The Idmap directory service lets users configure and select a backend to map Windows security identifiers (SIDs) to UNIX UIDs and GIDs. Users must enable the Active Directory service to configure and use identity mapping (Idmap).

Users can click Add in the Idmap widget to configure backends or click on an already existing Idmap to edit it.
TrueNAS automatically generates an Idmap after you configure AD or LDAP.
From the Directory Services screen, click Show to the right of Advanced Settings and then click Confirm to close the warning dialog.
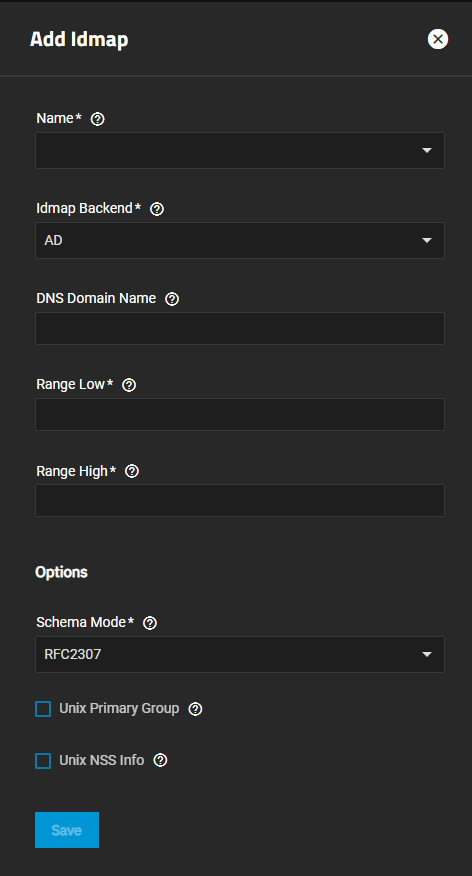
Click Add on the Idmap widget to open the Idmap Settings screen.

Select the type from the Name field dropdown. Screen settings change based on the selection.
Select the Idmap Backend type from the dropdown list. Screen settings change based on the backend selected.
Enter the required field values.
Click Save.


