TrueNAS SCALE Nightly Development Documentation
This content follows experimental early release software. Use the Product and Version selectors above to view content specific to a stable software release.
Storj
10 minute read.
Last Modified 2024-07-03 16:15 EDTThis Community App article provides installation instructions using the legacy TrueNAS SCALE Applications screen. SCALE 23.10 (Cobia) introduces new Installed and Discover screens for applications. See Apps and Applications Screens to learn how to install applications using these screens.
Storj is an open-source decentralized cloud storage (DCS) platform. TrueNAS SCALE partners with Storj in two areas, the cloud service offering and as storage media for cloud service data through the Storj node application.
Installing the Storj node app allows you to configure your system as a storage node, and to rent out unused system storage capacity and bandwidth to other Storj cloud service users.
Storj offers features such as their multi-tenant solution architecture pattern that is used on the customer side and their website service. Using TrueNAS SCALE in a multi-tenant solution architecture pattern is outside the scope of this document and the Storj node application. Contact Storj support for assistance with their products and services not covered in the TrueNAS SCALE articles.
Application maintenance is independent from TrueNAS SCALE version release cycles. App versions, features, fields, and install behavior at the time of access might vary from those in documented tutorials, especially for legacy version documentation that no longer receives active updates.
We welcome community contributions to keep this documentation current! Click Edit Page in the top right corner to propose changes to this article. See Updating Content for more information.
Before you can configure your system to act as a Storj node:
Review the Storj node hardware and bandwidth considerations at Storj Node.
Update TrueNAS SCALE to the latest public release.
Create a wallet address.
Obtain a Storj authentication token.
Create a publicly-available domain name to access the Storj application. Point this to your router public IP address.
Create a Storj identity and authorize it for every node.
Every node must have a unique identifier on the network. Use NFS/SMB shares or a file transfer service such as FTP to upload the credentials generated. If the identity is not present in the storage directory, it generates and authorizes one automatically. This can take a long time and consume system resources while it generates one.
Prepare TrueNAS SCALE for the app installation by creating the datasets for the application storage, and a new user if not using the default apps user.
Create a parent dataset, such as storj-node and then the two storage datasets (identity and data) under it. Select apps as the Dataset Preset for these datasets. You can modify the dataset ACLs at the time of creation, or modify them later when adding them in the app.
If not using the default user apps (568) as the assigned user and group, go to Credentials > Local User, click Add and create the new user. Make sure the user has read/write/execute privileges. If you have an existing admin user on your system with the right permissions, you make that user the app user.
If using ports other than the assigned default ports (20909 and 28967), go to Default Ports for a list of available or unavailable port numbers to verify the port numbers you want to use are available options.
Earlier releases of SCALE used port 20988 for in and outbound traffic. This port assignment changed in later releases to 28967.Install the Storj application in SCALE.
Storj provides a Quickstart Node Setup Guide with step-by-step instructions to help users create a Storj node.
Create a wallet address using any crypto wallet provider such as kraken.com, coinbase.com, Bitcoin Wallet, etc. If you already have a wallet for another crypto-currency application, you can use the existing wallet.
See Storj Wallet Configuration.
Special considerations regarding how to protect and manage a wallet are outside the scope of this article.
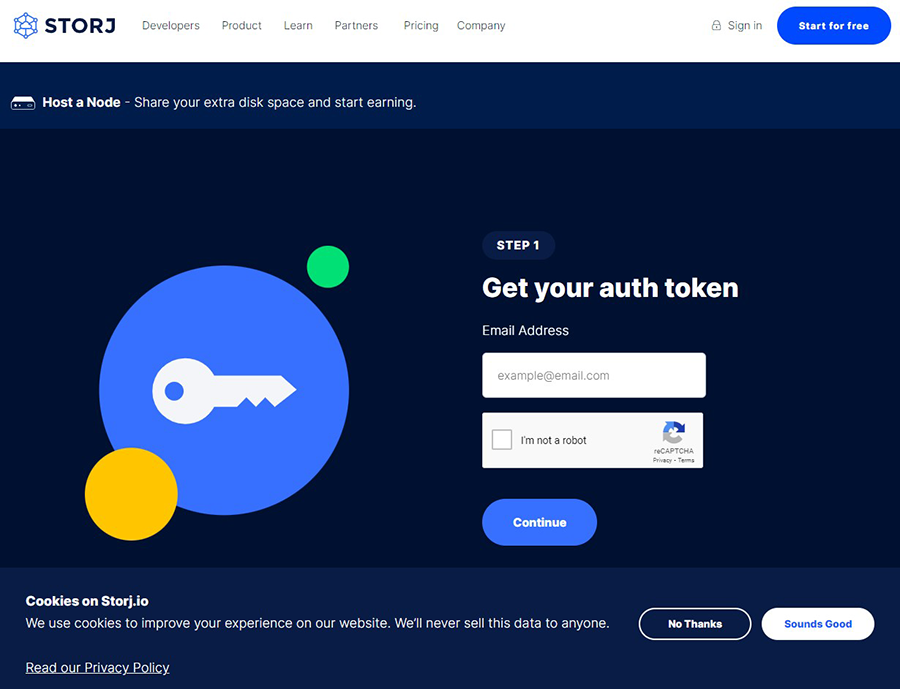
Open a browser window and go to Storj Get an Authorization Token. Enter an email address, select I’m not a robot, then click Continue.
Copy the auth token to use later in this procedure. Keep the token in a secure location.
To allow the Storj application to communicate with Storj and other nodes, configure your router with port forwarding and the firewall to allow these ports to communicate externally:
Add a new port forwarding rule to your router for:
- 28967 for both TCP and UDP protocols P2P communication
- 7777 for outgoing communication with the satellites
- 8888 for outgoing communication while creating and signing the identities.
Enter the internal IP address of your TrueNAS system in Destination Device.
Enter 28967 in Public and Private ports for both TCP and UDP for the Protocol.
With the TrueNAS system up and running, check your open port using something like https://www.yougetsignal.com/tools/open-ports/. If your port forwarding is working, port 28967 is open.
This enables QUIC, a protocol based on UDP that provides more efficient internet connection usage with both parallel uploads and downloads.
Alternatively, use a dynamic DNS (DDNS) service such as NoIP to create a host name if you do not have a static IP address for the system nodes.
Create a DDNS host name that points to your router WAN IP address, and provide a domain name to use for accessing the Storj application. You can use a dynamic DNS service that allows you to set up a DDNS host name. You can use a service such as NoIP to create a domain name (i.e., name.ddns.net) and then point it at the WAN IP address of your router.
To verify it works, use nslookup name.ddns.net where name.ddns.net is your DDNS host name.
Create three new datasets, one parent with two child datasets nested under it.
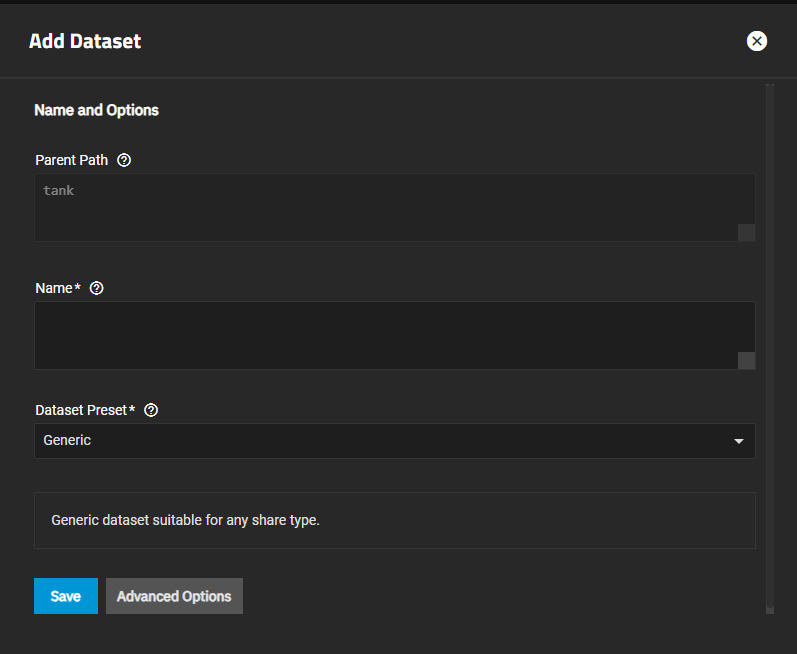
Log into TrueNAS SCALE, then go to Datasets and click Add Dataset to open the Add Dataset screen.
Enter a name for the first dataset in Name. For example, storj-node, select Apps in Dataset Preset, then click Save.
Select the new dataset storj-node, click Add Dataset again to create a new child dataset. For example, data. Select Apps in Dataset Preset, then click Save.
Select the storj-node dataset again, click Add Dataset and create the second child dataset. For example, identity. Select Apps in Dataset Preset, then click Save.
The Datasets screen displays two nested datasets data and identity underneath the storj-node dataset.
After adding each dataset you might be prompted to change the ACL permissions or to return to the Datasets screen. You can modify the dataset permissions now, or wait to modify permissions when you add the dataset as a storage volume in the Storage Configuration section of the Install Storj wizard.
See Setting Up Permissions for more information on changing permissions in SCALE.
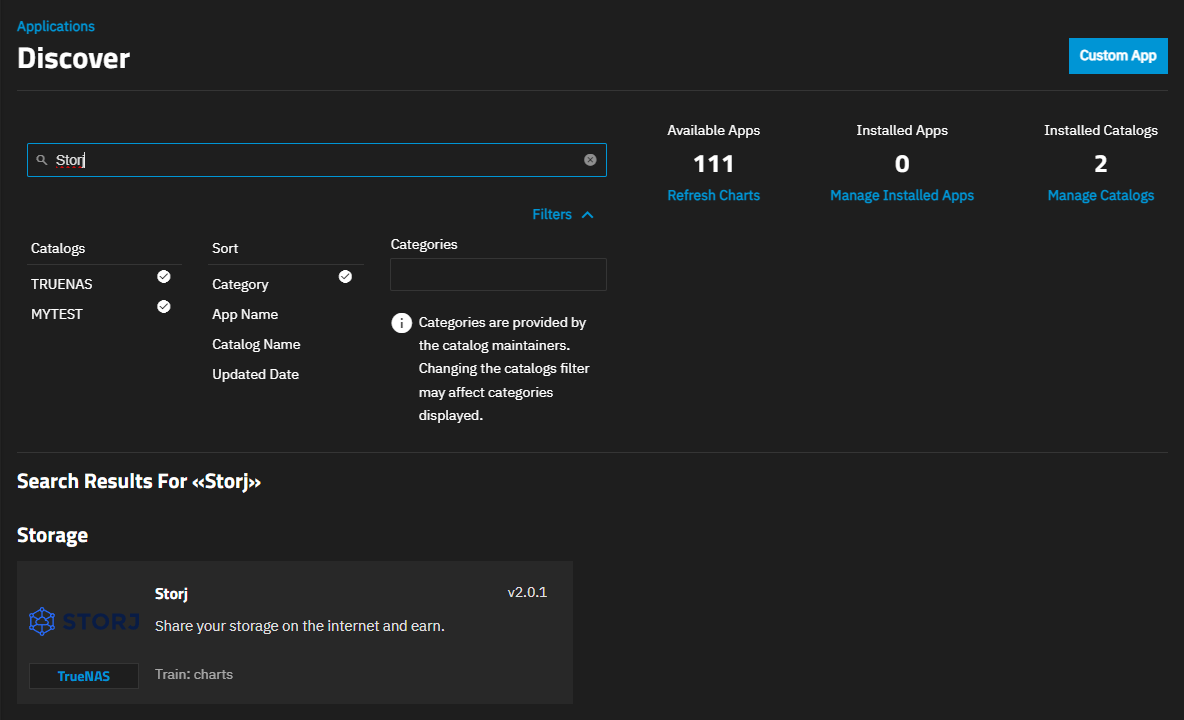
Go to Apps, click on Discover Apps. Either scroll down to the Storj application or begin typing Storj into the search field to locate the widget.
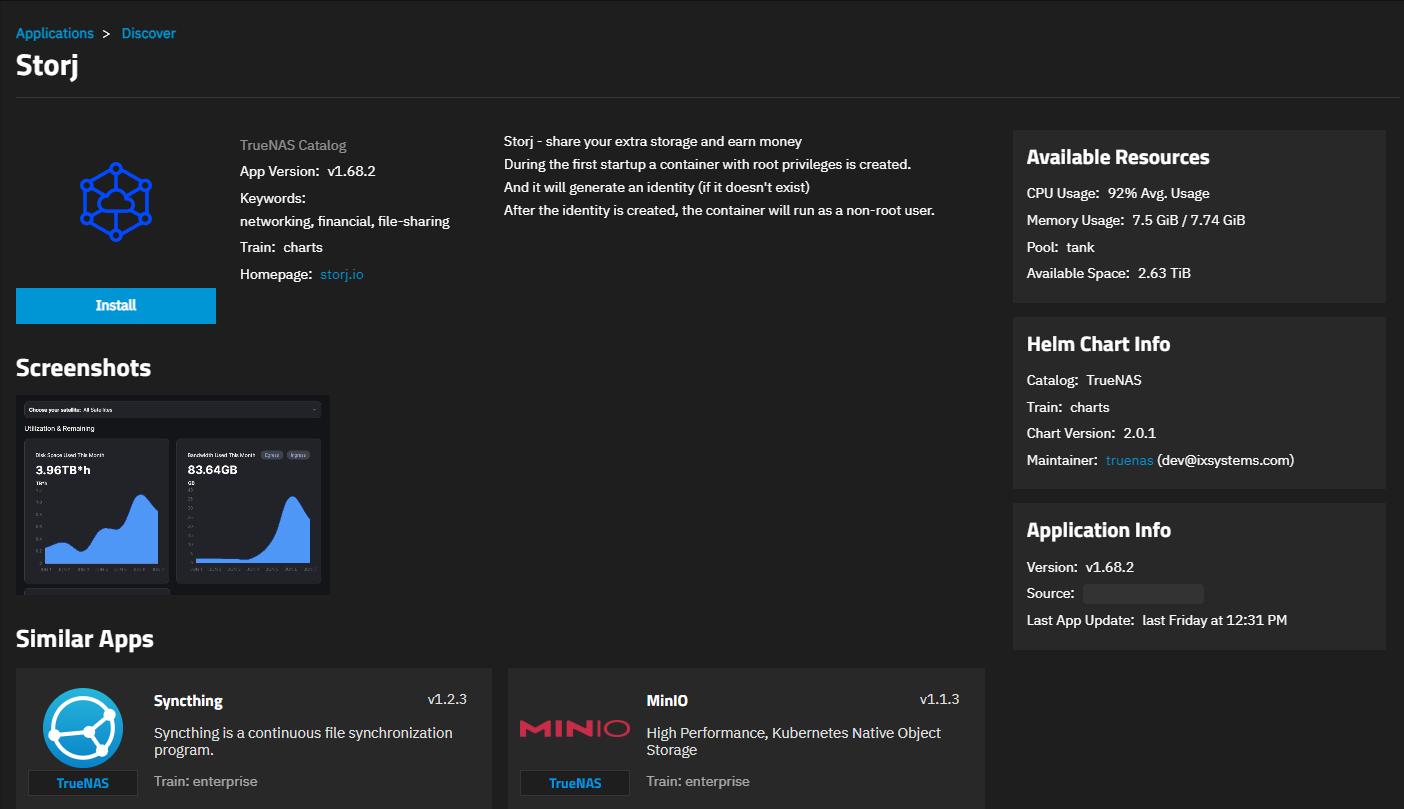
Click on the widget to open the Storj information screen.
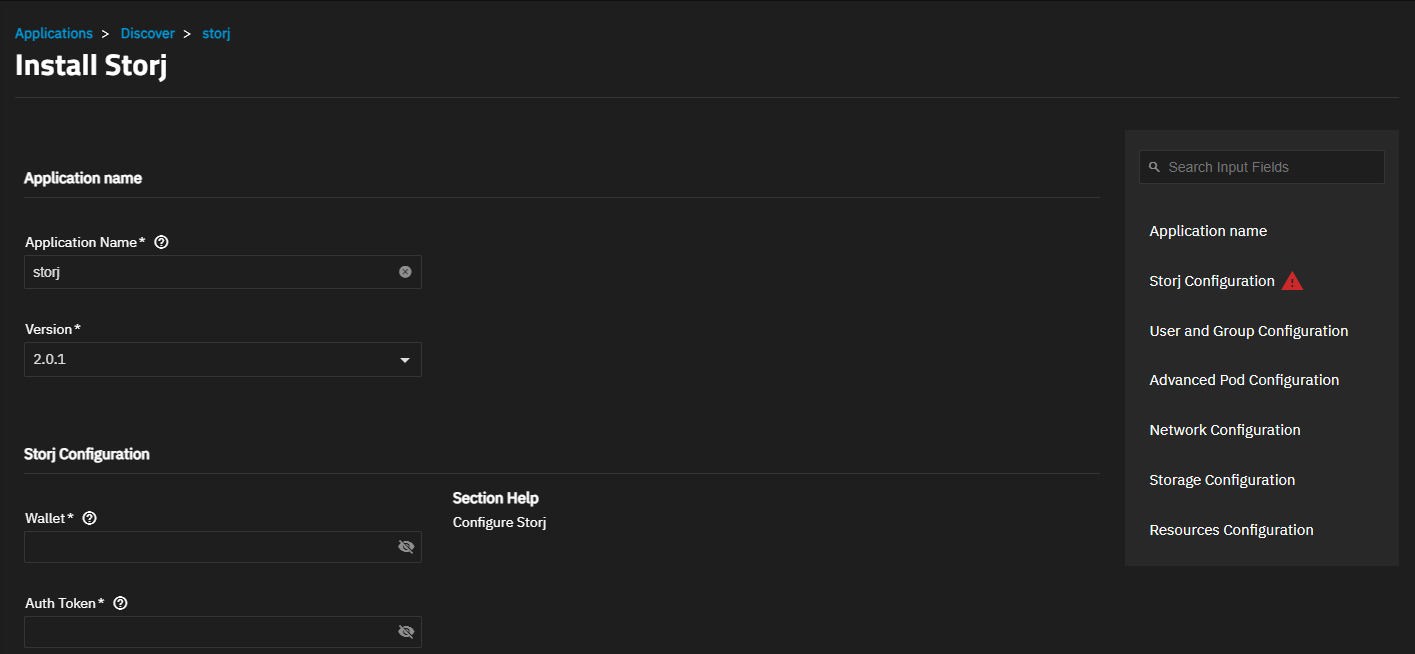
Click Install to open the Install Storj app configuration wizard.
Scroll down to each section or click the navigation menu item on the right of the screen to jump to that section.
Accept the default name or enter a new name for your Storj application if you prefer. Enter a name that consists of, and begins or ends with lowercase alphanumeric characters. Do not use a hyphen as the first or last character. For example, storjnode, or storj-node, but not -storjnode or storjnode-.
Do not change the Version. SCALE alerts you when a new version is available for deployed apps, and allows you to update through the click of a button on the Installed application screen.
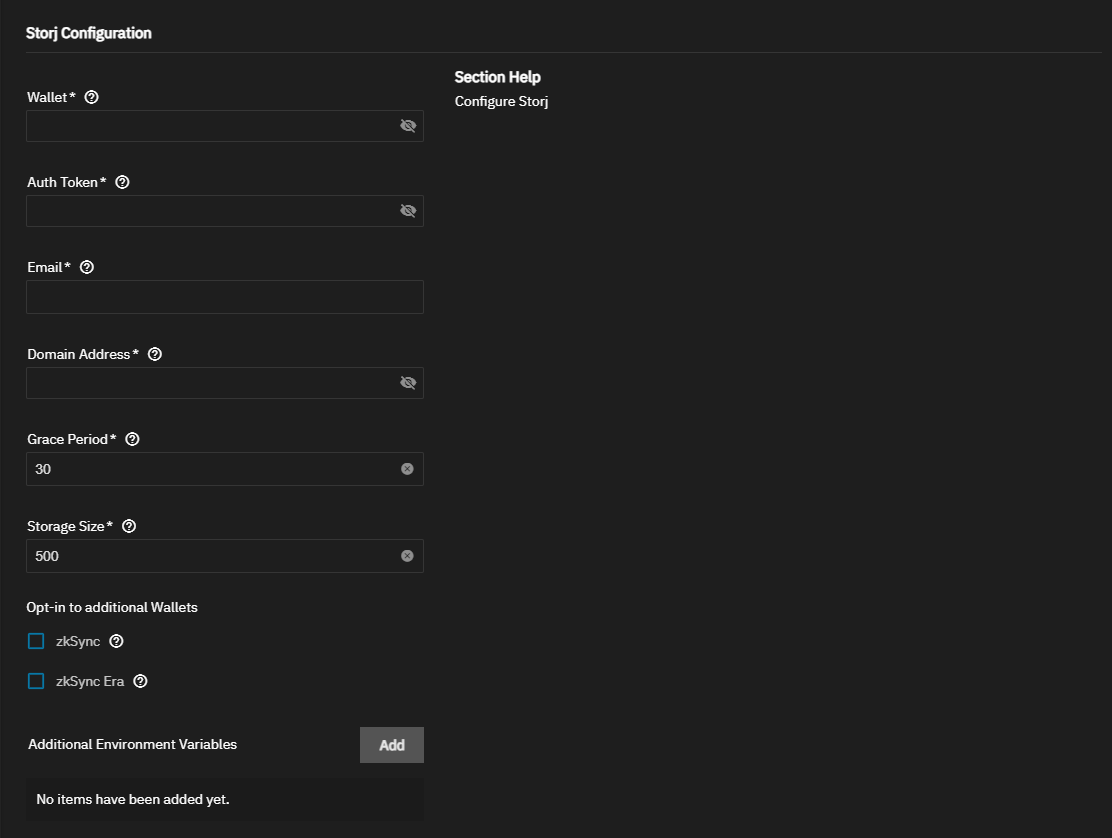
Enter the Storj Configuration settings:
a. Enter the wallet address in Wallet in the Storj Configuration section.
Select either zkSync or zkSync Era or both if you want to uses these wallet optional flags.
b. Enter the authentication token copied from Storj in Auth Token.
c. Enter the email address used when you obtained the token in Email.
d. Enter the storage domain (i.e., the public network DNS name) added for Storj in Domain Address. If using Dynamic DNS (DDNS), enter that name here as well. For example, name.ddns.net.
e. Accept the default values for Grace Period and Storage Size unless you want to set different parameters for the rented storage.
f. Click Add to show Additional Environmental Variables fields. These are optional settings. The Install Storj wizard includes all required settings to deploy the Storj node application.
Accept the default values in the User ID and Group ID. The default user apps (568) has the read, write, and execute permissions the application owner requires. If you created a new user for this app, enter the UI for that user in both the User ID and Group ID fields.
Accept the default values in the Advanced Pod Settings section unless you want to use advanced DNS configuration settings. Accept the default ports in Network Configuration.
Accept the default Network Configuration settings. If you want to use different ports, check the Default Ports for a list of available or unavailable port numbers. Leave Host Network unselected.
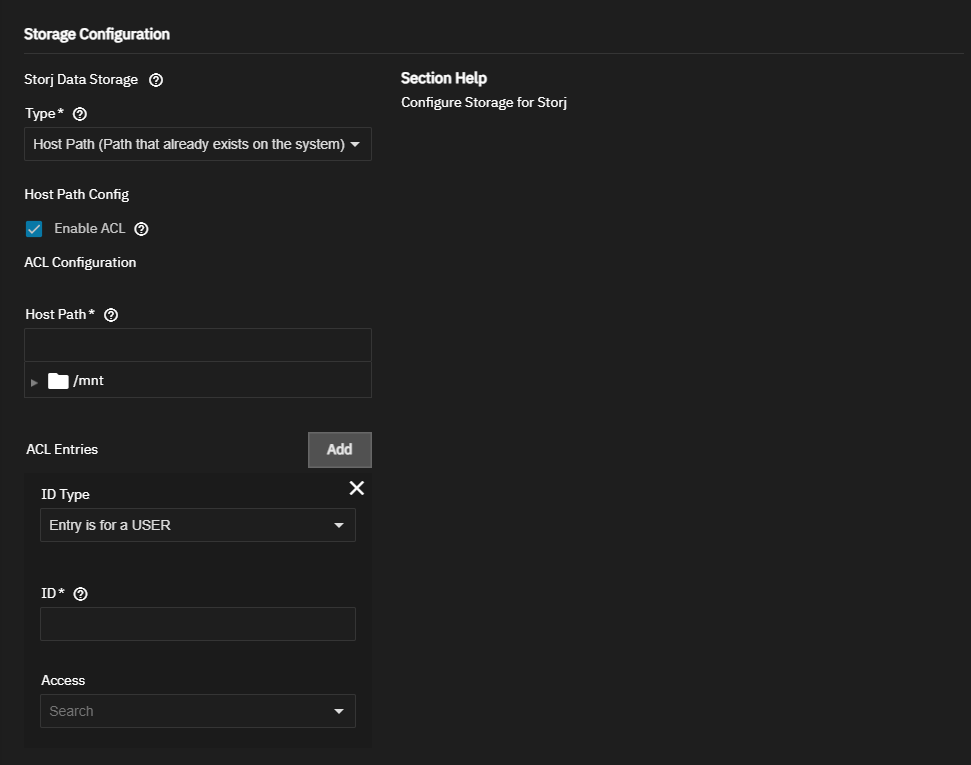
Configure the Storage Configuration settings. You can use the default ixVolume option to allow SCALE to create the data storage volume or select Host Path to select the path to the new data dataset created earlier in this document.
To modify the dataset permissions, select Enable ACL to show the option to create an ACL entry to customize the dataset permissions.
The data dataset does not require execute permissions, just read and write. If you add an ACE (ACL entry) for this dataset, you do not need to grant execute permissions for the user added for this dataset.Repeat this for the identity dataset. Select Host Path in the Storj Identity Storage > Type field then enter or browse to select the mount path for the existing dataset.
If you created additional datasets for other purposes and want to add that additional storage, click Add to the right of Additional Storage Volumes to show another set of storage options. The additional storage options include the ixVolume and Host Path options, and the option to create an SMB share volume.
Setting up an SMB share option in storage you rent out to other Storj cloud service customers is not recommended.
Review the Resource Configuration settings. Accept the default values or enter new CPU and memory values. By default, this application is limited to use no more than 4 CPU cores and 8 gibibytes available memory. The application might use considerably less system resources.
To customize the CPU and memory allocated to the container uses, enter new CPU values as a plain integer value followed by the suffix m (milli). Default is 4000m, which means the app is able to use 4 cores.
Accept the default value 8Gi allocated memory or enter a new limit in bytes. Enter a plain integer followed by the measurement suffix, for example 4G or 123Mi.
Click Install. The system opens the Installed applications screen with the Storj app in the Deploying state. When the installation completes it changes to Running.
Click Web Portal on the Application Info widget to open the Storj web interface.
The time required to install the Storj App varies depending on your hardware and network configuration.
The Storj node dashboard displays stats for the storage node. These could include bandwidth utilization, total disk space, and disk space used for the month. Payout information is also provided.


