Installing TrueNAS
23 minute read.
After you download the .iso file, you can start installing TrueNAS!
This article describes verifying the .iso file, then installing TrueNAS using that file, and selecting the type of installation as either on physical hardware or a virtual machine (VM).
TrueNAS Enterprise
TrueNAS Enterprise customers should receive their systems already installed and ready for UI configuration. If any issues require you to install or re-install TrueNAS, contact TrueNAS Enterprise Support for assistance.
Enterprise customers with High Availability (HA) systems should not attempt to re-install their systems on their own. The dual controller install process is complicated and the risk of causing serious network issues is high. Contact TrueNAS Enterprise Support for assistance!
The iXsystems Security Team cryptographically signs TrueNAS .iso files so that users can verify the integrity of their downloaded files. This section demonstrates how to verify an .iso file using the Pretty Good Privacy (PGP) and SHA256 methods.
You need an OpenPGP encryption application for this method of ISO verification.
SHA256 verification uses the checksum to validate/verify the file.
You can install TrueNAS on either physical hardware or a virtual machine.
Before starting the update process, confirm that the system storage has enough space to handle the update. The update stops if there is insufficient space to complete.
TrueNAS is flexible and can run on any x86_64 compatible (Intel or AMD) processor. TrueNAS requires at least 8GB of RAM (more is better) and a 20GB Boot Device.
Physical hardware requires burning the TrueNAS installer to a device, typically a CD or removable USB device. This device is temporarily attached to the system to install TrueNAS to the system permanent boot device.
TrueNAS allows using other methods to create boot media such as:
- Ventoy for Windows and Linux operating systems
- TINU for MacOS Operating systems
- DiskMaker X for MacOS
- Rufus for Windows and Linux operating systems, or by creating a Windows VM in your Mac
- Universal USB Installer (UUI) similar to Rufus
- Your Universal Multiboot Installer (YUMI) for multiple operating systems
- MultiBootUSB for Windows, Linux operating systems
The following sections provide more information on a few of these options.
Before you begin:
- Locate the hotkey defined by the manufacturer of your motherboard to use in this process.
- Disable SecureBoot if your system supports it or set it to Other OS, so you can boot to the install media.
With the installer added to a device (CD or USB), install TrueNAS onto the desired system using the TrueNAS installer.
Insert the install media and restart or boot the system. At the motherboard splash screen, use the hotkey defined by your motherboard manufacturer to boot into the motherboard UEFI/BIOS.
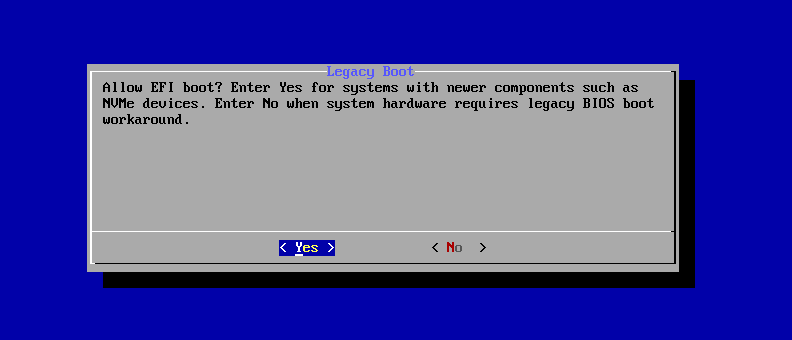
Choose to boot in UEFI mode or legacy CSM/BIOS mode. When installing TrueNAS, make the matching choice for the installation. For Intel chipsets manufactured in 2020 or later, UEFI is likely the only option.
If your system supports SecureBoot, and you have not disabled it or set it to Other OS, do it now, so you can boot the install media.
Select the install device as the boot drive, exit, and restart the system. If the USB stick is not shown as a boot option, try a different USB slot. Slots available for boot differ by hardware.
If you are doing a clean install from the TrueNAS .iso file as part of migrating from a different TrueNAS version, or to recover from a serious issue that requires you to re-install TrueNAS from the .iso, have your network configuration information ready to use after the installation completes. Also have your TrueNAS system configuration file and data backups handy, so you can recover your system settings and import your data into the recovered TrueNAS clean-install system.
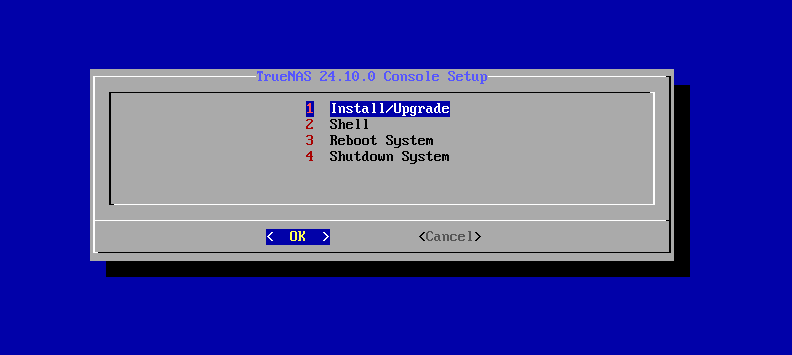
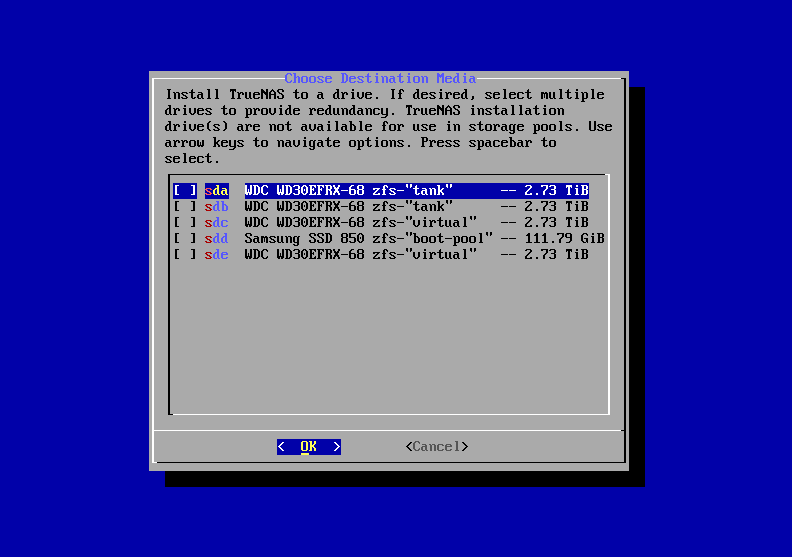
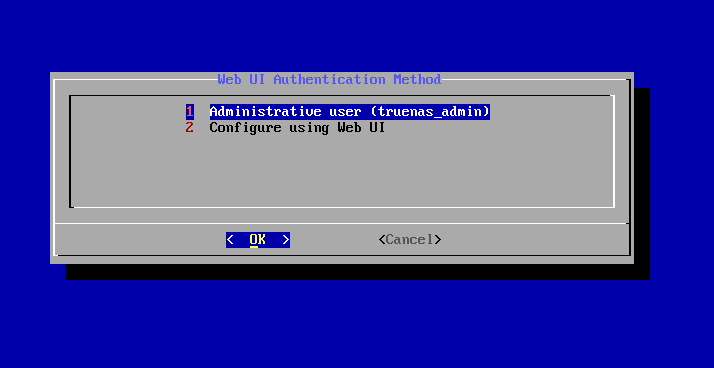
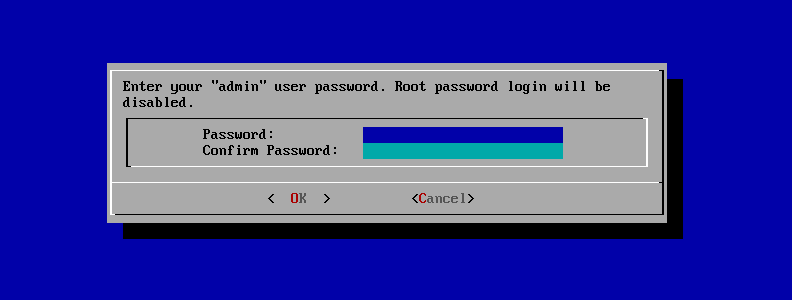
After the system boots into the installer, follow these steps.
Because TrueNAS is built and provided as an .iso file, it works on all virtual machine solutions (Proxmox, VMware, VirtualBox, Citrix Hypervisor, etc). This section describes installing on a VM using VMware Workstation Player on Windows.
Regardless of the virtualization application, use these minimum settings:
- RAM: at least 8192MB (8GB)
- DISKS: two virtual disks with at least 16GB, one for the operating system and boot environments, and at least one additional virtual disk for data storage.
- NETWORK: Use NAT, bridged, or host-only depending on your host network configuration.
When installing TrueNAS in a VMWare VM, double-check the virtual switch and VMWare port group. A misconfigured virtual switch or VMWare port group can cause network connection errors for TrueNAS systems with additional applications installed inside the TrueNAS VM. Enable MAC spoofing and promiscuous mode on the switch first, and then the port group the VM is using.
If not using static IP addresses, configure your VM to use DHCP to assign IP addresses for seamless network connectivity.
Jail Networking
If you have installed TrueNAS in VMware, you need functional networking to create a jail.
For the jail to have functional networking, you have to change the VMware settings to allow Promiscuous, MAC address changes, and Forged Transmits.
| Setting | Description |
|---|---|
| Promiscuous Mode | When enabled at the virtual switch level, objects defined within all portgroups can receive all incoming traffic on the vSwitch. |
| MAC Address Changes | When set to Accept, ESXi accepts requests to change the effective MAC address to a different address than the initial MAC address. |
| Forged Transmits | When set to Accept, ESXi does not compare source and effective MAC addresses. |
The procedure for creating a TrueNAS VM is the same for most hypervisors.
This example describes installing TrueNAS using VMWare Player 15.5.
After installing TrueNAS on a virtual machine (VM), add virtual disks to the VM. You need a minimum of two disks, 16 GB each. One disk is for the boot environment the other for data storage.
Just as with installing TrueNAS on physical hardware, complete the installation in the VM by booting into the TrueNAS installer.
Congratulations, TrueNAS is now installed!
The next step is to configure TrueNAS network and general settings. Experienced users can use the Console Setup Menu to configure network settings, but if you are unfamiliar with the Console setup menu and how network configuration works, we recommend using the TrueNAS UI to configure settings. TrueNAS uses DHCP to assign an IP address to the primary system interface and displays it at the top of the Console Setup menu screen. Use this IP address to log into the web UI.


