




TrueNAS Development Documentation
This content follows experimental development changes in TrueNAS 28, a future version of TrueNAS.
Use the Product and Version selectors above to view content specific to a stable software release.
Apps Screens
28 minute read.
The TrueNAS Applications Market is your new resource for the latest details about apps available within TrueNAS. Discover which apps are widely used or recently added, filter the entire catalog to find the perfect app, and learn specifics that can help you deploy an app.
The website updates daily, so you’ll always have the latest info about TrueNAS applications!
We welcome community contributions to keep this documentation current! Click Edit Page in the top right corner to propose changes to this article. See Updating Content for more information.
There are two main application screens: Installed and Discover. The Installed applications screen shows the status of installed apps, provides access to pod shell and logs screens and a web portal for the app (if available), and the ability to edit deployed app settings.
The Discover screen shows cards for the installed catalog of apps. The individual app cards open app information screens with details about that application, and access to an installation wizard for the app. It also includes options to install third-party applications in Docker containers that allow users to deploy apps not included in the catalog.
The Installed applications screen header shows an Apps Service Not Configured status until you choose the pool for apps storage.

Apps Service Running shows in the screen header after choosing the app pool.
The Installed applications screen shows Check Available Apps before you install the first application.
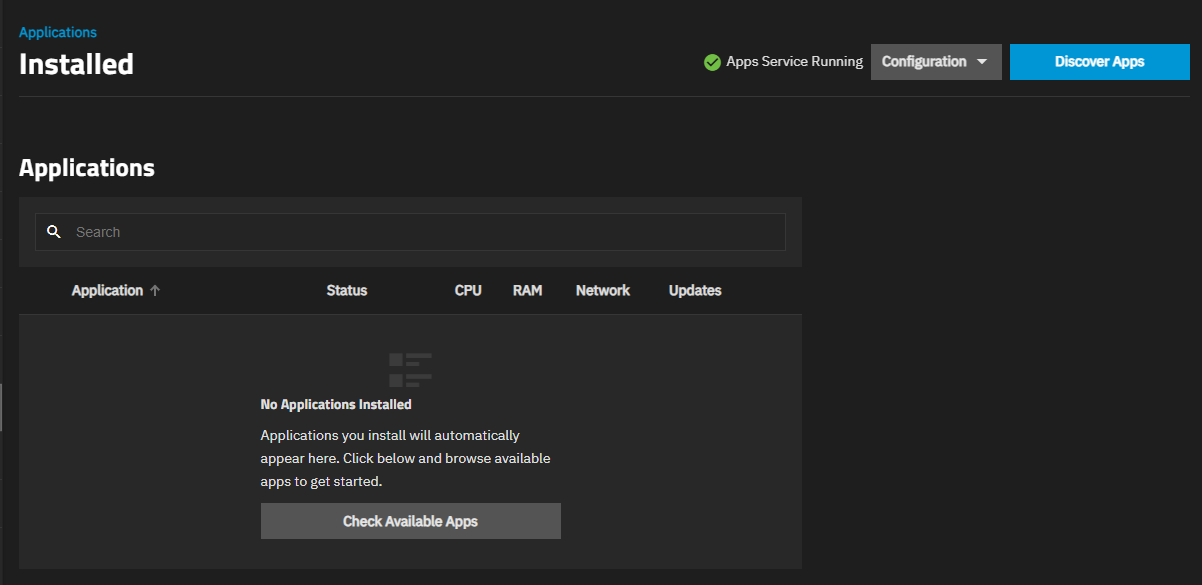
Check Available Apps and Discover Apps open the Discover screen.
Discover Apps opens the Discover screen with search filters and cards for each app in the trains selected on the Configuration > Settings screen.
Configuration on the Installed applications screen shows a menu of global setting options that apply to all applications.
- Choose Pool opens the Choose a pool for Apps dialog.
- Unset Pool shows after setting a pool for applications to use. It opens the Unset Pool dialog.
- Manage Container Images opens the Manage Container Images screen.
- Sign-in to a Docker registry opens the Docker Registries screen.
- Settings opens the Settings screen.

Choose Pool on the Configuration menu opens the Choose a pool for apps dialog. Pool shows a list of available pools on the system. Choose sets the selected pool for use by applications.
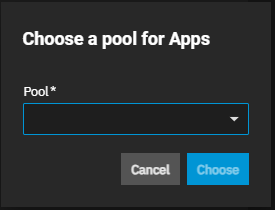
The first time you open the Installed applications screen you might see a dialog that prompts you to choose the pool for apps to use for storage. Selecting the pool from the dropdown list, then clicking Save starts the applications service. After closing this dialog, clicking Configureation > Choose Pool opens the Choose a pool for apps dialog.
You must choose a pooo for apps before you can install an app.
Migrate existing applications migrates all installed applications to the new pool. Migrates only data in the apps dataset, not host paths. Only shows on the Choose a pool for apps dialog after initial configuration and when you choose a new pool while you have apps installed.
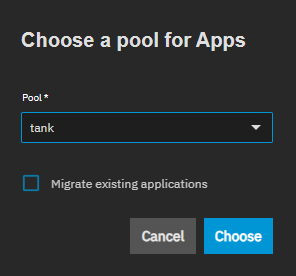
Migrate existing applications only affects data saved in the apps dataset, such as the installed app location and iXvolume storage. Data in mounted host paths is not migrated.
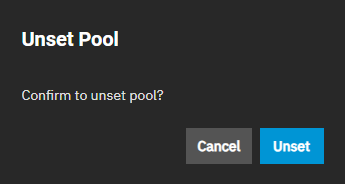
Unset Pool on the Configuration menu opens the Unset Pool dialog.
Unset removes the pool configuration and turns off the application service. When complete, a Success dialog displays.
The Manage Container Images screen lists all container images downloaded on TrueNAS.
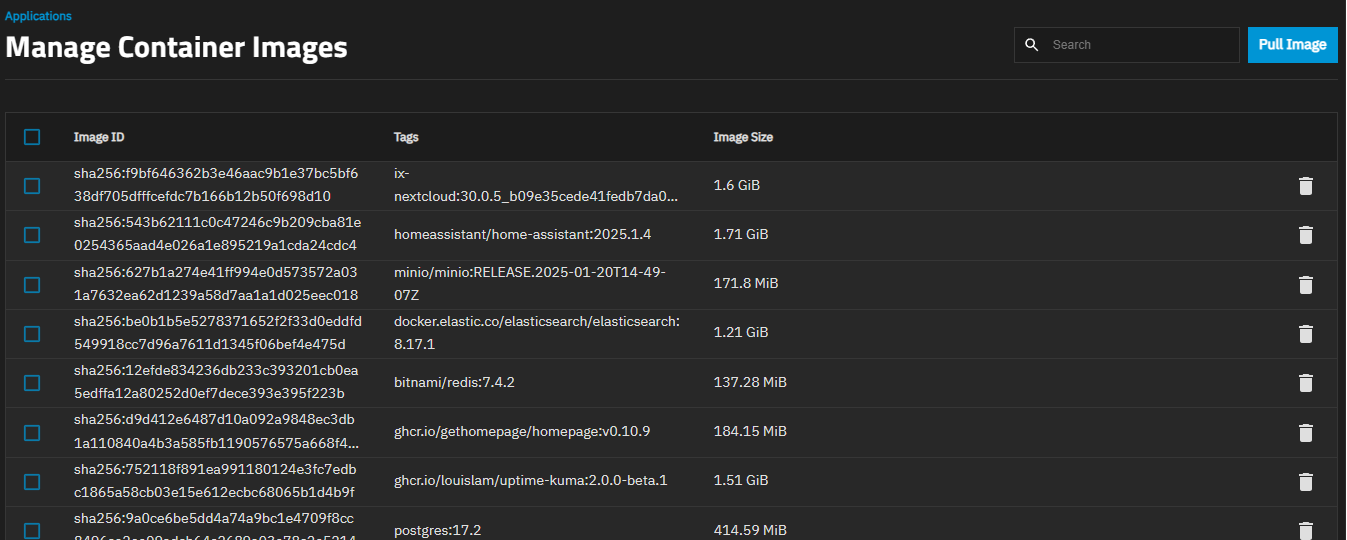
Entering characters in the Search field on the screen header filters the images list to only the Image ID or Tags entries matching the entered characters.
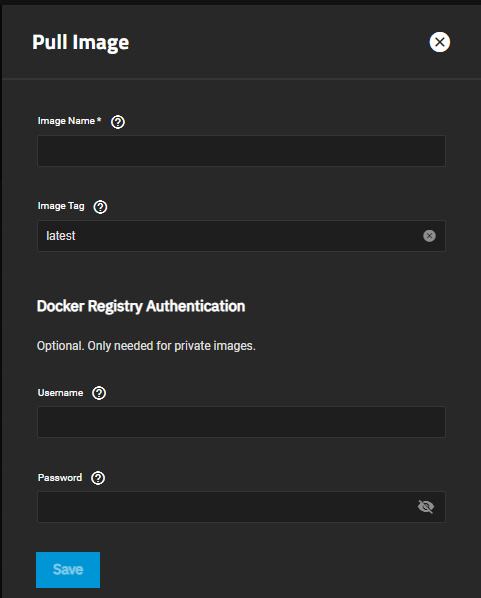
Pull Image opens the Pull Image screen with options to download specific images to TrueNAS.
The Pull Image screen specifies the options for an image you want to add to TrueNAS. The screen presents settings in two section: general and Docker Registry Authentication settings.
| Setting | Description |
|---|---|
| Image Name | Specifies the full path and name for the specific image to download. Use the format registry/repository/image. |
| Image Tag | Specifies the image tag string to download that specific version of the image. The default latest pulls whichever image version is most recent. |
These settings are optional for most images but required for private images.
| Setting | Description |
|---|---|
| Username | Specifies the user account name to access a private Docker image. |
| Password | Soecifies the user account password to access a private Docker image. |
There are two versions of the Delete image dialog: batch operation and individual image.
Delete Delete for each image row opens the individual image Delete dialog showing the selected image.
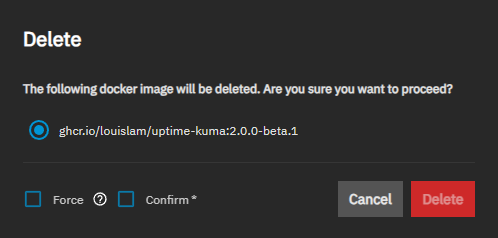
The checkboxs to the left of Image ID or any image row shows the Batch Operations and Delete button. Delete for the Batch Operations opens the Delete dialog listing all selected images.
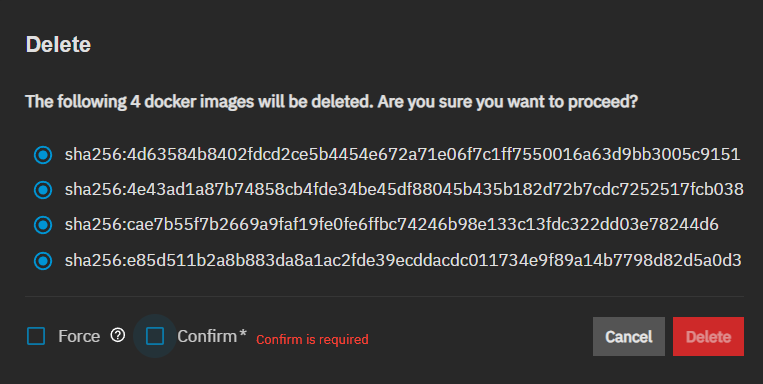
Confirm activates the Delete button.
Target images must not be associated with any running container.
Force allows deleting an image that is referenced by multiple tags or stopped containers. Use Force with caution as it can potentially break dependencies or leave images without defined tags.
The Docker Registries screen lists signed-in Docker registry records. No records have been added yet shows on the screen until you add a registry.

Add Registry opens the Create Docker Registry screen.
The Create Docker Registry screen settings specify the URI, username and password credentials for the registry you want to add.
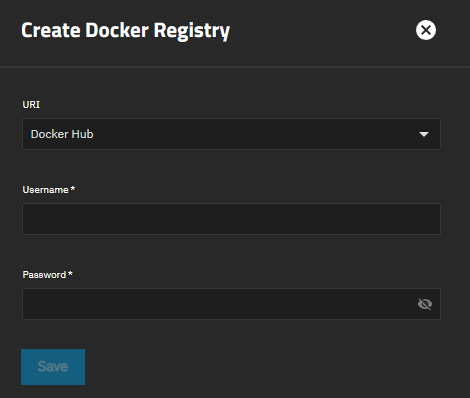
| Setting | Description |
|---|---|
| URI | Sets the Uniform Resource Identifier (URI) type for the registry. Default option is Docker Hub or use Other Registry to specify some other URI. The URI address field is hidden when a Docker Hub registry record is already configured or is selected. |
| URI | The valid Uniform Resource Identifier (URI) for the registry, for example https://index.docker.io/v1/. Displays when URI is set to Other Registry. |
| Name | Specifies the display name for the registry record. Shows when URI is set to Other Registry. |
| Username | Specifies the username to sign in to the registry. |
| Password | Specifies the password for the user to sign in to the registry. |
The Settings screen shows the application train options, the option to add IP addresses and subnets for the application to use, specfies whether to check for Docker image updates, and, if the system is equipped with a GPU, enables TrueNAS to update drivers for that GPU.
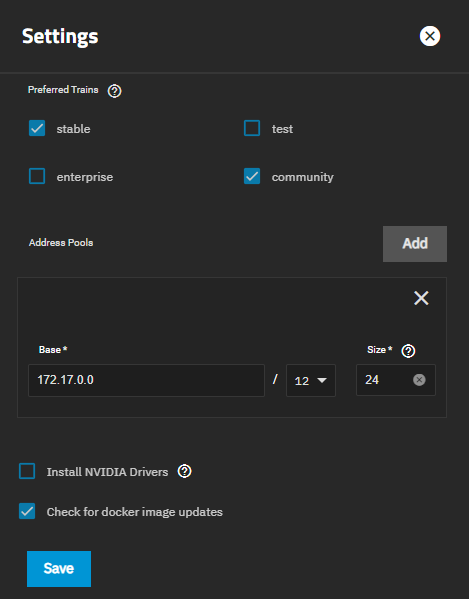
The checkbox to the left of the train name adds that train to the applications catalog. Train options:
- stable is the default train for official apps
- enterprise is for apps verified and simplified for Enterprise users, default for enterprise-licensed systems.
- community fis or community proposed and maintained apps
- test is for application in development but not yet released in one of the other three trains.
- dev is for application currently in development.
You must specify at least one train.
Add to the right of Address Pools shows Base and Size settings with the current IP address and subnet mask for the network used by applications. Base shows the default IP address and subnet (select from the dropdown list of options). Size shows the network size of each docker network that is cut off from the base subnet.
This setting replaces the Kubernetes settings option for Bind Network in 24.04 and earlier. Use to resolve issues where apps experience issues where the TrueNAS device is not reachable from some networks. Select the network option, or add additional options to resolve the network connection issues.
Add to the right of Registry Mirrors shows the settings for a registry mirror URL and specifies whether it is Insecure.
Mirror URL specifies the URL of the registry mirror to use when pulling container images. Must be a valid URL (for example, https://mirror.example.com). Useful for air-gapped environments, corporate proxies, or to avoid Docker Hub rate limits.
Insecure allows the registry mirror to use an unverified or self-signed TLS certificate. Enable only for trusted internal mirrors. Not recommended for production use.
Install NVIDIA Drivers shows if an NVIDIA GPU is detected by TrueNAS. It allows installing NVIDIA GPU drivers on the system. Disabled when TrueNAS Debug Kernel is enabled. When disabled, allows removing installed drivers. Requires the system to use the production kernel — if Enable Debug Kernel is selected in the Kernel Card, driver installation fails. Installing requires you to disable the debug kernel before installing NVIDIA drivers.
Check for docker image updates sets TrueNAS to automatically check for docker image updates (default setting).
The Applications table on the Installed screen shows a row for each installed app. It shows the current state of the app and the option to stop the app. Stopped apps show the option to start the app.
The Application tabie shows with the first row selected by default, and showing the cards for that app.
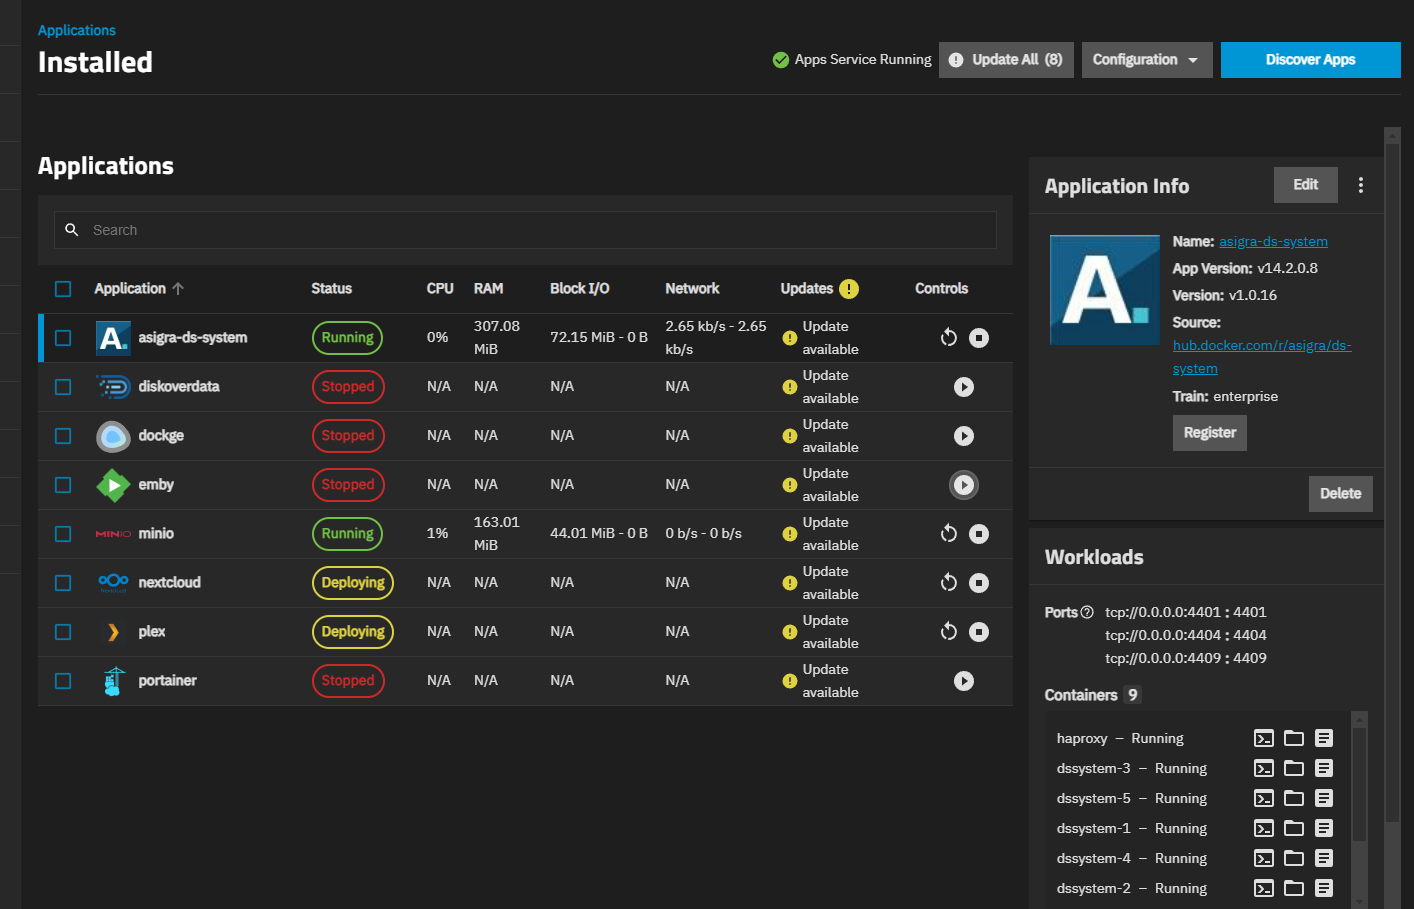
Clicking on Application, Status, or Update on the table header row sorts the table in ascending or descending order.
A yellow badge shows when an update is available. See Update Apps for more information on updating the application.
Search above the Applications table allows entering the name of an app to locate an installed application.
Selecting the checkbox to the left of Applications selects all installed apps and shows the Bulk Actions menu.
The Bulk Action menu applies actions to the selected applications installed and running on your system.
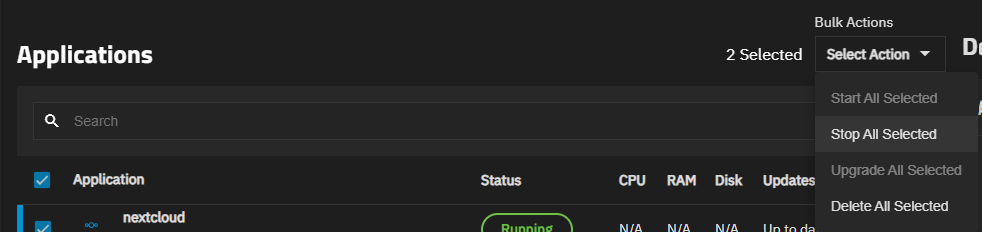
Selecting the checkbox to the left of Applications shows the Bulk Actions menu options:
- *Start All Selected - Disabled while the selected apps are running.
- Stop All Selected - Stops the selected apps, then activates the Start All Selected option.
- Update All Selected - Starts the updates process for the selected apps with pending updates.
- Delete All Selected - Opens the Delete Applications dialog listing the selected app.
Performing a bulk action update opens a dialog listing the apps with available updates.
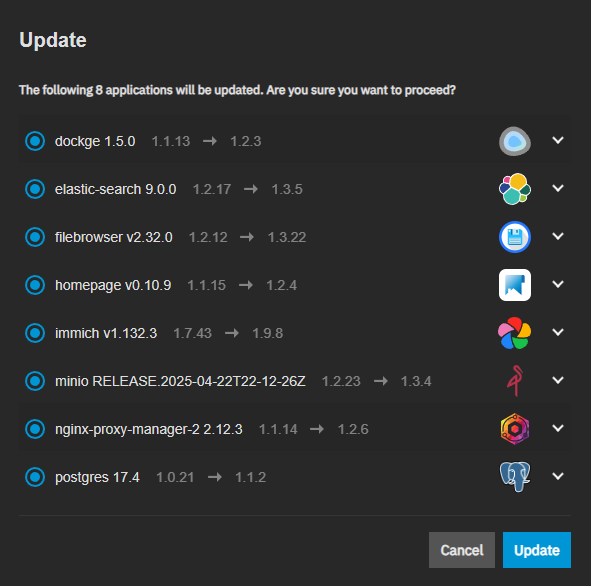
Each app appears in a collapsible panel that displays the app name and current upstream version. Click the expand icon to view version details. A Version row appears when the upstream version changes. A Revision row shows the catalog revision change. A Version to be updated to dropdown appears for apps with multiple available revisions. A View Upstream Release Notes link appears when the app provides a changelog URL.
Update begins updating the selected application. Each app status changes to Stopped during the update and returns to Running when the update completes.
Installed applications have a set of cards on the Installed screen. Content in the cards changes based on the individual applications.
The Application Info card shows the name, Version (upstream application version), Revision (TrueNAS catalog revision), source link(s) for the application, and TrueNAS train name.
Edit opens an Edit Application configuration screen populated with editable settings also found on the install wizard screen for the application.
Delete opens the Delete dialog. This deletes the application deployment but does not remove it from the catalog or train in TrueNAS.
Roll Back* shows for applications that have been upgraded and opens the Roll Back dialog that allows you to to revert an app to an earlier installed version.
Web UI opens a browser window showing the application web UI or account sign-in screen.
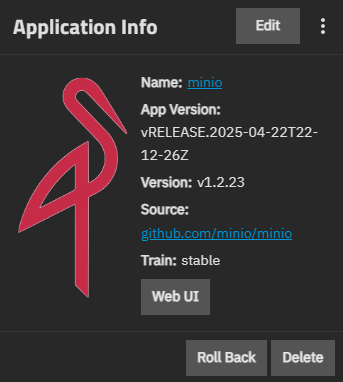
The more_vert shows the Update and Convert to custom app options.
Update opens a window for the application showing the current version and the new version the update installs.
Convert to custom app opens a Convert to custom app dialog to convert the installed application to a custom YAML app.
The Delete dialog requires you to type the application name to confirm deletion.

The blank field should specify the application name exactly as shown in the confirmation field. Delete remains disabled until the name is entered correctly. The following options are for the delete operation:
| Option | Description |
|---|---|
| Remove iXVolumes | Deletes hidden app storage from the apps pool. Only shown if the app has iXVolumes. |
| Force-Remove iXVolumes | Deletes app storage created on TrueNAS 24.04 and migrated to 24.10 or later. Only shown when Remove iXVolumes is selected. Removes both legacy Kubernetes and current Docker data for the application. Use with caution. |
| Remove Images | Prunes Docker images of the deleted app. Selected by default. |
Click Delete to remove the application.
Roll Back opens a dialog to revert an application to the snapshot of an earlier installed version. It only shows for ugraded applications that have selectiable previous versions to choose from.
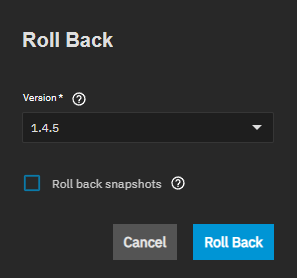
Version sets the version of the app to roll back to from the available app versions. The version numbers are the Revision of the app in the TrueNAS catalog, equivalent to the Revision shwwn on the Application Info card. This is the catalog revision, not the upstream Version. See Understanding Versions on the TrueNAS Apps Market for more information.
Roll back snapshots restores the application data volume to match the selected version by rolling back to the snapshot for that version. This reverts both the application and app data stored in the apps pool to the exact state from when the snapshot was created.
Roll back snapshots only affect data saved in the apps dataset, such as iXvolume storage. Data in mounted host paths is not rolled back.
Cancel closes the dialog without completing the rollback.
Roll Back begins the operation.
Update shows on the Application Info card after clicking Update All Selected on the Installed applications header. Both show only when TrueNAS detects an available update for an application. The application row on the Installed screen shows Update available when the upstream application version is changing, or Revision available when only the TrueNAS catalog revision is changing.
Update opens an update dialog showing the version change. When the upstream application version is changing, the dialog shows a Version row with the current and new upstream versions. The dialog always shows a Revision row with the current and new catalog revision numbers. When multiple catalog revisions are available, a Version to be updated to dropdown appears with options in the format Version: X / Revision: Y. A View Upstream Release Notes link appears when the app provides a changelog URL.

Update begins the process and opens a progress dialog that shows the update progress. When complete, the update badge and buttons disappear. The Update state on the application row on the Installed screen changes to Up to date.
Convert to custom app on the more_vert dropdown opens a dialog to convert an installed catalog application to a custom YAML application. Converting to a custom app allows direct editing of the YAML configuration file for the app using the Custom App Screens.
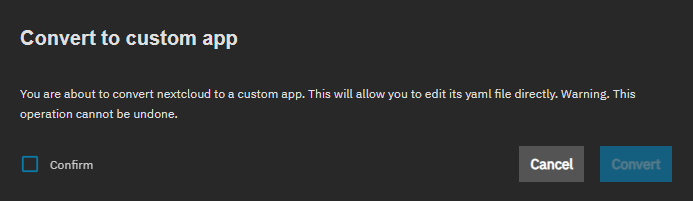
Converting to custom app is a one-time and permanent operation. When converted, a custom application cannot be converted back to a catalog version.
Cancel closes the dialog without converting the application.
Confirm enables the Convert button.
Convert begins the conversion process.
The Workloads card shows the container information for the selected application. Information includes the number of pods, used ports, number of deployments, stateful sets, and container information. It also shows icons for a Shell, Volume Mounts, and View Log that open the container pod shell or log screens, and a mount point dialog. The option to access the log and the shell remains available for stopped applications with fully deployed application containers, and for applications in the crashed state.
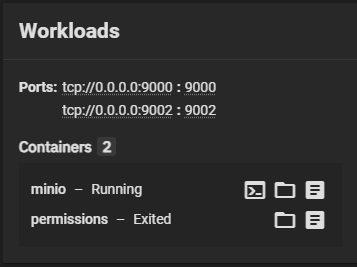
The Shell Shell opens the Container Shell screen.
Accessing a web shell requires the Web Shell Access privilege. Shells for apps, containers, and VMs also require the write role for that resource type. The Full Admin role includes all these write roles.
| Shell | Required Privilege and Role |
|---|---|
| System > Shell (host system) | Web Shell Access privilege only |
| VM Serial Shell | Web Shell Access privilege plus the VM write role (VM_WRITE) |
| Container Shell | Web Shell Access privilege plus the container write role (CONTAINER_WRITE) |
| Container Shell (Apps) | Web Shell Access privilege plus the apps write role (APPS_WRITE) |
When authorized, shell commands run as the root user.

Volume Mounts opens the Volume Mounts dialog.
View Logs Logs opens the Pod Logs screen for the app.
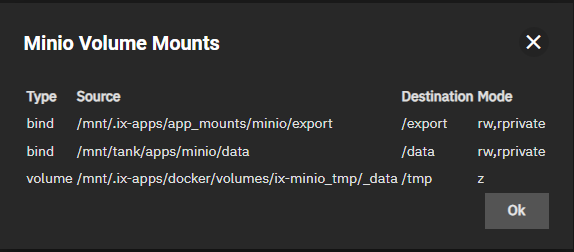
Volume Mounts opens a dialog showing information on the app volume mounts for current and exited volume mounts for the application container. The app has Volume Mount options to open windows for both the running mount point and permissions - exited mount point.
Each Pod Log screen includes a banner with the Application Name, Pod Name, and Container Name.

Use the logs to help troubleshoot problems with your container pods.
The Notes card shows information about the apps, the TrueNAS Documentation Hub article locations, links to file bug reports through Jira or GitHub, and where to make feature requests.
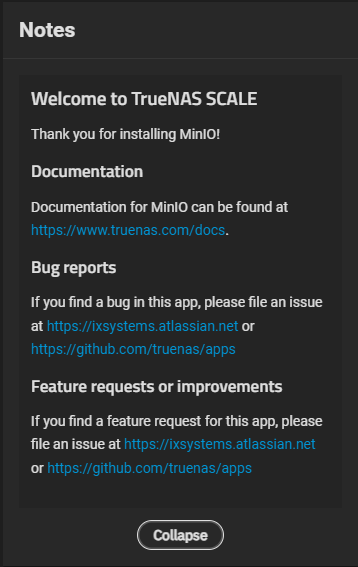
View More expands the card to show more information on application settings. Collapse hides the extra information.
The Application Metadata card shows application capabilities unique to the application, and Run As Content shows the user and group IDs, the default user and group name, and a brief description for the application.
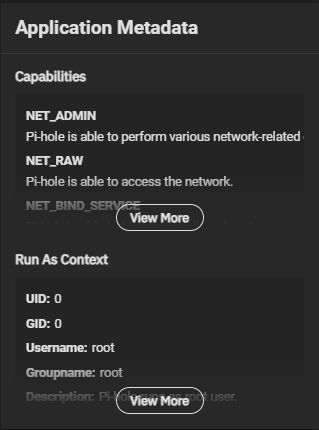
View More expands the card to show more information on application settings. Collapse hides the extra information.
The Discover screen displays application cards for the official TrueNAS stable train by default. Users can add the community and enterprise, or test train applications on the Settings screen.
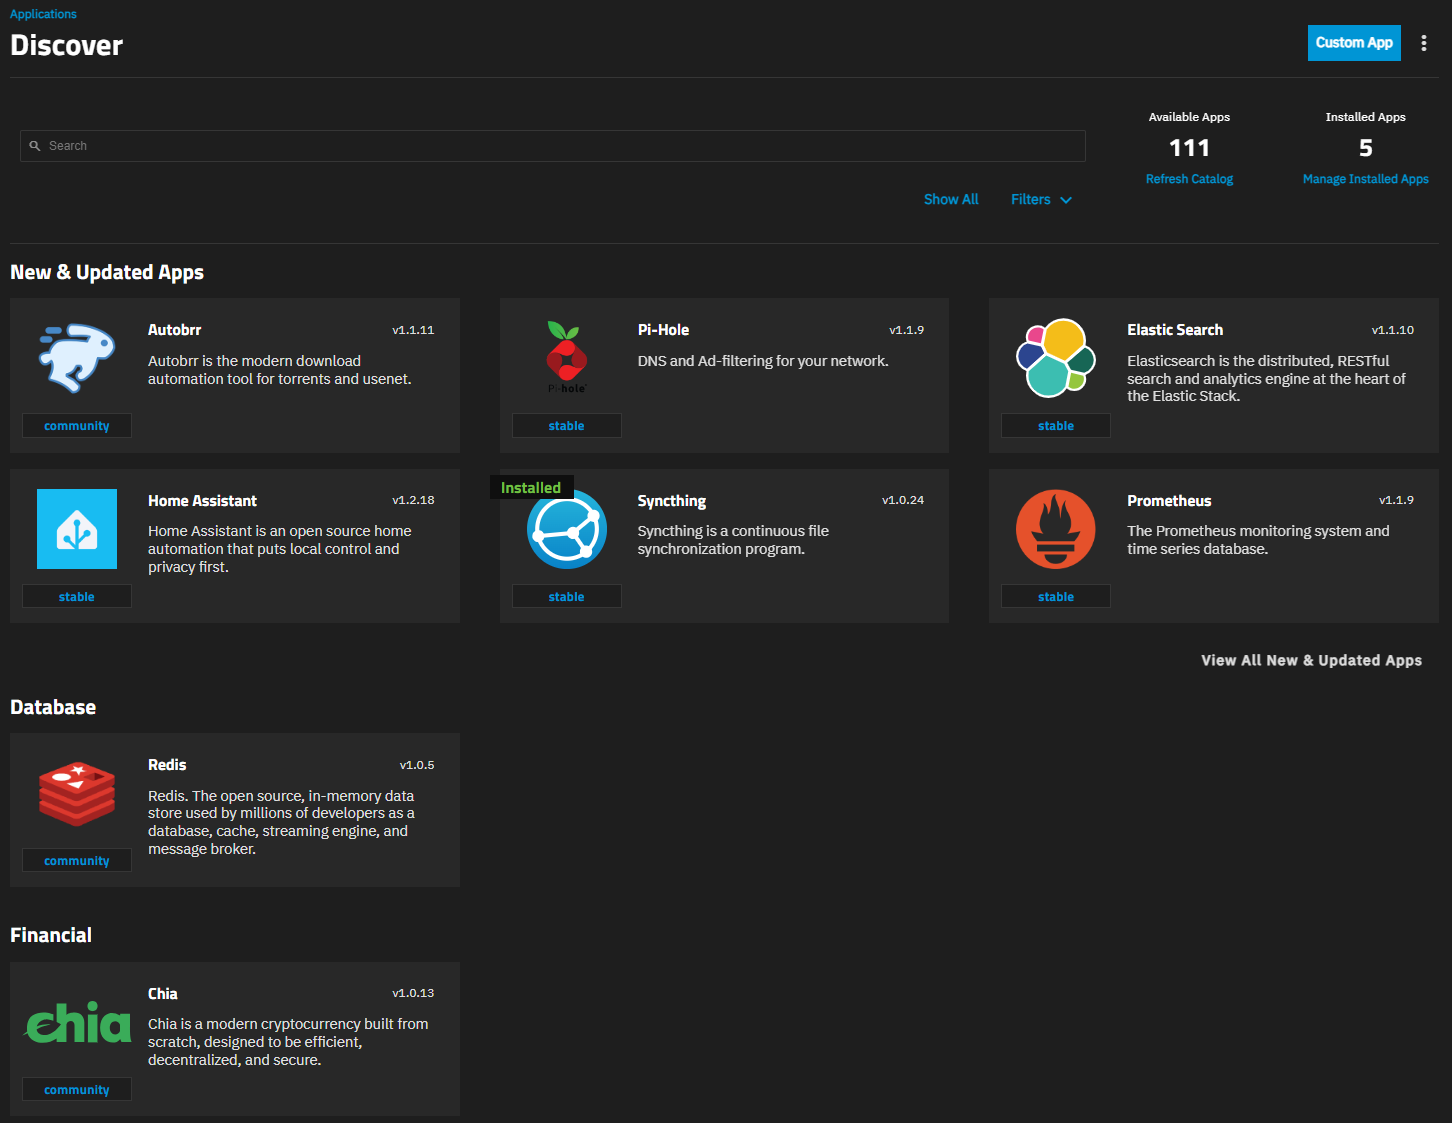
The breadcrumbs at the top of the screen header show links to the previous or the main applications screen. Clicking a link opens that screen.
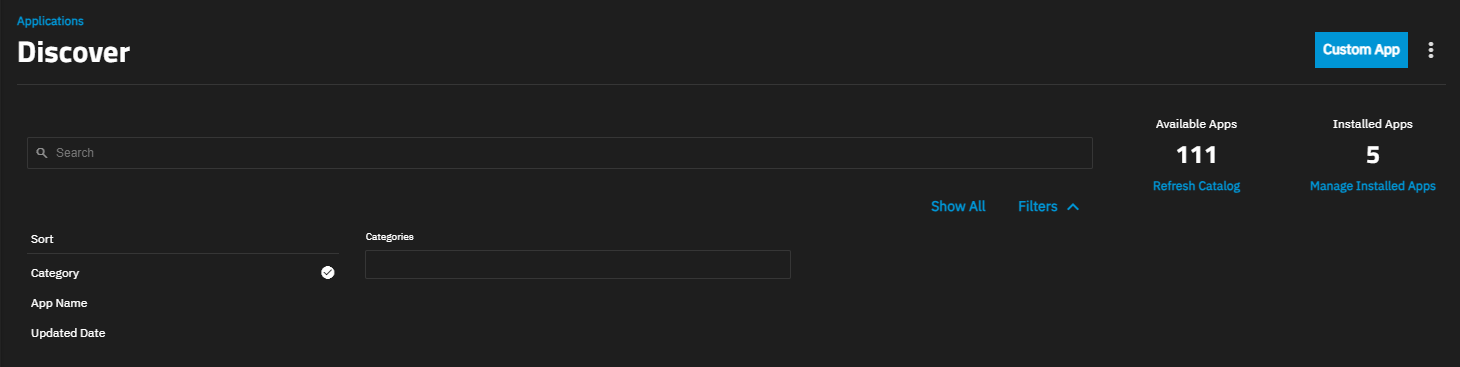
Custom App opens the Install iX App screen with an install wizard.
The more_vert shows the Install via YAML option, which opens the Add Custom App screen with an advanced YAML editor for deploying apps using Docker Compose.
The Discover screen includes a search field, links to other application management screens, and filters to sort the application cards displayed. Show All shows all application cards in the trains added to the Stable catalog. The links are:
- Refresh Charts executes a job to refresh the catalog applications.
- Manage Installed Apps opens the Installed applications screen.
Filters shows a list of sort categories that alter the application cards shown. Clicking on a category filters the app cards. Filter options:
- Category sorts the app cards by category or functional area. For example, Media, Monitoring, Networking, Productivity. etc.
- App Name sorts app cards alphabetically (A to Z).
- Updated Date sorts the app cards by date of update.
TrueNAS 24.10 or later provides two options for installing a third-party application not included in the official catalogs using a Docker image. Custom App opens the Install iX App guided installation wizard. more_vert > Install via YAML opens the Add Custom App screen with an advanced YAML editor for deploying apps using Docker Compose.
See Install Custom App Screens for more information.
Each application card on the Discover screen opens an information screen with details about that application, a few screenshots of the web UI for the application, and the Install button.
Application information shown includes the current app version, GitHub repository link for the image, last-updated date for the image, keywords, the TrueNAS app train, and the app homepage location.
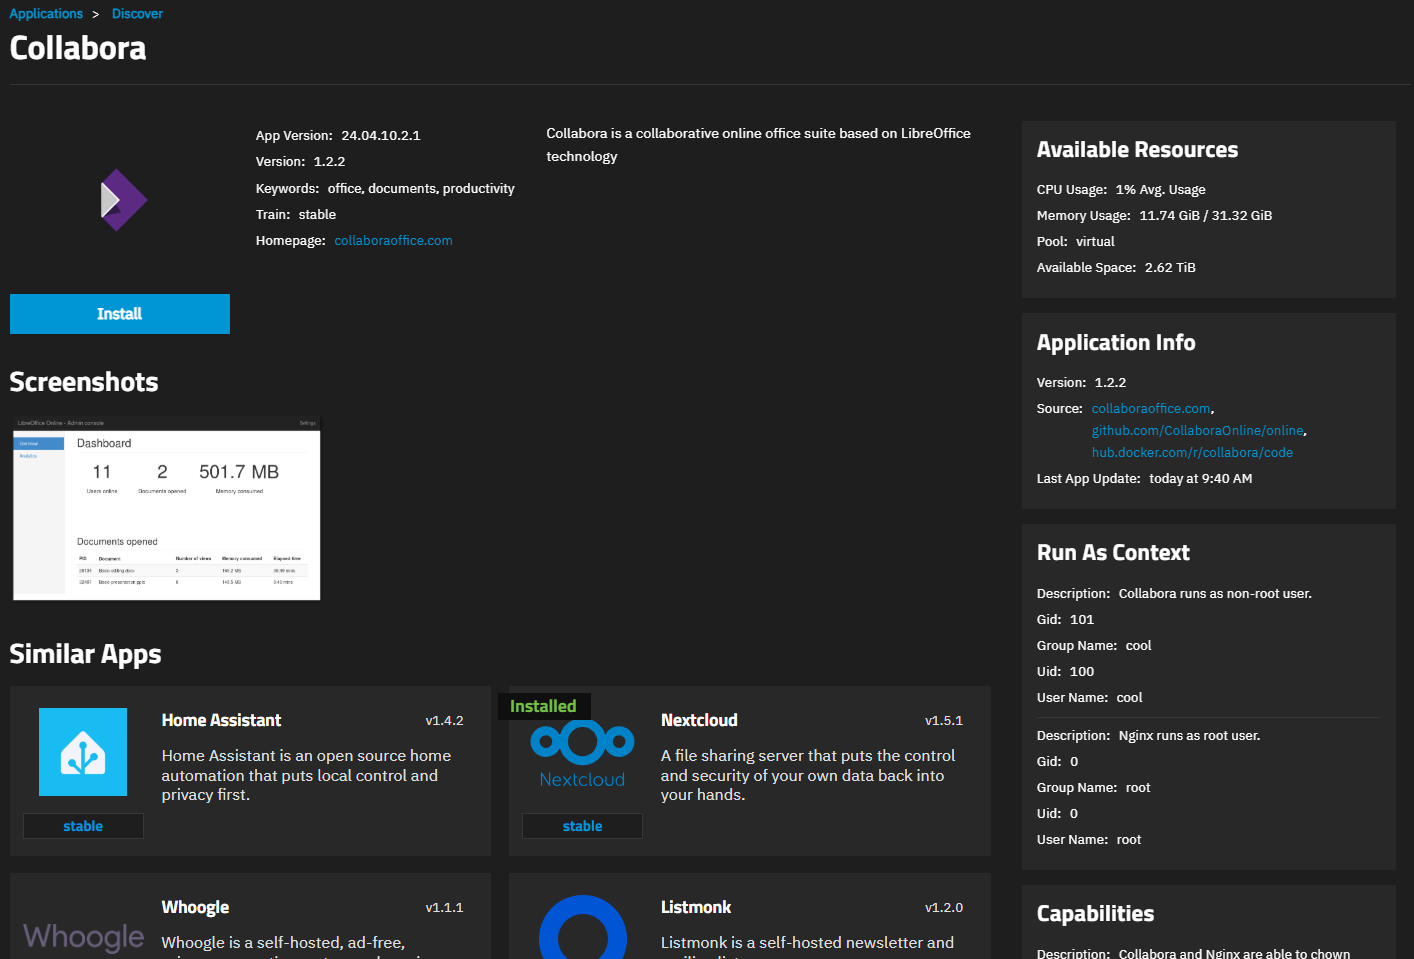
Information on the application cards vary by application but each app includes these cards:
- Available Resources - Show CPU and memory usage the app requires, the app pool, and available space in gigabits.
- Application Info = Shows the application version number, link to GitHub repository for the image, and date the image was last updated.
- Runs as Content - Shows user and group ID, and descriptions for each container the app deploys.
- Capabililties - Shows capabilities of the app when this information is available.
The screen includes small screenshots of the application website that, when clicked, open larger versions of the image.
Install on the details screen for each app opens the install wizard for the app.
The bottom of the screen includes app cards for similar applications found in the catalog.
The application Install Application wizard and Edit Application screens show the same settings, but un-editable settings are either not shown or are inactive to prevent edit attempts. The installation wizard configuration sections vary by application, with some including more configuration areas than others.
Settings in the app installation wizard are grouped into sections. Not all sections are required to deploy every app, so some might not be included in the install-app wizard. Settings in each section can differ by app based on what that app requires to fully deploy. The sections and settings below are common to apps in the Stable and Enterprise trains, but it is not an exhaustive list of app settings. Apps in Community trains might also include these sections and these settings.
The install and edit wizard screens include a Table of Contents navigation panel on the right of the screen that lists and links to the setting sections. A red triangle with an exclamation point marks the sections with the required settings. An asterisk marks the required fields in a section. You can enter a new setting in fields that include a preprogrammed default.
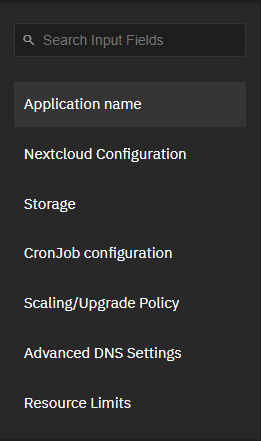
The app name in the breadcrumb at the top of the app install wizard returns to the details screen for the app, closing the app installation wizard without saving changes made.
Discover in the breadcrumb at the top of the app install wizard returns to the Discover screen, closing the app installation wizard without saving any changes made.
After installing an app, Edit on the Application Info card for that app opens the Installed applications screen where you can the modify most settings. The Edit Application screen opens populated with the current settings for the application.
For more detailed information on application install wizard settings, see individual app resources in the Catalog.
Application Name shows the default name for the application. If deploying more than one instance of the application, you must change the default name.
Version shows the current version of the app. Do not change the version number for official apps or those included in a TrueNAS catalog. When a new version becomes available, the Installed application screen shows an update alert, and the Application Info card shows an Update button. Updating the app changes the version to the currently available release.
Settings in the application configuration section change based on what the app requires to deploy. It shows required and optional settings for the app. Typical settings include user credentials, environment variables, additional argument settings, the name of the node, or even sizing parameters.
Settings shows the user and group ID for the default user assigned to the app. If not using a default user and group provided, add a new user to manage the application before using the installation wizard, then enter the UID in both the user and group fields. This section is not always included in app installation wizards.
Settings cover network settings the app needs to communicate with TrueNAS and the Internet. They include the default port assignment, hostname, IP addresses, and other network settings.
If changing the port number to something other than the default setting, refer to Default Ports for a list of used and available port numbers.
Some network configuration settings include the option to add a certificate. Create the certificate authority and certificate before using the installation wizard if using a certificate is required for the application.
Networks Settings
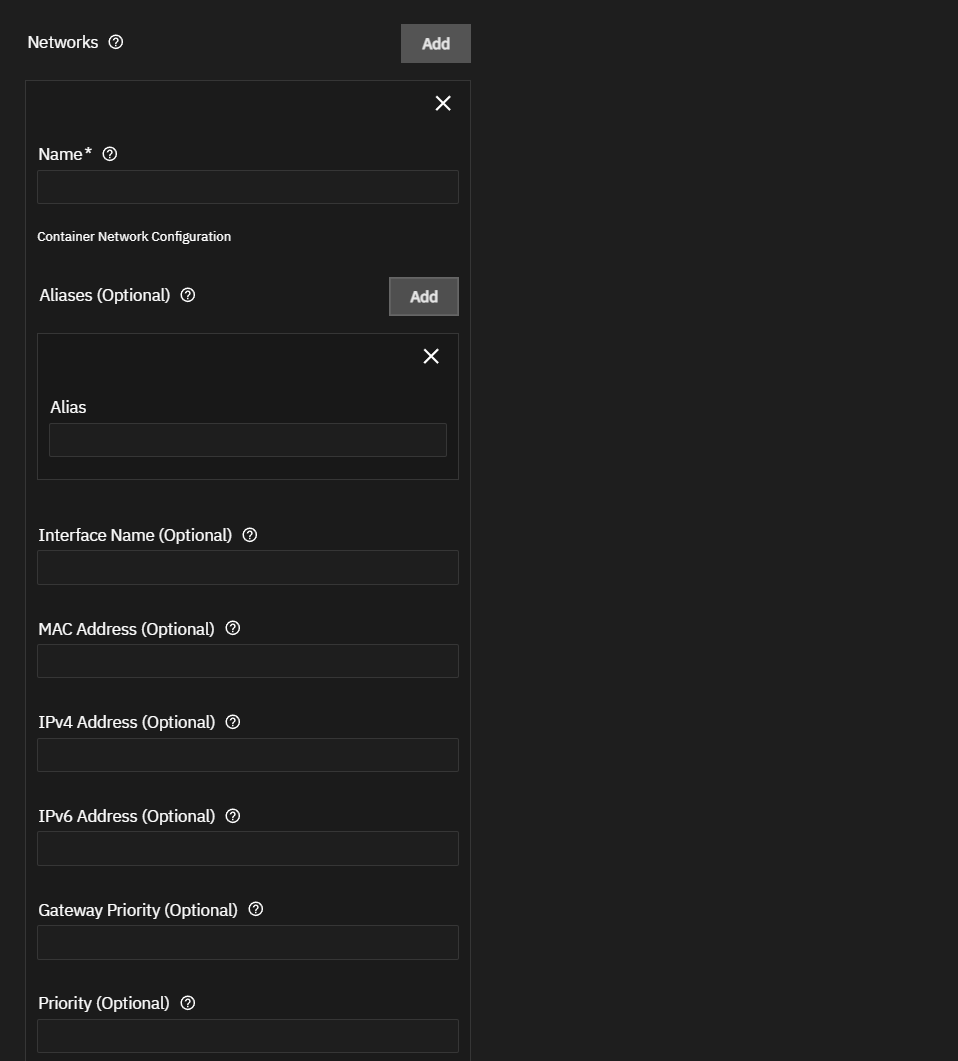
| Setting | Description |
|---|---|
| Name | Specifies the name of an existing Docker network for the container to join. The network must already exist. |
| Containers | Specifies the settings for the container assoicated with the selected app. Add shows the container settings. |
| Container Name | Sets the container to configure. Shows a list of containers assoicated with the selected app. |
| Aliases (Optional) | Specifies one or more optional network aliases for the container on this network. Clicking Add shows the Alias field. |
| Alias | Specified the optional network alias to add. for the container. Must be on the same network. |
| Interface Name (Optional) | Specifies the optional network interface name to use for this network. |
| MAC Address (Otional) | Specifies the otpional MAC address for the network interface. |
| IPv4 Address (Optional) | Specifies the optional IPv4 address for the network interface. |
| IPv6 Address (Optional) | Specifies the optional IPv6 address for the network interface. |
| Gateway Priority (Optional) | Sets the optional priority of the gateway for this network interface. |
| Prioirty (Optional) | Specifies the order which Compose connects the container services to its networks. |
Setting options configure storage volumes (datasets, ix-application volumes, shares, temporary options) for the application. Storage configuration can include the primary data mount volume, a configuration volume, postgres volumes, and an option to add additional storage volumes.
If the application requires host path storage volumes for particular storage, the app installation wizard shows a storage configuration section nameed for that storage requirement. Refer to tutorials for specifics.
Storage options can include:
ixVolume - Creates a storage volume inside the hidden ix-apps dataset by default unless a different mount path is specified. It shows as the default storage type. Used to rapidly deploy the app for testing purposes, but is not intended as storage for a full app deployment. ixVolumes are not recommended for permanent storage volumes. We recommend adding datasets and configuring the container storage volumes with the host path option.
Host path - Sets a specific dataset created for the app for use as the required storage. Shows additional settings related to the storage volume such as ACL permissions. Host paths add existing dataset(s) as the storage volumes. You can configure the datasets before beginning the app installation using the wizard or click Create Dataset in the app install wizard.
SMB share - Sets up an SMB share as a Docker volume for the application to use.
NFS share - Sets up an NFS share as a Docker volume for the application to use.
Tmpfs (Temporary directory created on the RAM) - Creates temporary storage in RAM that does not persist. Suitable for logs.
If the application requires specific datasets or you want to allow SMB or NFS share access, configure the dataset(s) and share before using the installation wizard.
See Understanding App Storage Volumes for more information.
Add shows additonal storage options to create additional storage volumes after configuring required storage volumes.
Label Configuration settings allow creating custom key-falue pairs attached to a container as metadata. These are informational tags used to organize, identify, and filter containers. Common uses include marking which app or environment a container belongs to, noting a version or owner, or letting external tools (monitoring, orchestration, backup scripts) select the containers by label instead of by name or ID.
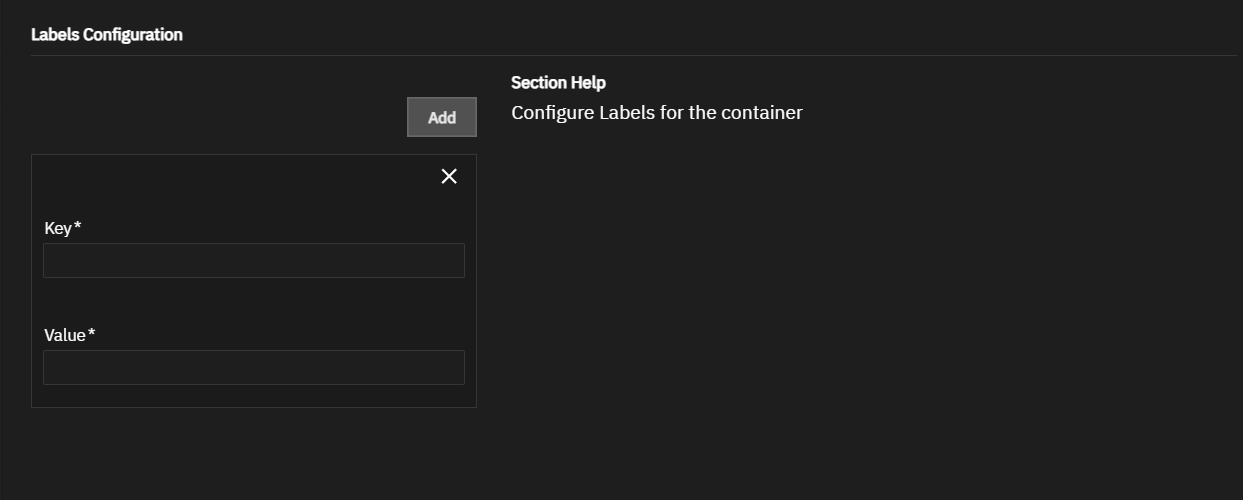
Add shows the label settings.
Key sets the label key for the container.
Value sets the label value paired with the label key.
Setting options configure how much CPU and memory is allocated for the container pod. In most cases, you can accept the default settings or you can change these settings to limit the system resources available to the application.
Some apps include GPU settings if the app allows or requires GPU passthrough.

MinIO is a trademark of the MinIO Corporation.