TrueNAS CORE Nightly Development Documentation
This content follows experimental early release software. Use the Product and Version selectors above to view content specific to a stable software release.
Install
12 minute read.
Last Modified 2024-04-30 15:51 EDTNow that the
Major Upgrades
The install process can be repeated with newer installation files when the system already has TrueNAS installed. This is used for major version upgradesISO Verification
The iXsystems Security Team cryptographically signs TrueNAS ISO files so that users can verify the integrity of their downloaded file. This section demonstrates how to verify an ISO file using the Pretty Good Privacy (PGP) and SHA256 methods.
You need an OpenPGP encryption application for this method of ISO verification.
There are many different free applications available, but the OpenPGP group provides a list of available software for different operating systems at https://www.openpgp.org/software/.
The examples in this section show verifying the TrueNAS
To verify the security-officer@ixsystems.com) or keys.openpgp.org.
Open the PGP Public key link and note the address in your browser and Search results for string.
Use one of the OpenPGP encryption tools mentioned above to import the public key and verify the PGP signature.
Go to the
q5sys@athena /tmp>  gpg --keyserver keys.openpgp.org --recv-keys 0xc8d62def767c1db0dff4e6ec358eaa9112cf7946
gpg: requesting key 12CF7946 from hkp server keys.openpgp.org
gpg: key 358EAA9112CF7946: "IX SecTeam <security-officer@ixsystems.com>" not changed
gpg: Total number processed: 1
gpg:              unchanged: 1
q5sys@athena /tmp>
Use command gpg --verify to compare the
q5sys@athena /tmp>  gpg --verify TrueNAS-12.0-BETA2.1.iso.gpg TrueNAS-12.0-BETA2.iso
gpg: Signature made Thu Aug 27 10:06:02 2020 EDT using RSA key ID 12CF7946
gpg: Good signature from "IX SecTeam <security-officer@ixsystems.com>"
gpg: WARNING: This key is not certified with a trusted signature!
gpg:          There is no indication that the signature belongs to the owner.
Primary key fingerprint: C8D6 2DEF 767C 1DB0 DFF4  E6EC 358E AA91 12CF 7946
q5sys@athena /tmp>
This response means the signature is correct but still untrusted. Go back to the browser page that has the PGP Public key open and manually confirm that the key was issued for IX SecTeam <security-officer@ixsystems.com> (iX Security Team) on October 15, 2019 and is signed by an iXsystems account.
The command to verify the checksum varies by operating system:
- BSD:
sha256 isofile - Linux:
sha256sum isofile - Mac:
shasum -a 256 isofile
Freeware or online checksum utilities are available for Windows users.
The value produced by running the command must match the value shown in the
Choose the install type to see specific instructions:
Physical Hardware
TrueNAS is very flexible and can run on most x86 computers. However, there are many different hardware considerations when building a NAS! If you’re still researching what kind of hardware to use with TrueNAS, read over the very detailed CORE Hardware Guide.
Physical hardware typically requires burning the TrueNAS installer to a physical device. In general a CD or removable USB device is used. This device is temporarily attached to the system to install TrueNAS to the system’s permanent boot device.
Headless, or remote, installation is possible when the system has IPMI available and can create a virtual media CD-ROM using a locally stored
The method of writing the installer to a device varies between operating systems. Click Windows or Linux to see instructions for your Operating System, or CD for generic CD burning guidance.
To use the installer with a CD, download your favorite CD burning utility and burn the
To write the TrueNAS installer to a USB stick on Windows, plug the USB stick into the system and use a program like Rufus to write the
The USB stick is not recognized by Windows after the TrueNAS installer writes to it. To reclaim the USB stick after installing TrueNAS, use Rufus to write a “Non bootable” image, then remove and reinsert the USB stick.
To write the TrueNAS installer to a USB stick on Linux, plug the USB stick into the system and open a terminal.
Start by making sure the USB stick connection path is correct.
There are many ways to do this in Linux, but a quick option is to enter command lsblk -po +vendor,model and note the path to the USB stick.
This shows in the NAME column of the lsblk output.
Next, use dd to write the installer to the USB stick.
Be very careful when usingdd, as choosing the wrongof=device path can result in irretrievable data loss!
Enter dd status=progress if=path/to/.iso of=path/to/USB in the CLI.
If this results in a permission denied error, use command sudo dd with the same parameters and enter the administrator password.
Systems with IPMI connectivity, like the TrueNAS Mini, can use the Virtual Media feature with an
Here is an example of setting up a virtual CD-ROM with a SUPERMICRO IPMI:
- From the Virtual Media menu, select CD-ROM Image.
- Fill in the details:
- Shared Host: The IP address of the system storing the
.iso . - Path to Image: The path to the image file. For example, install/iso/SCALEAngelfish.iso
- Shared Host: The IP address of the system storing the
- Click Mount.
- Click Refresh Status and confirm a disk is being emulated.
- Click Save.
With the installer added to a device, you can now install TrueNAS onto the desired system. Insert the install media, or load the iso using IPMI, and reboot or boot the system. At the motherboard splash screen, use the hotkey defined by your motherboard manufacturer to boot into the motherboard UEFI/BIOS.
Choose to boot in UEFI mode or legacy CSM/BIOS mode. When installing TrueNAS, make the matching choice for the installation. For Intel chipsets manufactured in 2020 or later, UEFI is likely the only option.
If your system supports SecureBoot, you need to either disable it or set it to Other OS to be able to boot the install media.
Select the install device as the boot drive, exit, and reboot the system. If the USB stick is not shown as a boot option, try a different USB slot. Which slots are available for boot differs by hardware.
After the system has booted into the installer, follow these steps.
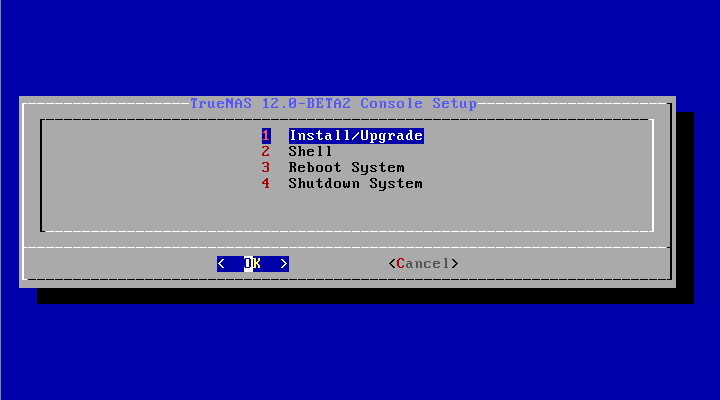
Select Install/Upgrade.
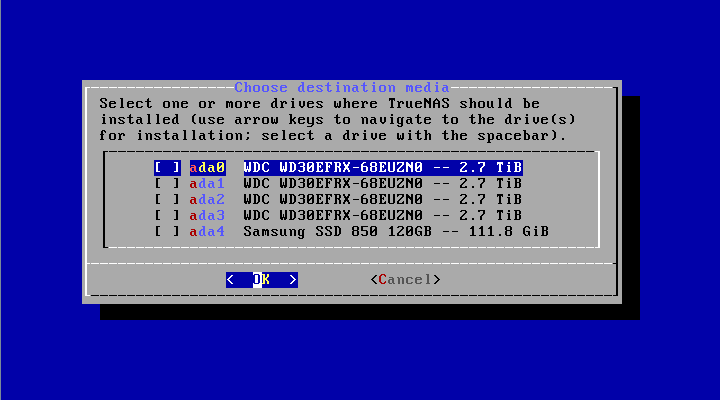
Select the desired install drive.
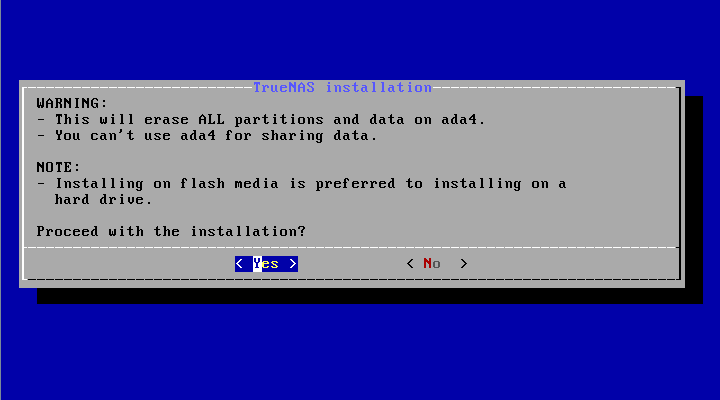
Select Yes
Select Fresh Install to do a clean install of the downloaded version of TrueNAS. This erases the contents of the selected drive.!

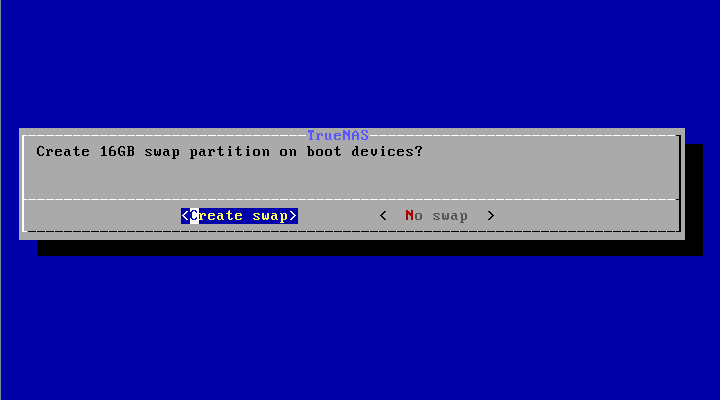
When the operating system device has enough additional space, you can choose to allocate some space for a swap partition to improve performance.
Next, set a password for the TrueNAS administrative account, named root by default.
This account has full control over TrueNAS and is used to log in to the web interface.
Set a strong password and protect it.

After following the steps to install, reboot the system and remove the install media.
Troubleshooting
If the system does not boot into TrueNAS, there are several things you can check to resolve the situation:
- Check the system BIOS and see if there is an option to change the USB emulation from CD/DVD/floppy to hard drive. If it still does not boot, check to see if the card/drive is UDMA compliant.
- If the system BIOS does not support EFI with BIOS emulation, see if it has an option to boot using legacy BIOS mode.
- If the system starts to boot but hangs with this repeated error message: run_interrupt_driven_hooks: still waiting after 60 seconds for xpt_config, go into the system BIOS and look for an onboard device configuration for a
1394 Controller. If present, disable that device and try booting again. - If the burned image fails to boot and the image was burned using a Windows system, wipe the USB stick before trying a second burn using a utility such as Active@ KillDisk. Otherwise, the second burn attempt fails as Windows does not understand the partition written from the image file. Be very careful to specify the correct USB stick when using a wipe utility!
Virtual Machine
Because TrueNAS is built and provided as an
Regardless of virtualization application, use these minimum settings:
- RAM: at least 8192MB (8GB)
- DISKS: one virtual disk with at least 8GB for the operating system and boot environments and at least one additional virtual disk with at least 4GB to be used as data storage.
- NETWORK: Use NAT, Bridged, or Host-only depending on your host network configuration.
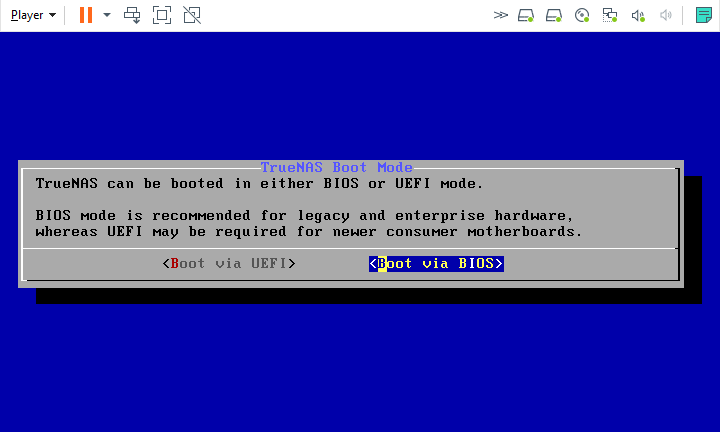
VMWare products and EFI boot mode: A third party bug currently affects EFI (UEFI) booting on VMWare products. Install TrueNAS in BIOS mode until this is resolved. See VMware article Host Fails to Boot After You Install ESXi in UEFI Mode.
When installing TrueNAS in a VMware VM, double check the virtual switch and VMware port group. A misconfigured virtual switch or VMware port group can cause network connection errors for plugins or jails inside the TrueNAS VM. Enable MAC spoofing and promiscuous mode on the switch first, and then the port group the VM uses.
Jail Networking
If you have installed TrueNAS in VMware, you need functional networking to create a jail.
For the jail to have functional networking, you have to change the VMware settings to allow Promiscuous, MAC address changes, and Forged Transmits.
| Setting | Description |
|---|---|
| Promiscuous Mode | When enabled at the virtual switch level, objects defined within all portgroups can receive all incoming traffic on the vSwitch. |
| MAC Address Changes | When set to Accept, ESXi accepts requests to change the effective MAC address to a different address than the initial MAC address. |
| Forged Transmits | When set to Accept, ESXi does not compare source and effective MAC addresses. |
For most hypervisors, the procedure for creating a TrueNAS VM is the same:
- Create a new Virtual Machine as usual, taking note of the following settings.
- The virtual hardware has a bootable CD/DVD device pointed to the TrueNAS installer image (this is usually an
.iso ). - The virtual network card is configured so your network can reach it. bridged mode is optimal as this treats the network card as if it is plugged into a simple switch on the existing network.
- Some products require identifying the OS installed on the VM. The ideal option is FreeBSD 12 64 bit. If this is not available, try options like FreeBSD 12, FreeBSD 64 bit, 64 bit OS, or Other. Do not choose a Windows or Linux related OS type.
- For VMWare hypervisors, install in BIOS mode.
- The VM has sufficient memory and disk space. TrueNAS needs at least 8 GB RAM and 20 GB disk space. Not all hypervisors allocate enough memory by default.
- The virtual hardware has a bootable CD/DVD device pointed to the TrueNAS installer image (this is usually an
- Boot the VM and install TrueNAS as usual.
- After installation completes, shut down the VM instead of rebooting, and disconnect the CD/DVD from the VM before rebooting the VM.
- After rebooting into TrueNAS, install VM tools if applicable for your VM, and if they exist for FreeBSD 12, or ensure they are loaded on boot.
Open VMware Player and click Create a New Virtual Machine to enter the New Virtual Machine Wizard.
Select the Installer disk image file (iso) option, click Browse, and upload the TrueNAS Core
In this step, you can change the virtual machine name and location.
Specify the maximum disk size for the initial disk. The default 20GB is enough for TrueNAS. Next, select Store virtual disk as a single file.
Review the virtual machine configuration before proceeding. By default, VMware Player doesn’t set enough RAM for the virtual machine. Click *Customize Hardware > Memory. Drag the slider up to 8GB and click Ok. If you wish to power on the machine after creation, select Power on this virtual machine after creation.
After creating the virtual machine, select it from the virtual machine list and click Edit virtual machine settings. Click Add and select Hard Disk. Select SCSI as the virtual disk type. Select Create a new virtual disk. Specify the maximum size of this additional virtual disk. This disk stores data in TrueNAS. If desired, allocate the disk space immediately by setting Allocate all disk space now. Select *Store virtual disk as single file. Finally, name and chose a location for the new virtual disk.
Repeat this process until enough disks are available for TrueNAS to create ideal storage pools This depends on your specific TrueNAS use case. See Pool Creation for descriptions of the various pool (vdev) types and layouts
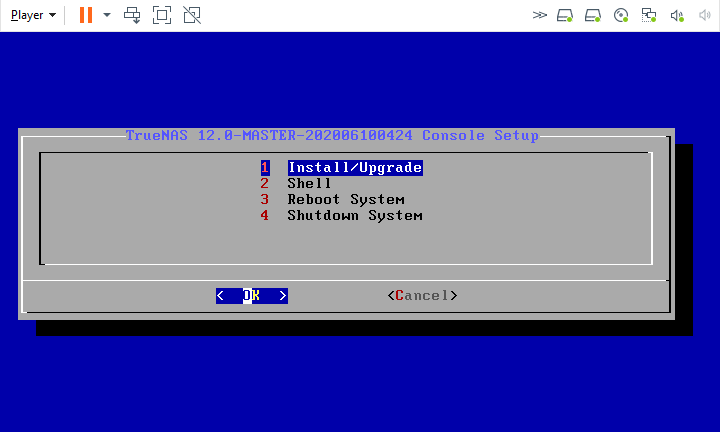
Select the virtual machine from the list and click Play virtual machine. The machine starts and boots into the TrueNAS installer. Select Install/Upgrade.
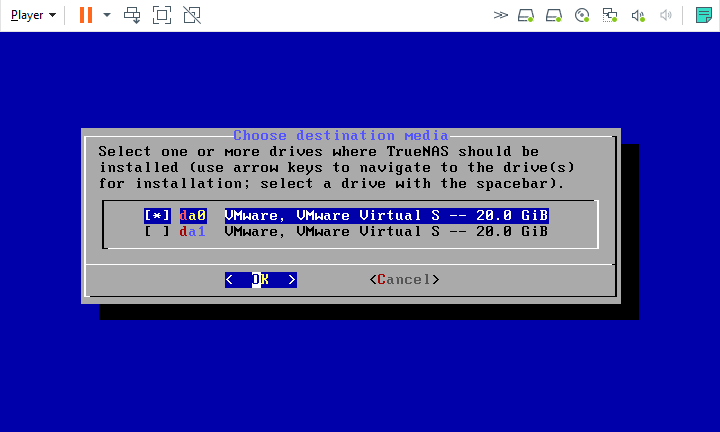
Select the desired disk for the boot environments.
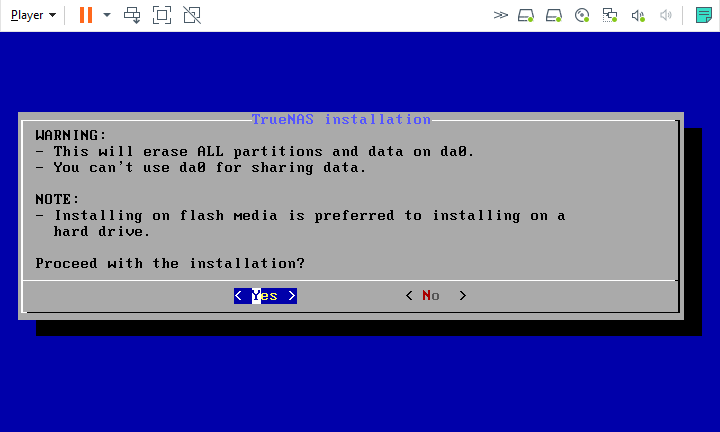
Select Yes. This erases all contents on the disk!
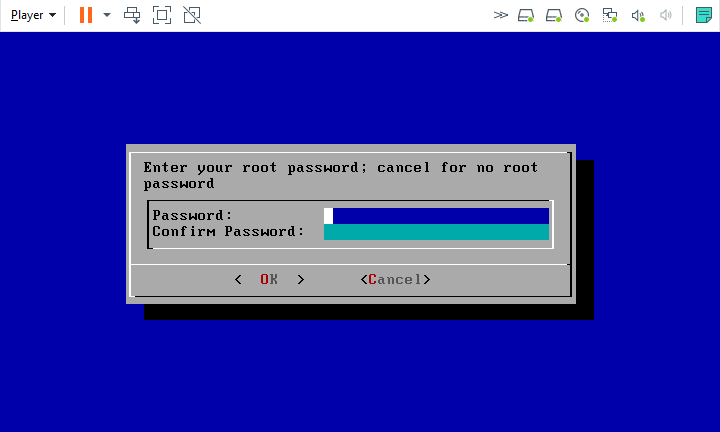
Next, set a password for the TrueNAS administrative account, named root by default.
This account has full control over TrueNAS and is used to log in to the web interface.
Set a strong password and protect it.
Select Boot via BIOS.
After the TrueNAS installation is complete, reboot the system. The Console Setup Menu displays when the system boots successfully.
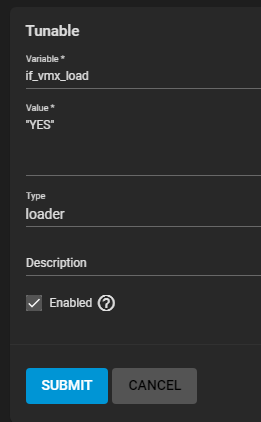
After installing TrueNAS in a VMware VM, it is recommended to configure and use the vmx(4) drivers on TrueNAS. To load the VMX driver when TrueNAS boots, log in to the web interface and go to System > Tunables. Click Add and create a new tunable with the Variable
if_vmx_load, Value"YES", and Typeloader, and save the tunable:
Congratulations, TrueNAS is now installed!
The next step is to log in to the web interface using the administrative account credentials and begin configuring the system.
Related Content
Have more questions?
For further discussion or assistance, see these resources:
- TrueNAS Community Forum
- TrueNAS Community Discord
- iXsystems Enterprise Support (requires paid support contract)
Found content that needs an update? You can suggest content changes directly! To request changes to this content, click the Feedback button located on the middle-right side of the page (might require disabling ad blocking plugins).


