TrueNAS CORE Nightly Development Documentation
This content follows experimental early release software. Use the Product and Version selectors above to view content specific to a stable software release.
Creating Cloud Sync Tasks
7 minute read.
Last Modified 2024-03-21 13:55 EDTCloud sync tasks let TrueNAS integrate with a Cloud Storage provider for additional backup storage. Cloud Sync tasks allow for single time transfers or recurring transfers on a schedule, and are an effective method to back up data to a remote location.
These providers are supported for Cloud Sync tasks in TrueNAS CORE:
- Amazon S3
- Backblaze B2
- Box
- Dropbox
- File Transfer Protocol (FTP)
- Google Cloud Storage
- Google Drive
- Hypertext Transfer Protocol (HTTP)
- Hubic (closed to new accounts)
- Mega
- Microsoft Azure Blob Storage
- Microsoft OneDrive
- OpenStack Swift
- pCloud
- SSH File Transfer Protocol (SFTP)
- iX-Storj
- WebDAV
- Yandex
Using the Cloud means that data can go to a third party commercial vendor not directly affiliated with iXsystems. Please investigate and fully understand vendor pricing policies and services before creating any Cloud Sync task. iXsystems is not responsible for any charges incurred from the use of third party vendors with the Cloud Sync feature.
Transferring data from TrueNAS to the Cloud requires saving Cloud Storage Provider credentials on the system.
To maximize security, TrueNAS encrypts credentials after saving. However, this means that to restore any cloud credentials from a TrueNAS configuration file, you must enable Export Password Secret Seed when generating that configuration backup. Remember to protect any downloaded TrueNAS configuration files.
Go to System > Cloud Credentials and click ADD.
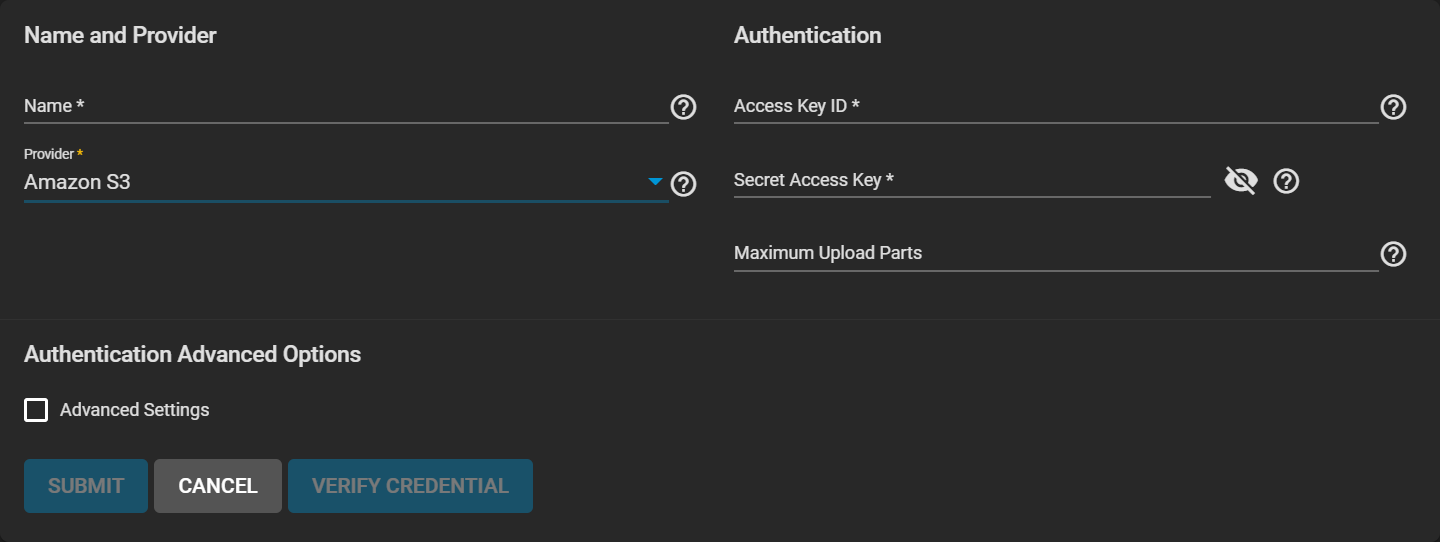
Enter a credential Name and choose a Provider. The rest of the options vary by Provider.
Enter the required Authentication strings to enable saving the credential.
See Cloud Credentials for provider-specific fields and settings.
Some providers can automatically populate the required Authentication strings by logging in to the account. To automatically configure the credential, click Login to Provider and entering your account username and password.
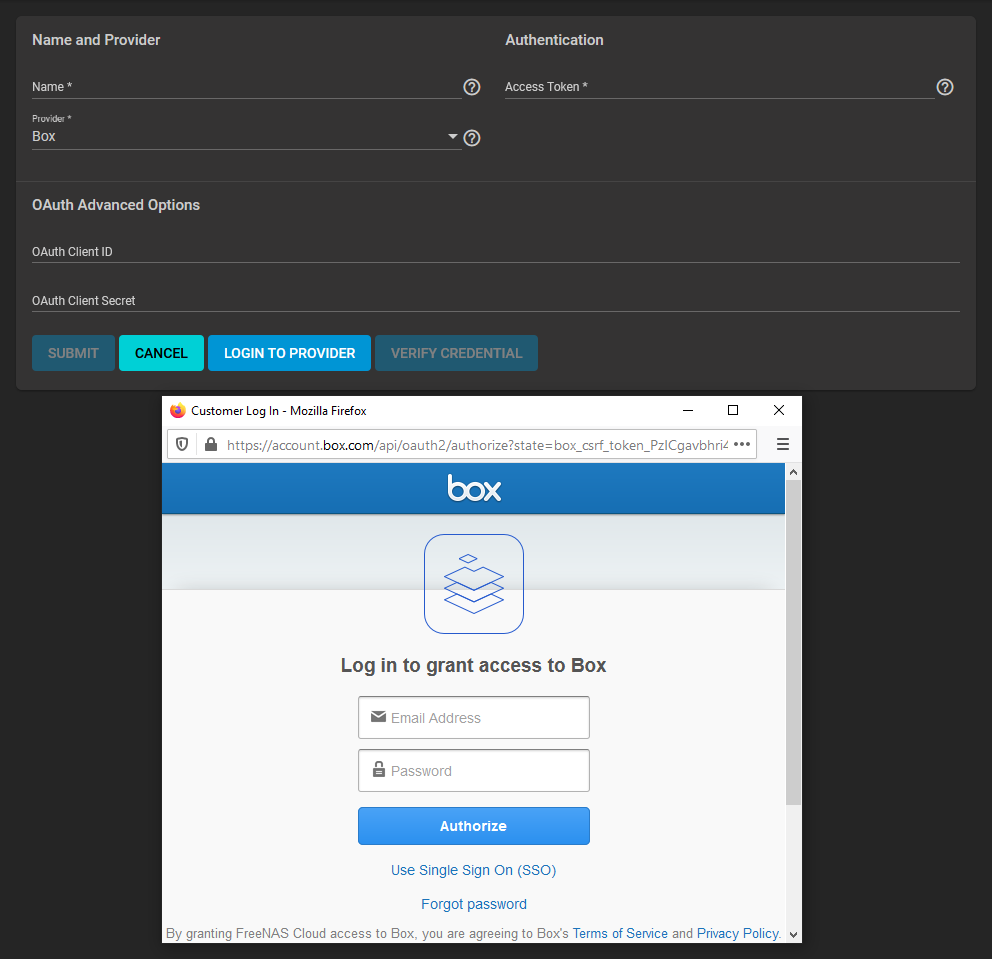
We recommend verifying the credential before saving it.
Go to Tasks > Cloud Sync Tasks and click ADD.
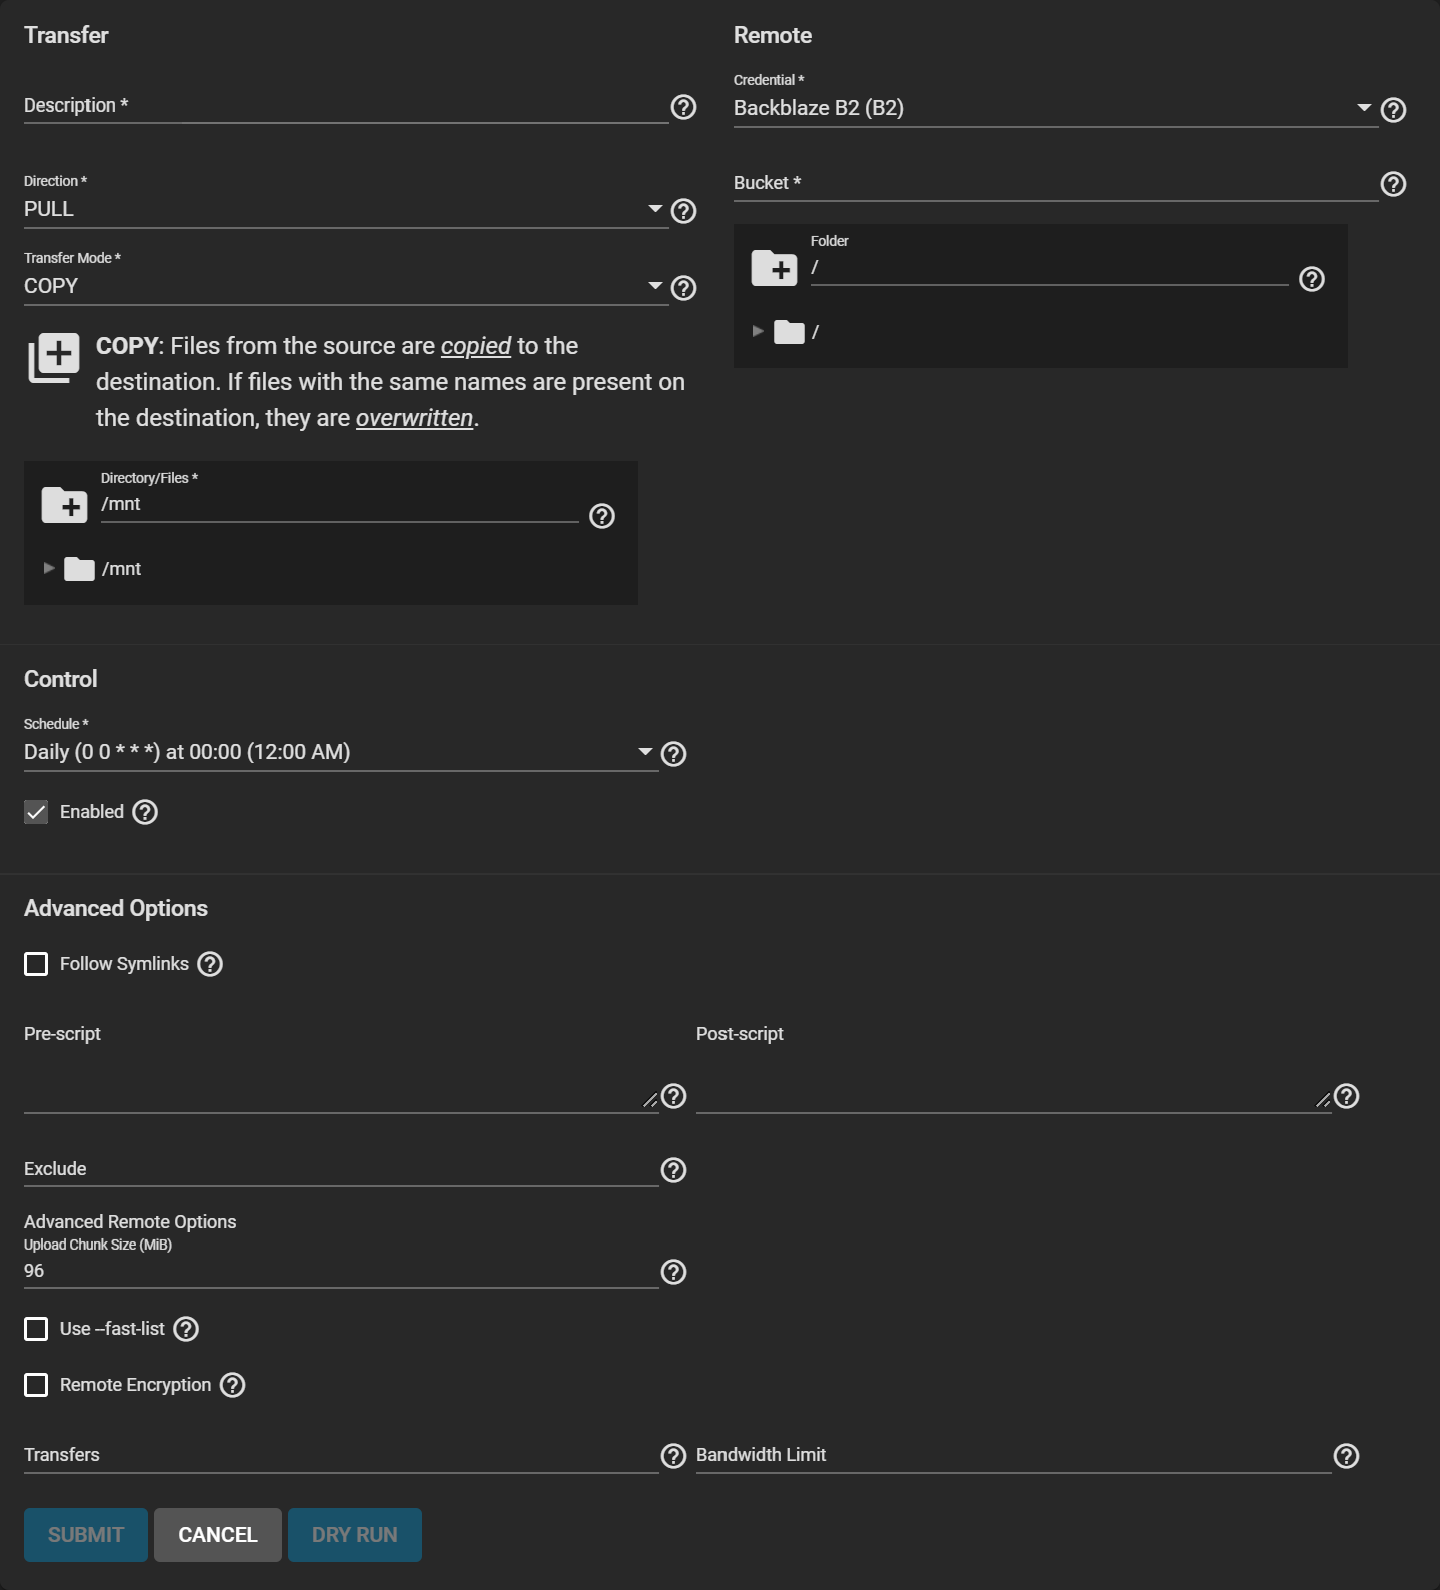
Give the task a Description and select a cloud credential. TrueNAS connects to the chosen Cloud Storage Provider and shows the available storage locations.
Decide if data is transferring to (PUSH) or from (PULL) the Cloud Storage location (Remote).
Choose a Transfer Mode:
SYNC keeps all the files identical between the two storage locations. If a sync encounters an error, the destination does not delete the files.
Syncing to a Backblaze B2 bucket does not delete files from the bucket, even when you delete those files locally. Instead, Backblaze tags files with a version number or moves them to a hidden state. To automatically delete old or unwanted files from the bucket, adjust the Backblaze B2 Lifecycle Rules.
COPY duplicates each source file into the destination, overwriting any destination files with the same name as the source. Copying is the least potentially destructive option.
MOVE transfers the files from the source to the destination and deletes the original source files. It also overwrites files with the same names on the destination.
Next, select a Schedule from the drop-down, or unset Enable to make the task available without running on a schedule.
Test the settings before saving by clicking DRY RUN. TrueNAS connects to the Cloud Storage Provider and simulates a file transfer without sending or receiving data.
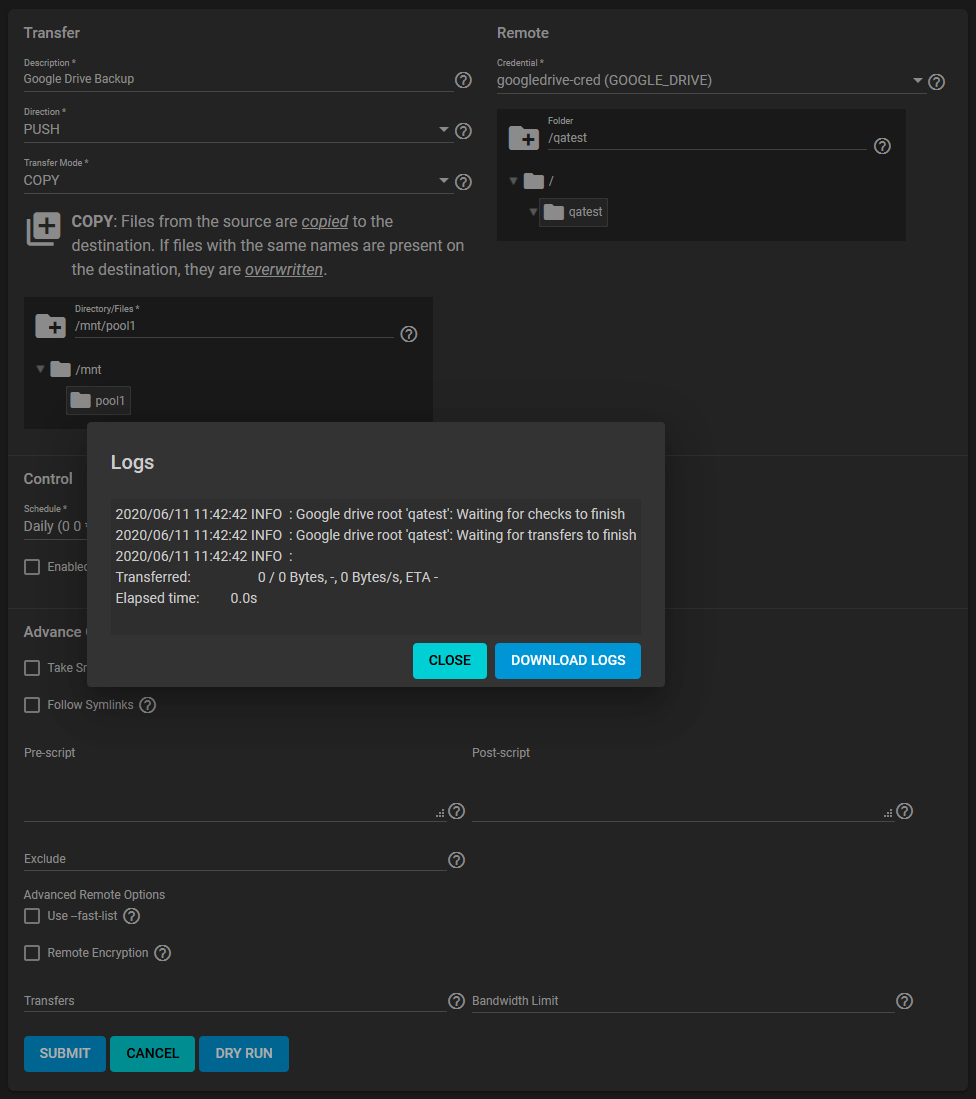
Saved tasks activate based on their schedule, or when you click RUN NOW. An in-progress cloud sync must finish before another can begin. Stopping an in-progress task cancels the file transfer and requires starting the file transfer over.
To view logs about a running task or a task most recent run, click the task status.
To quickly create a new cloud sync task that uses the same options but reverses the data transfer, expand () on an existing task and click RESTORE.
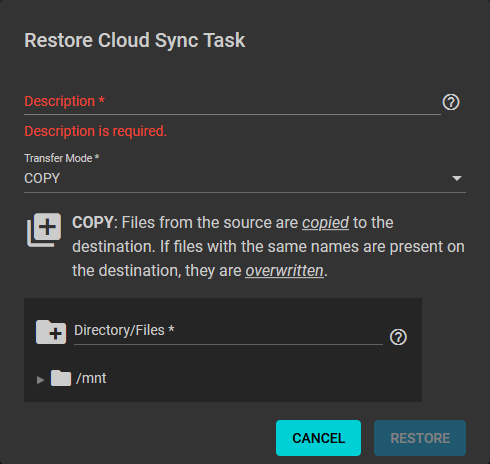
Give the new task a Description and define the path to a storage location for the transferred data.
TrueNAS saves the restored cloud sync task as another entry in Tasks > Cloud Sync Tasks.
If the restore destination dataset is the same as the original source dataset, the restored files might have their ownership altered to root. If root did not create the original files and they need a different owner, you can recursively reset ACL Permissions of the restored dataset through the GUI or by running chown from the CLI.


