TrueNAS CORE Nightly Development Documentation
This content follows experimental early release software. Use the Product and Version selectors above to view content specific to a stable software release.
IPMI
2 minute read.
Last Modified 2024-03-21 13:55 EDTIPMI requires compatible hardware! Refer to your hardware documentation. Hardware compatibility determines if the IPMI option displays in the TrueNAS web interface.
Many TrueNAS Storage Arrays provide a built-in out-of-band management port. If the system becomes unavailable through the web interface, you can use this port to provide side-band management. Use IPMI to perform several vital functions. These include checking the log, accessing the BIOS setup, and powering on the system. IPMI does not need physical access to the system. You can use it to allow another person remote access to the system. This is useful when investigating a configuration or troubleshooting issue.
Some IPMI implementations need updates to work with newer versions of Java. See PSA: Java 8 Update 131 breaks ASRock’s IPMI Virtual console for more information.
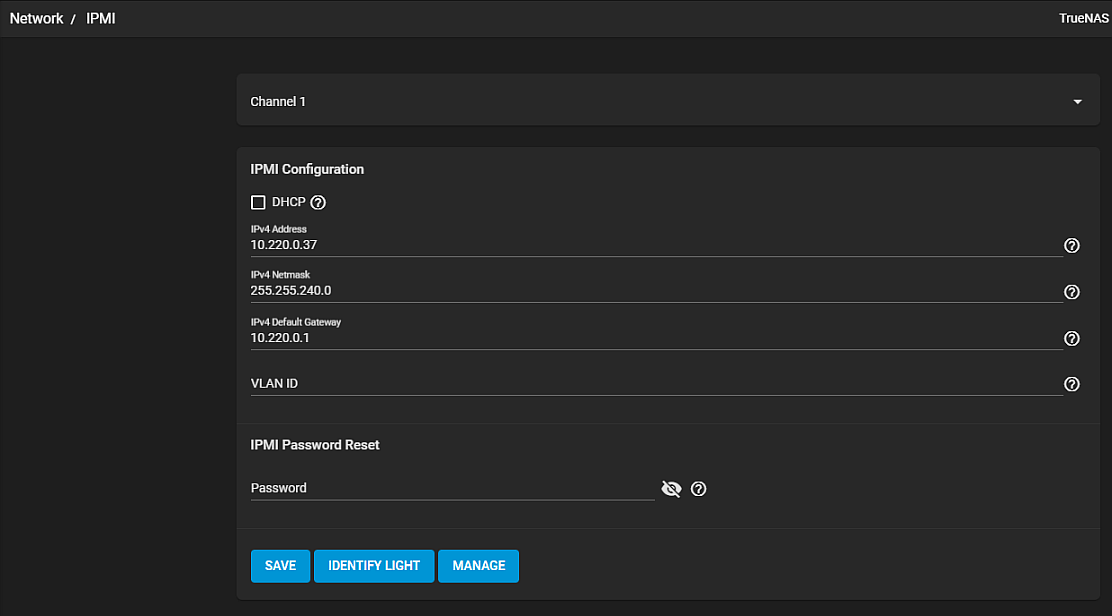
Configure IPMI by going to Network > IPMI. The IPMI configuration screen provides a shortcut to the most basic IPMI configuration.

Use the Network > IPMI screen to configure IPMI settings. See IPMI Screen for more information on IPMI settings.
Click SAVE to save the IPMI settings.
Save the configuration. Access the IPMI interface using a web browser and the IP address specified in Network > IPMI. The management interface prompts for login credentials. Refer to your IPMI device documentation to learn the default administrator account credentials.
Log in to the management interface. Here you can change the default administrative user name and create extra IPMI users. The appearance of the IPMI utility and the functions that are available vary by hardware.

